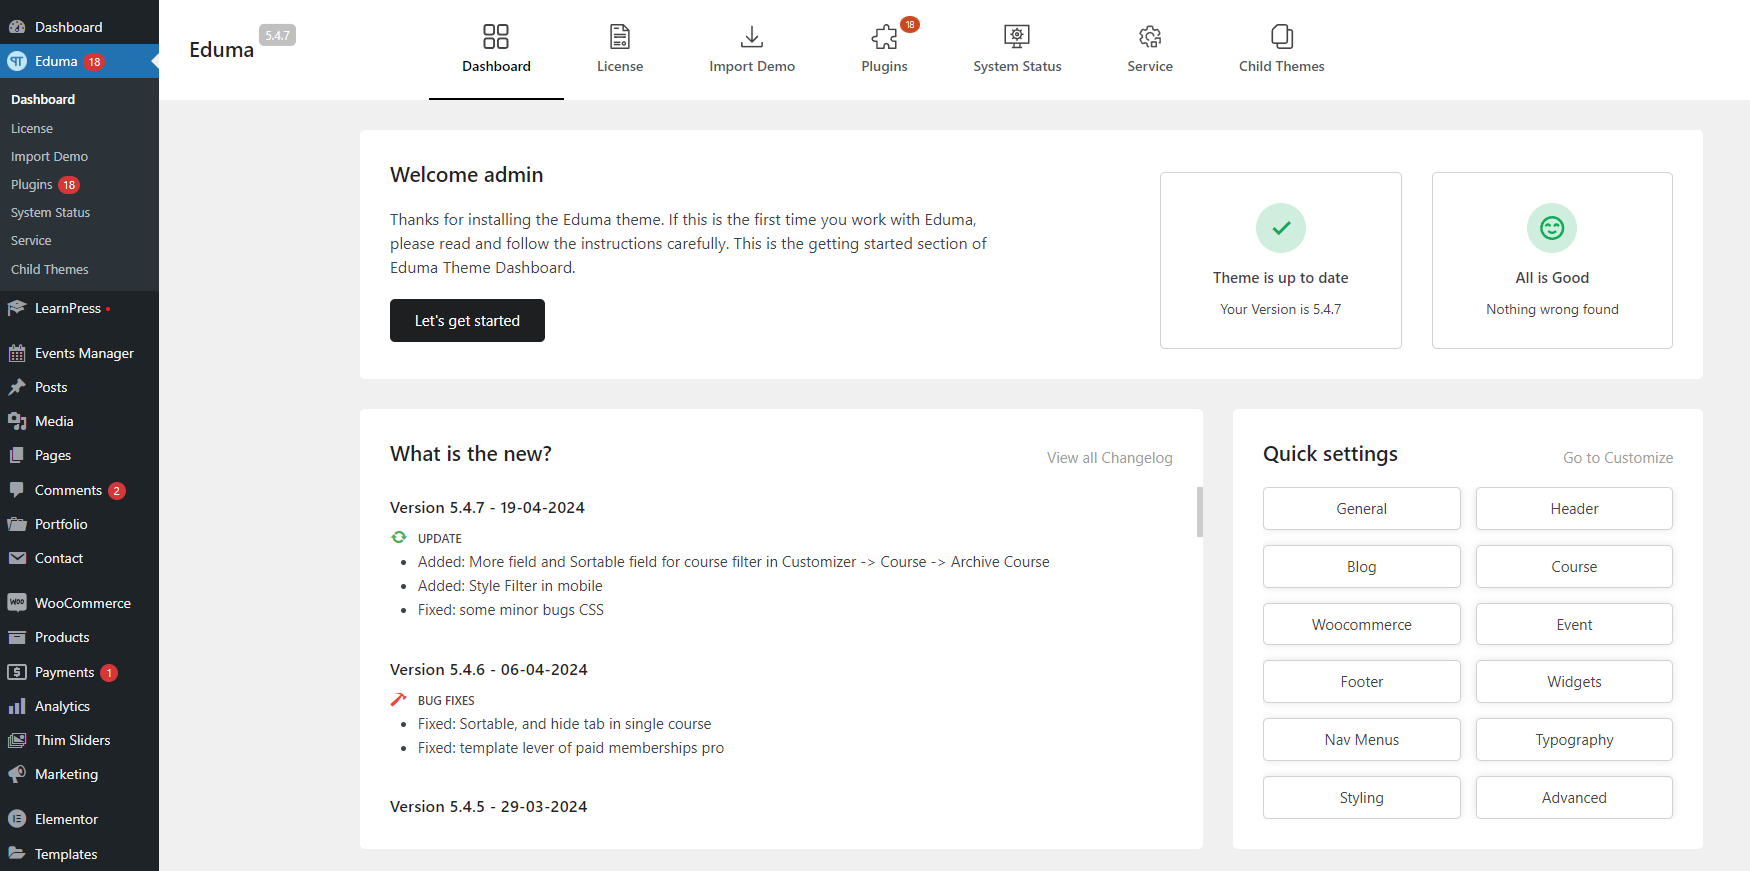
Once you successfully install and activate Eduma theme, Eduma Dashboard will be added to your WordPress menu.
Now you can get started to set up your site with Eduma. You will walk through the following steps:
- Name your website and site description
- Install and activate required and recommended plugins
- Import Demo Content
- Active Theme
- Customize your site
- Get support resources
1. Import Demo
Thim Core Demo Importer
Thim Core is a required plugin for the Eduma theme. This plugin is a demo importer that imports all posts/pages, sample sliders, widgets, customization, and more.
Follow these steps below to import demo via Thim Core:
Step 1 – Visit Dashboard > Eduma > Import Demo.
Step 2 – Hover on the demo you want and click Install
Step 3 – Select what type of content you want to import and click Import.
The importing process may take up to 5 minutes.
Note:
- If you want to build an offline course sale website you can use the following demos: Demo Kid Art – Offline, Demo Kindergarten – Offline.
- On each website, you can only use one demo.

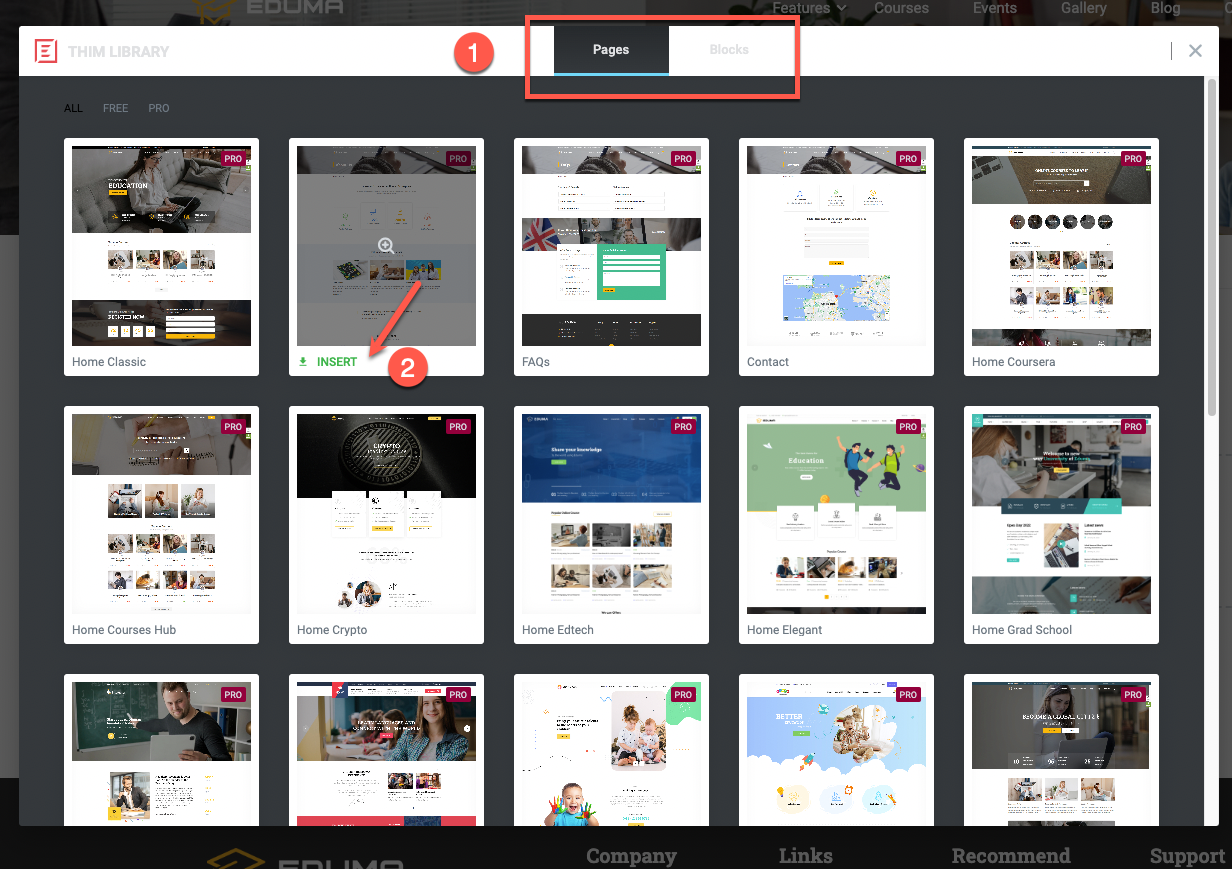
2. Import A Specific Page And Blocks
- You can import a specific page (like: home page, about us, FAQs…) and blocks.
Step 1 – Edit page with Elementor page builder.
Step 2 – Click “Thim Elementor Kit”
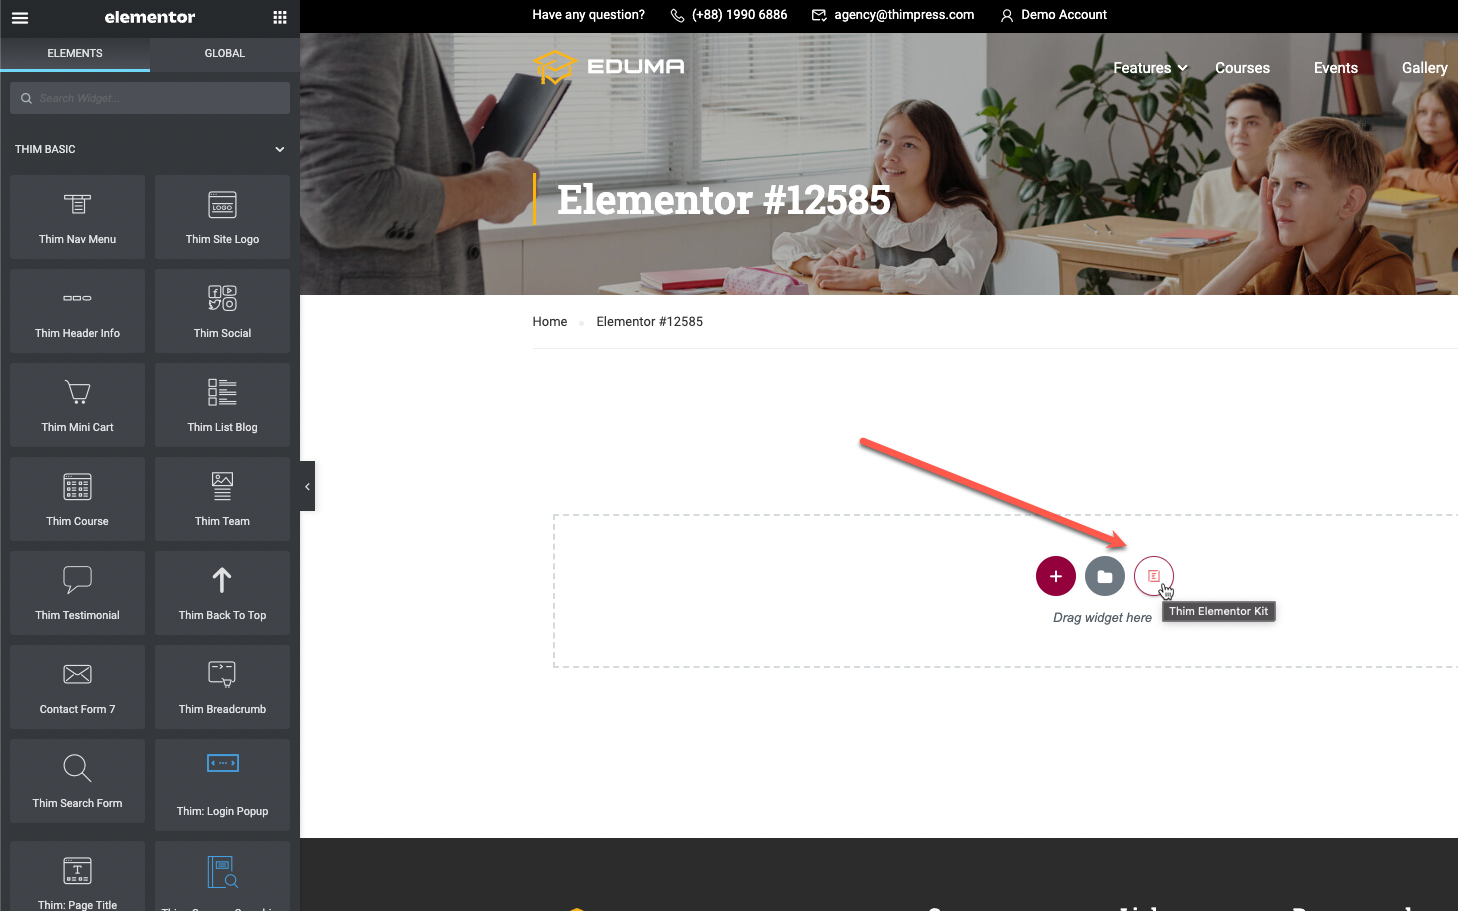
Step 3 – Click “Insert” a page or a block.
3. Child Theme
Follow the steps below to enter Kids Topics:
Step 1 – Go to Dashboard> Eduma> Child Themes
Step 2 – Click Install / Activate
