1. Slider
- In the theme editor (Customize)
- Locate Slider electronic
- Make necessary changes > Save
1. Slider Settings
1. General
- Choose type for slider.
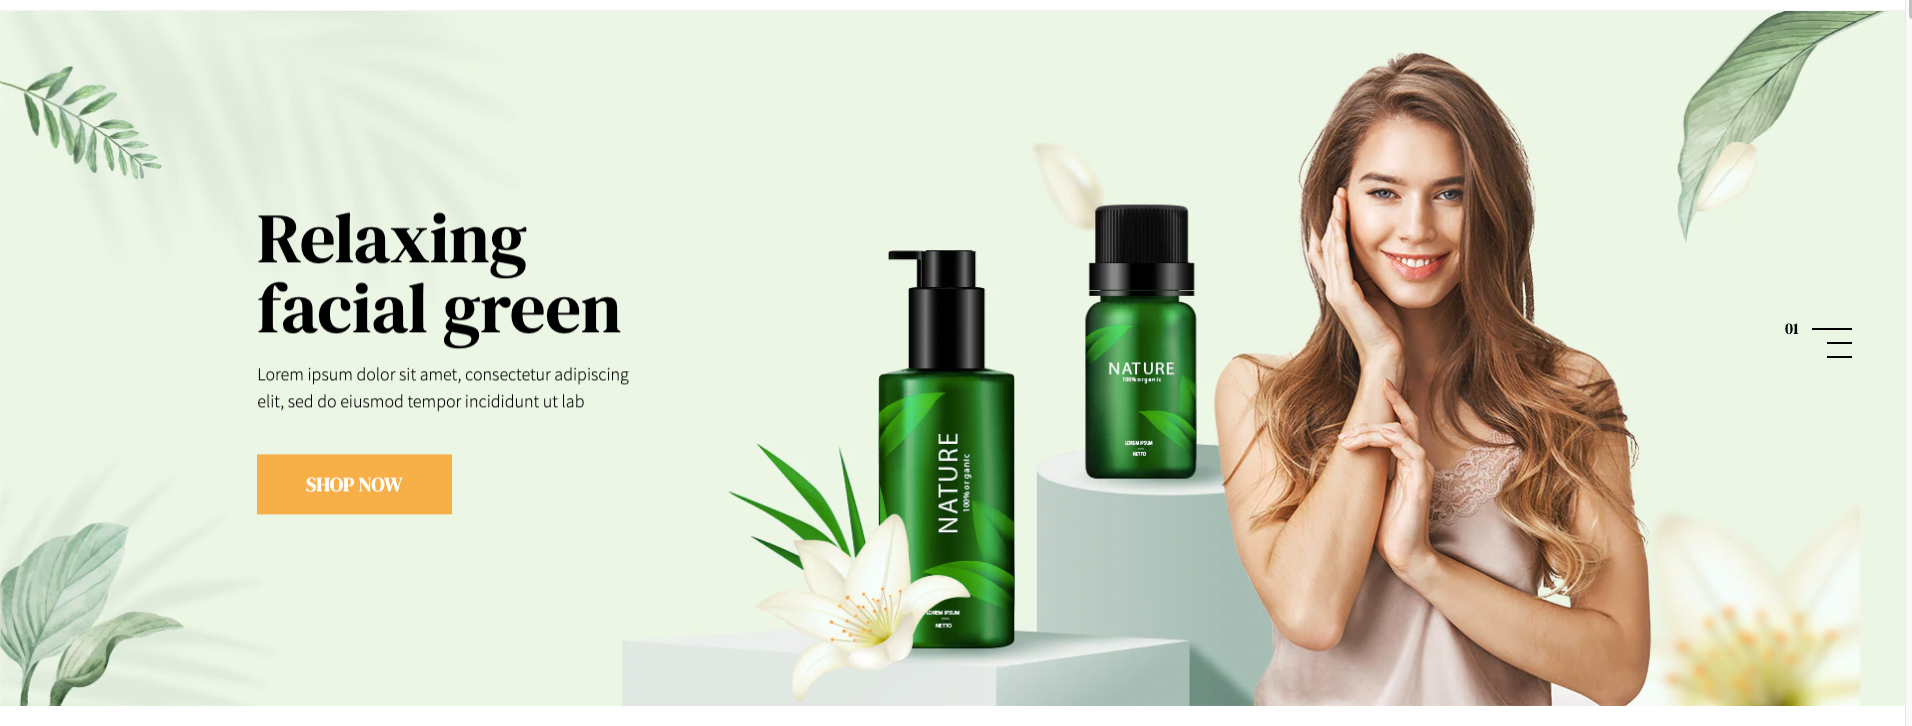
- Add some text for title.
- Enable Loop Image to back to the first photo when slider ran out of pictures.
- Enable Autoplay in order for the slideshow to run automatically. The duration time to change slides is between 1-20 seconds.
- Show/hide pagination and choose type for it.
- Choose pagination type.
- Choose container type.
- Choose the number of images will show on 1 screen.
- Show/hide navigation.

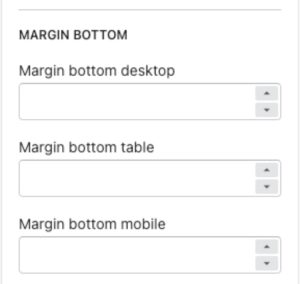
2. Margin bottom
- Set margin bottom for slider on desktop, tablet and mobile.
2. Slider Item
1. General.
- Add some text for subtitle, title.
- Select image ( recommend size: 1920 x 1080 px )
- Show/ hide overlay on slider.
- Add URL for “Shop now” button.
- Choose position of content.

2. Color & font size
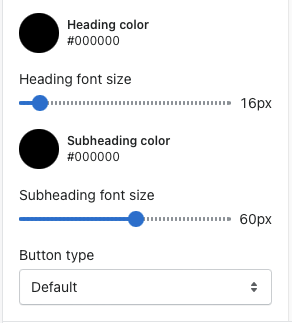
- Select color for heading & subheading.
- Set font size for heading & subheading.
- Choose type for “Shop now” button.
2. Home Service

- In the theme editor (Customize)
- Locate Home service
- Make necessary changes > Save
1. Home Service Settings
- Choose container type and style.
- Configure margin bottom on desktop, tablet and mobile.

2. Home Service Block
- Add some text for title, content & description.
- Select image for
- Add URL for item.
- Choose button type.

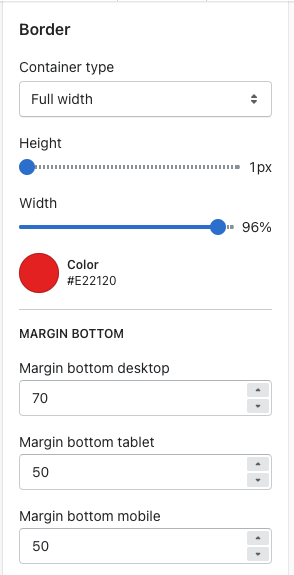
3. Border
- Choose container type for border.
- Set height and width.
- Select color for border.
- Set margin bottom on desktop, tablet and mobile.
4. Banner
- In the theme editor (Customize)
- Locate Banner
- Make necessary changes > Save
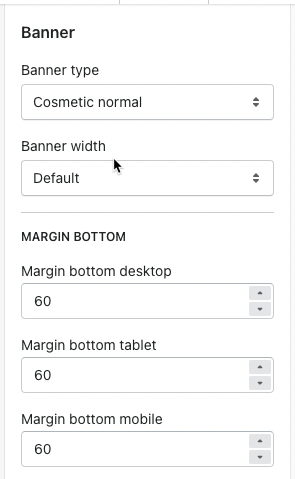
1. Banner Settings
- Choose banner width & type
- Set margin bottom on desktop, tablet and mobile.
2. Banner Block
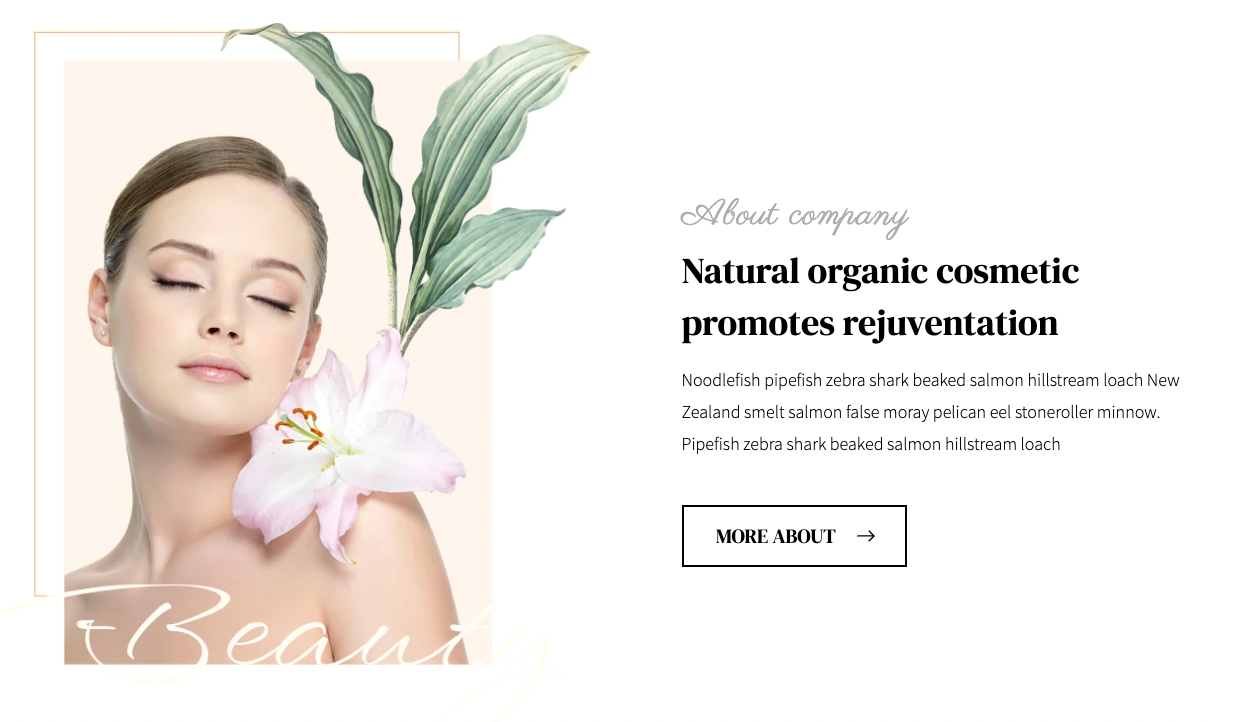
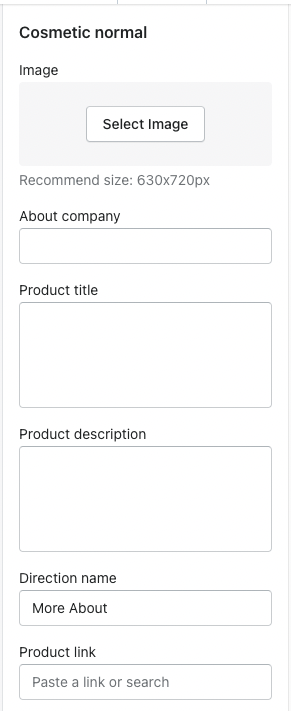
1. Cosmetic normal block
- Select image ( recommend size: 630 x 720 px )
- Add some text for about company, product title, product description, direction.
- Add URL for “More about” button.
2. Cosmetic countdown block
- Select background color
- Select image.
- Add some text for discount, title, product title, product description.
- Add URL for “shop now” button.
- Enable/disable open link in a new tab.
- Set time count down.

5. Rich Text

- In the theme editor (Customize)
- Locate Rich text
- Make necessary changes > Save
1. Rich Text Settings
- Choose rich text width and position content.
- Set margin bottom on desktop, tablet and mobile.

2. Rich Text Block
1. Heading block
- Add some text for heading
- Set font size and height.
- Select color heading.

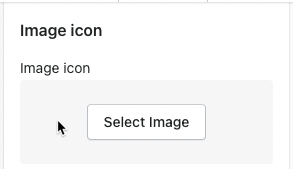
2. Image icon
6. Featured Collection

- In the theme editor (Customize)
- Locate Featured Collection
- Make necessary changes > Save
1. Featured Collection Settings
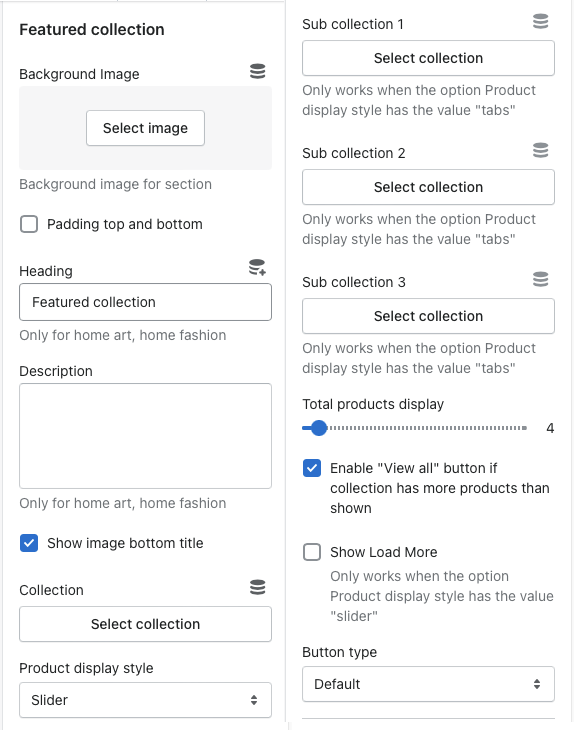
1. General
- Select background image.
- Enable/disable padding top and bottom.
- Add some text for Heading and Description.
- Show/hide image bottom title.
- Select collection will be shown.
- Select product display style.
- Select collection for sub collection.
- Set maximum products to show.
- Enable/disable “View all” button if the collection has more products than shown.
- Show “Load more” button when merchants choose grid style or slider style.
- Choose button type.
- Sub collection only can use when merchants choose tabs style or slider style with Clothes home.
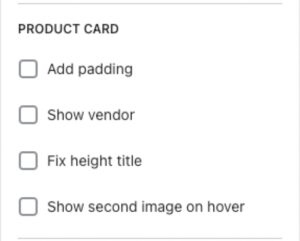
2. Product card
- Add padding, show vendor, fix height title and show second image on hover.
3. Margin bottom
- Set margin bottom on desktop, tablet and mobile.
2. Featured Collection Block

7. List Collections
- In the theme editor (Customize)
- Locate List Collections
- Make necessary changes > Save
1. List Collections Settings
1. General
- Choose collection type.
- Add some text for heading & description.
- Select background color.

2. Margin bottom
- Configure margin bottom on desktop, tablet and mobile.
2. List Collections Block
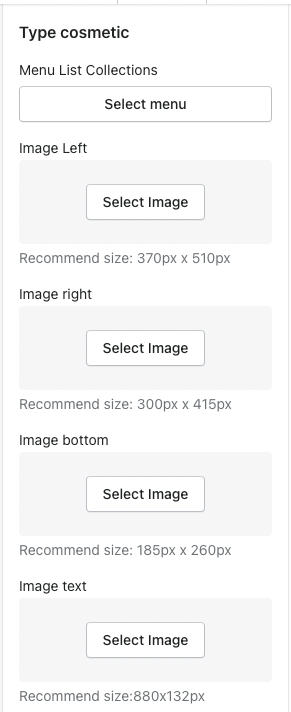
- Choose type cosmetic block.
- Select menu
- Select image for left image ( recommend size: 370 x 510 px ), right image ( 300 x 415 px), bottom image (185 x 260 px) & text image ( 880 x 132 px).
8. Categories

- In the theme editor (Customize)
- Locate Categories
- Make necessary changes > Save
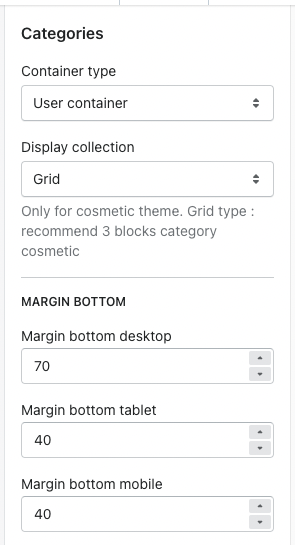
1. Categories Settings
- Choose container type & display collection.
- Set margin bottom for slider on desktop, tablet and mobile.
2. Categories Block
- Choose category cosmetic block.
- Select collection.
- Add some text for description.

9. Partner

- In the theme editor (Customize)
- Locate Partner
- Make necessary changes > Save
1. Partner Settings
1. General
- Set the number of items will show.
- Choose type.
- Add some text for title & description when use type 2.
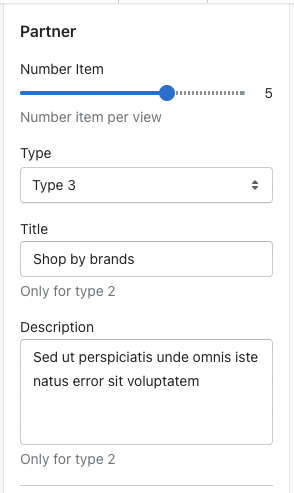
2. Margin bottom
- Set margin bottom on desktop, tablet and mobile.
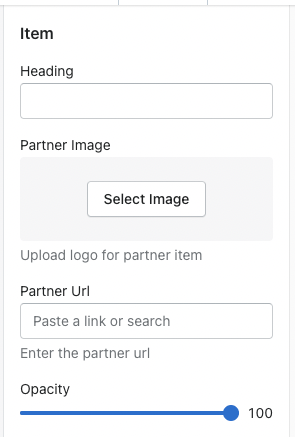
2. Partner Item
- Add some text for heading.
- Select partner image
- Add URL for item.
- Set opacity.
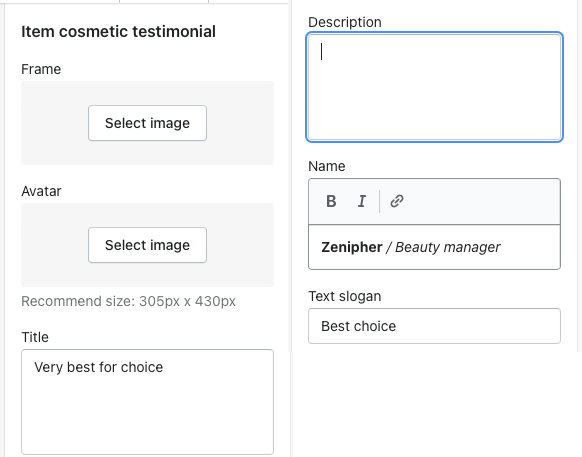
10. Our Testimonials
- In the theme editor (Customize)
- Locate Our testimonials
- Make necessary changes > Save
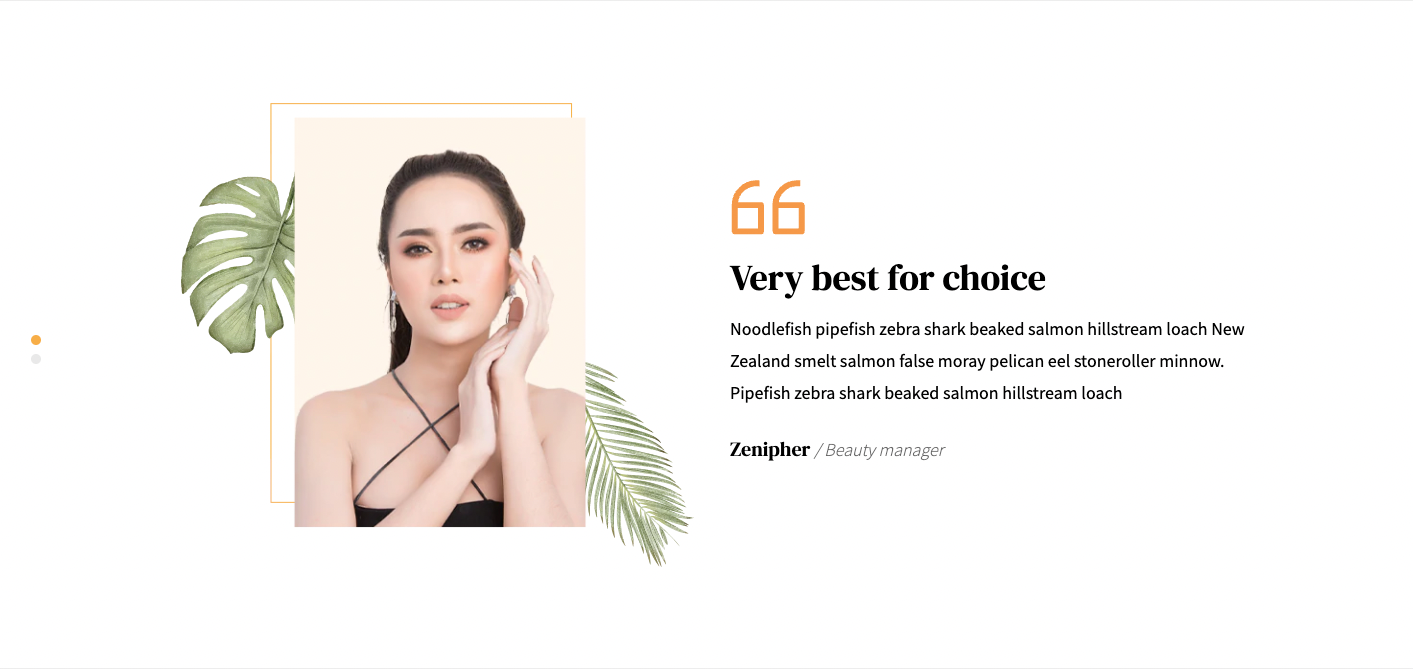
1. Our Testimonials Settings
1. General
- Choose type, add text for title, subtitle.
- Select image – The recommended format is png, size 470 x 700 px.

2. Margin bottom
- Set margin bottom on desktop, tablet and mobile.
2. Our Testimonials Block
- Choose cosmetic testimonial block.
- Select image for frame & avatar (the recommended size is 305 x 430 px with a transparent background ).
- Add some text for title, description, name, text slogan
11. Latest Blog
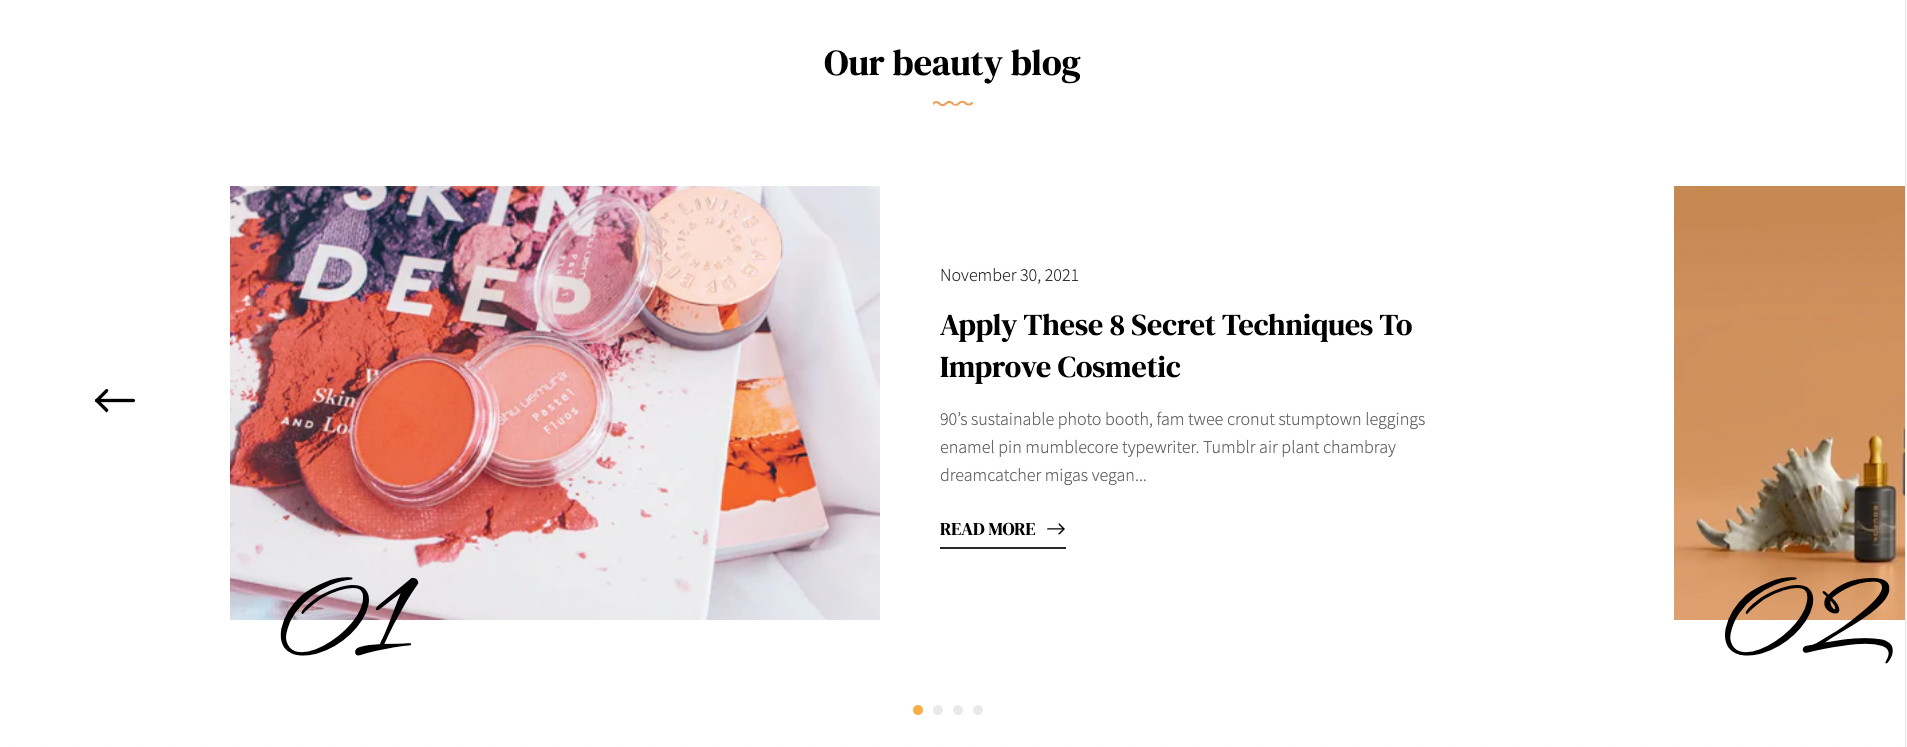
- In the theme editor (Customize)
- Locate Latest blog
- Make necessary changes > Save
1. General
- Choose style and add some text for title.
- Set the number of posts will show.
- Select blog to show.
- Show/hide pagination, number and select number color.

2. Margin bottom
- Set margin bottom on desktop, tablet and mobile.