This Documentation is used for Thim Elementor Kit.
To create post archive page with Thim Elementor KITs have the following steps:
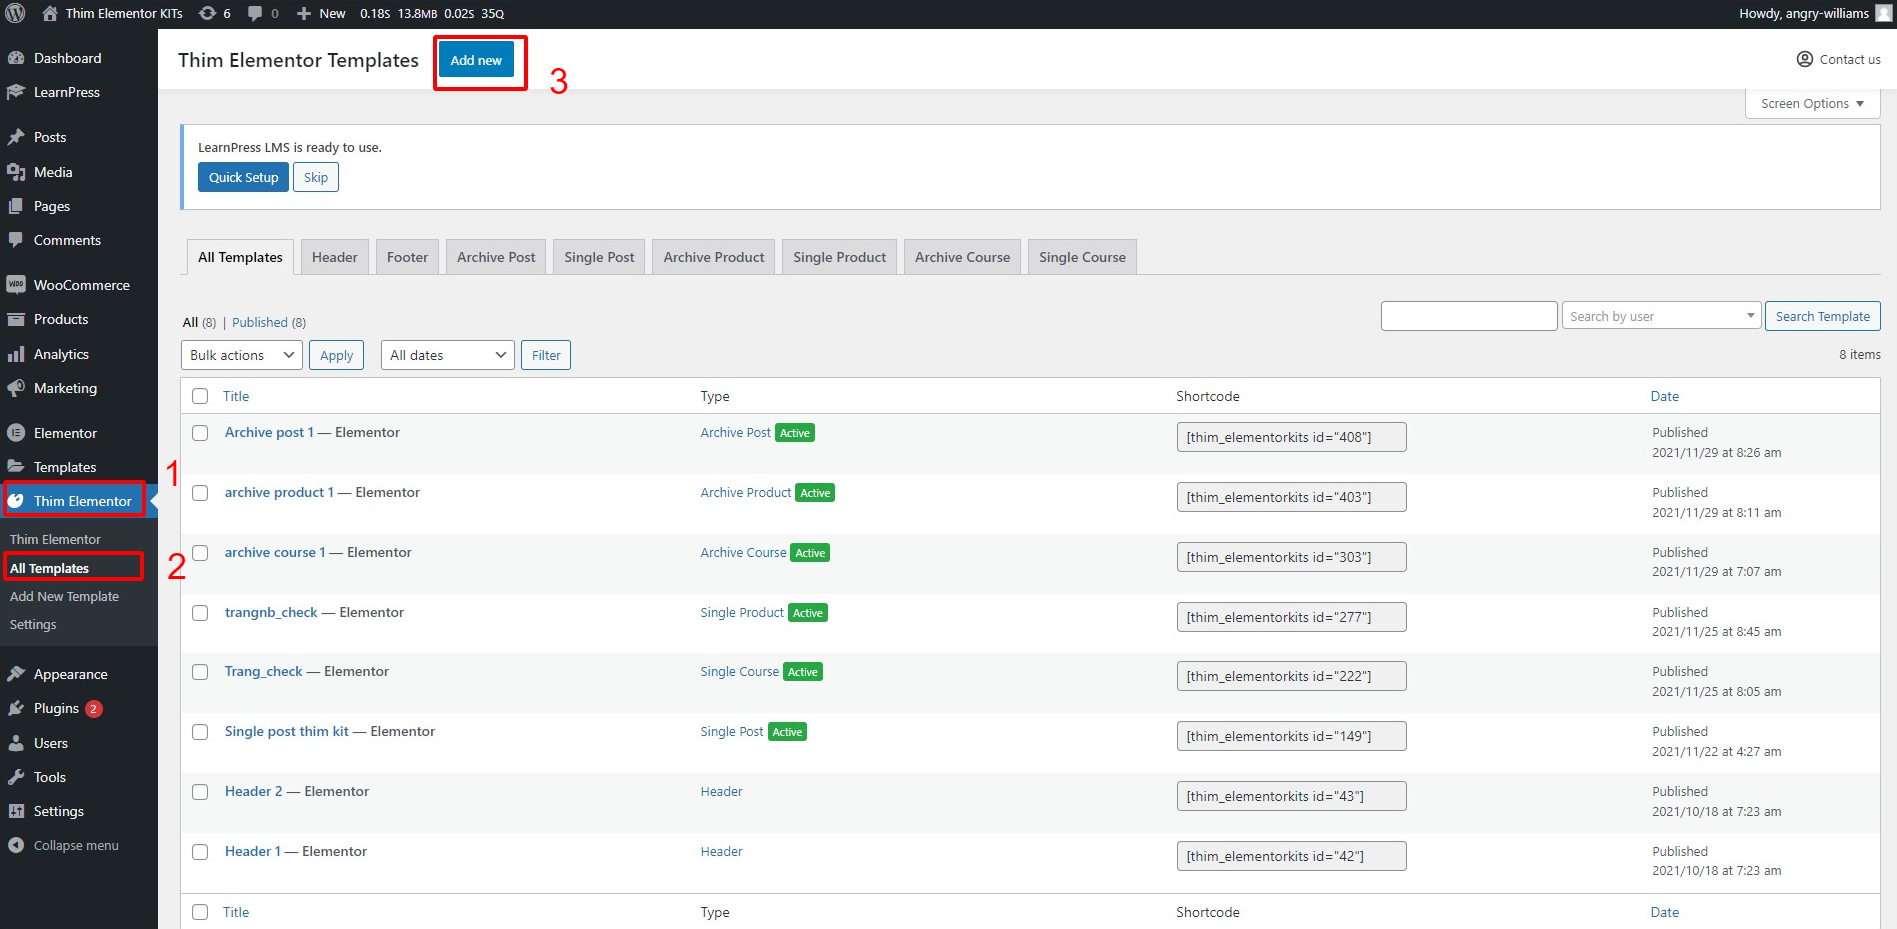
- Select tab Thim Elementor =>All Templates =>Add new.
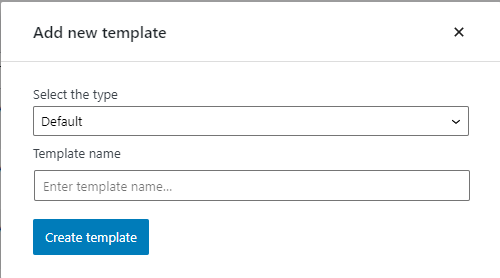
Show the “Add new template” box:
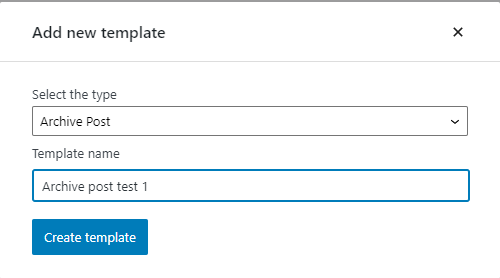
2. Select the type “Archive Post“, type the template name you want, for example: Archive post test 1 => Select “Create template” button
Create a post archive page with Thim Elementor KITs successfully
3. Select “Set Archive Post” to set this page as the main page. If “Set Post Archive” is unchecked, the post page in the Archive will show the default themes.

The page after being selected will have an active icon

Select “Remove Archive Post” or select “Disable” to cancel the active icon

4. To edit post archive page with Thim Elementor KITs: Select “Edit with Elementor”

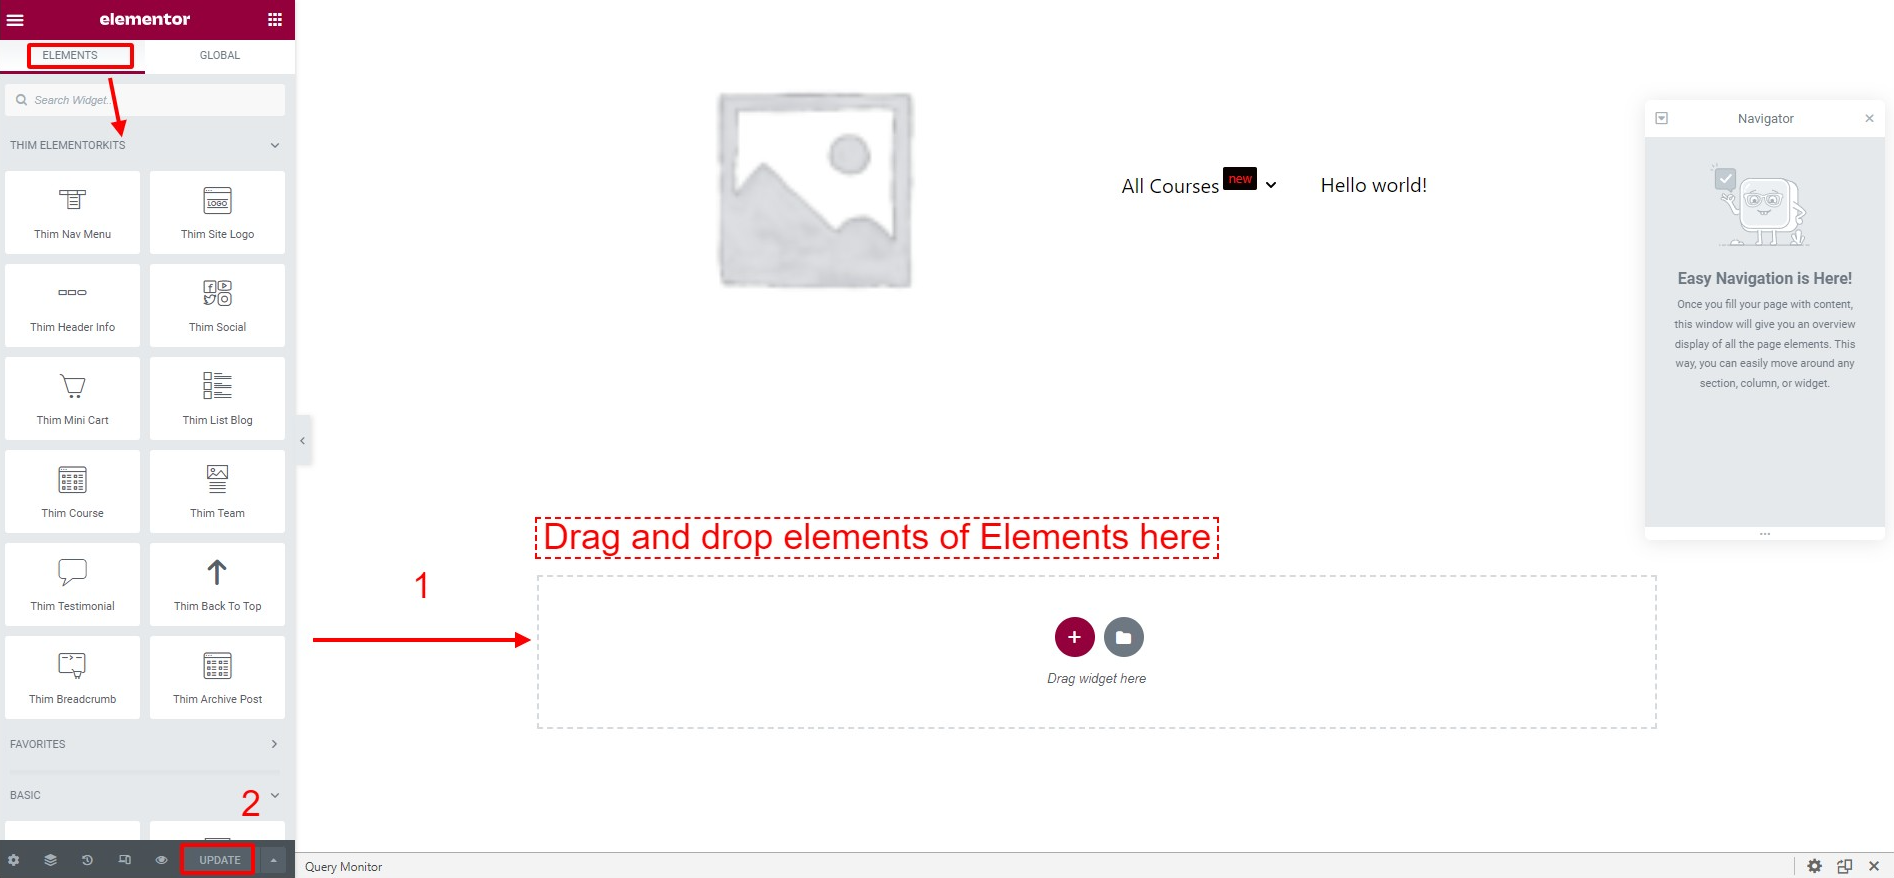
Drag and drop widgets in the left column of the Elements tab => Update
1. Thim Archive Post
This Documentation is used for Thim Elementor Kit.
Editing with Thim archive post includes the following steps
Drag and drop thim archive post to the right box in the image

This is the interface when you successfully drag and drop “Thim Archive Post”
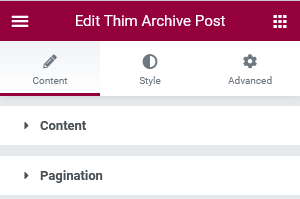
- Content
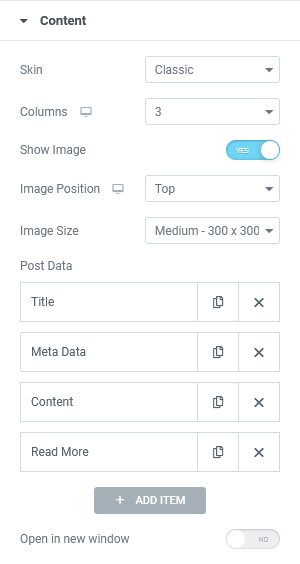
- Skin: Choose a Skin style for the tag, default is Classic, also Tag and Full Content
- Columns: Select the number of posts to appear in 1 row. Default is 3
- Show Image: Allow to show the featured image of the post or disable the option to hide it
- Image Postion: Choose the display position of the post’s photo. Default image shows top
- Image Size: Choose image size
- Post Data: There are 4 types of data: title, meta data, content, read more

Click the icon to duplicate the title
- Type: Select Type to change to Meta Data, Content or Read More
- Tile HTML Tag: select size text
- Button ADD ITEM: add type data

Open in new window
- Enable: Redirect to a new tab when clicking on a post
- Disable: Don’t redirect to a new tab when clicking on a post

2. Pagination
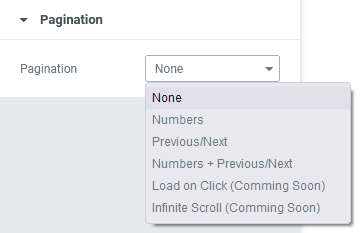
- You can select type for pagination.
After editing, remember to click the Update button

