
The Classes page allows administrators to create and manage all classes in ClassPress.
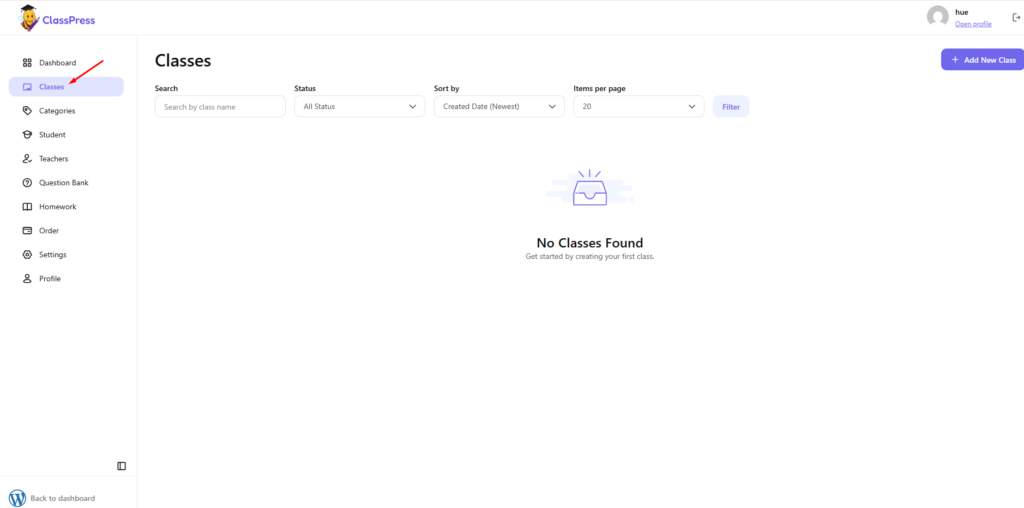
To access this page, click Classes from the left sidebar.
Class List
The Classes page displays all classes that have been created. If no classes are available, the page will display a No Classes Found message.
You can use the available filters to quickly locate and organize classes.
Search
Enter a class name in the Search field to find a specific class.
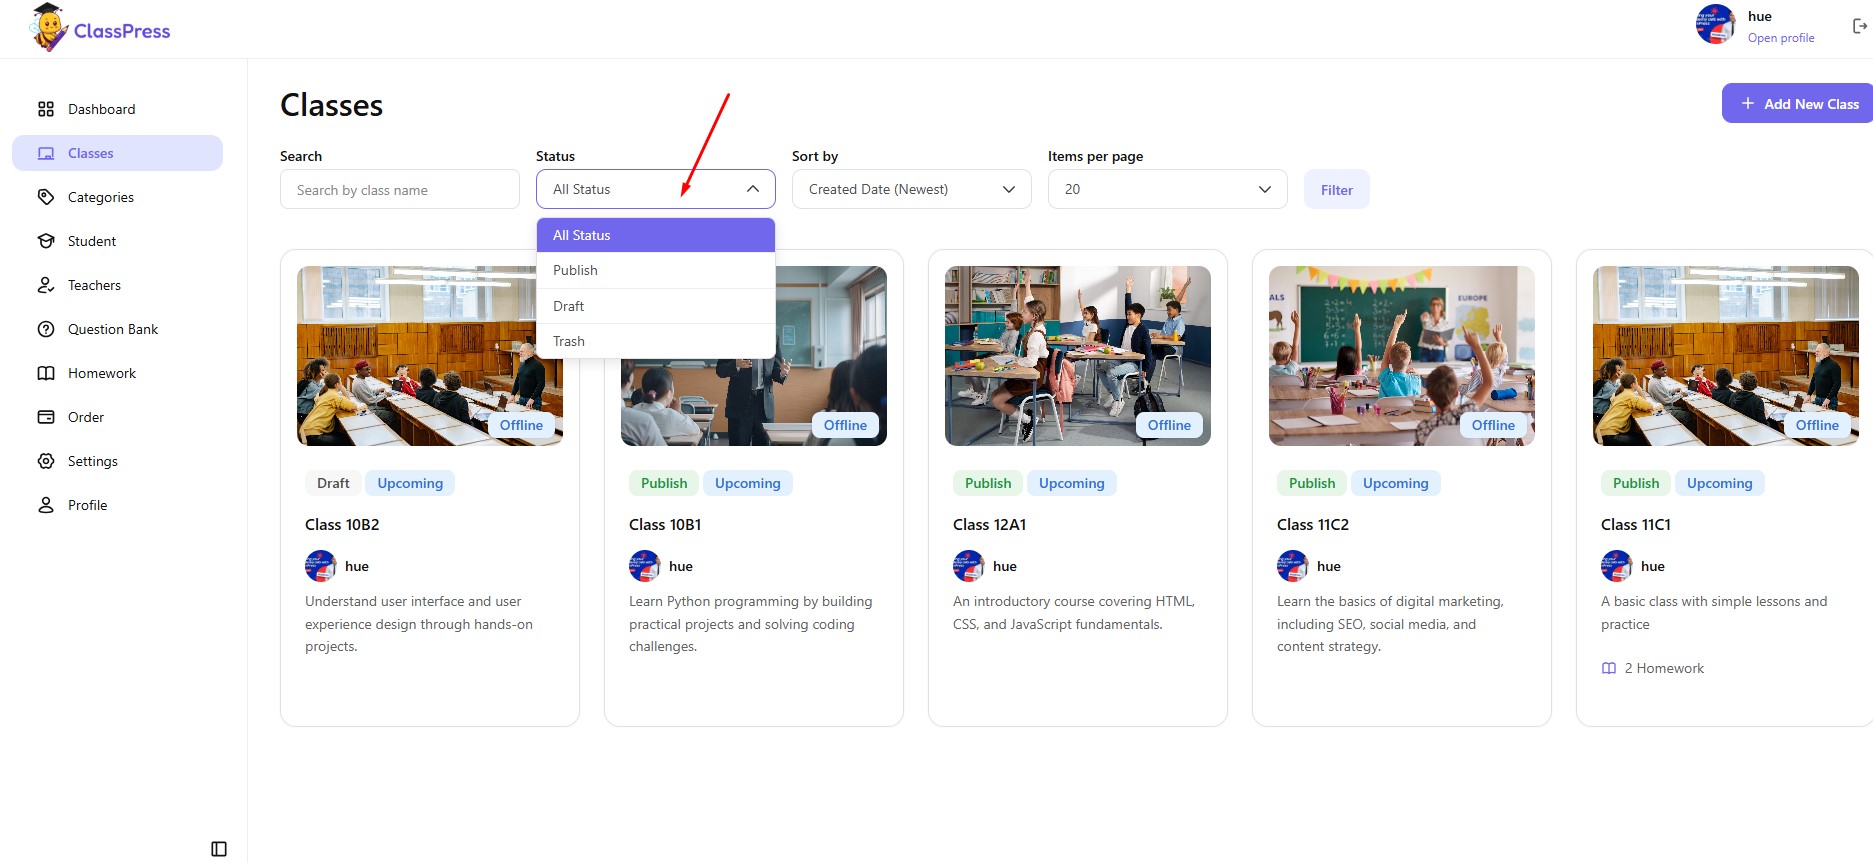
Status
Use the Status dropdown to display classes with a specific status.
Sort by
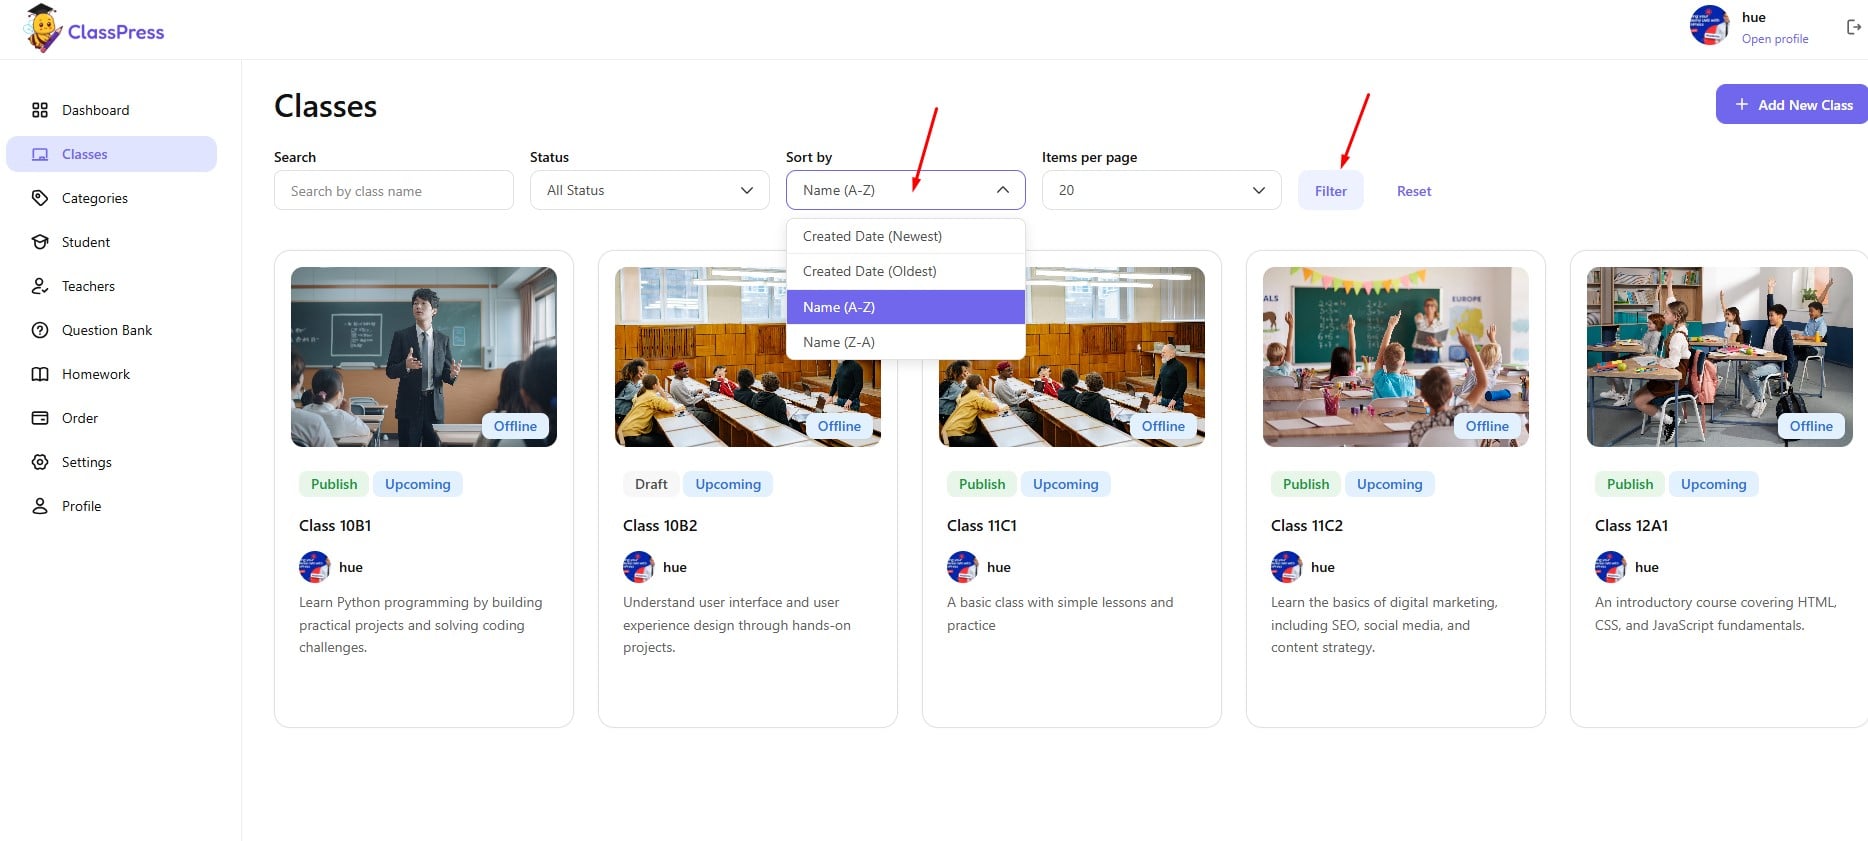
Use the Sort by dropdown to change the order in which classes are displayed.
Items per page
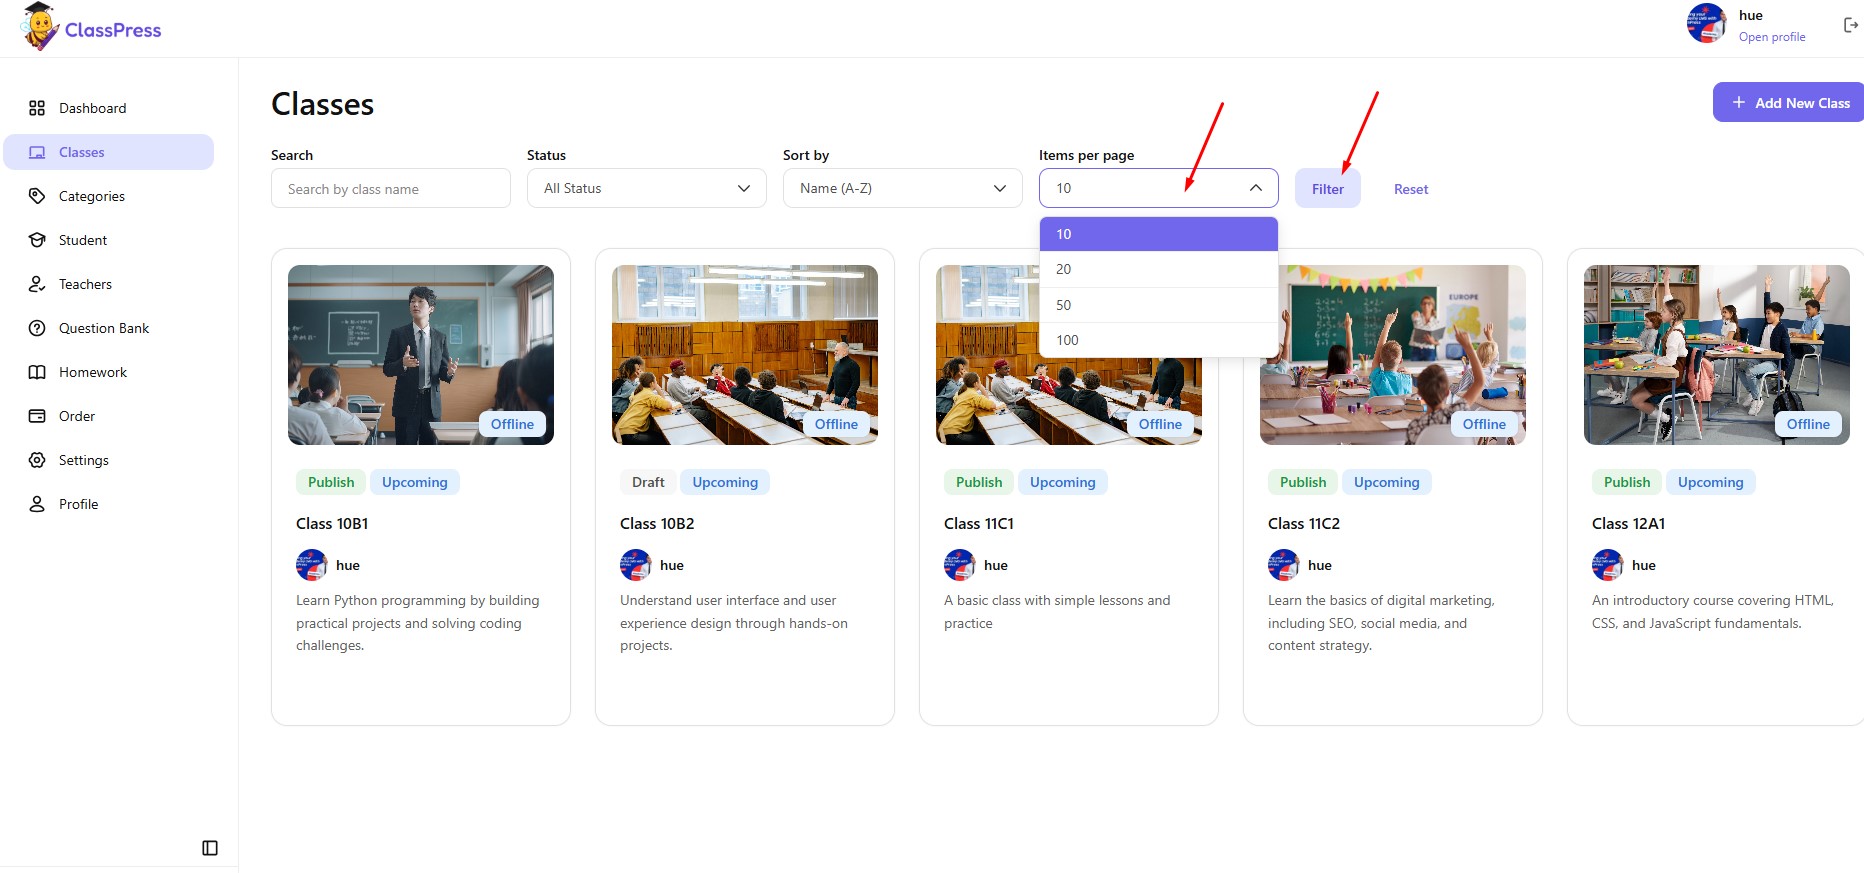
Select the number of classes to display on each page.
Filter
After selecting your search criteria, click Filter to refresh the class list.
1.Creating a New Class
To create a new class:
- Navigate to Classes.
- Click Add New Class.
- Enter the required information.
- Click Create.
Once the class has been created successfully, it will appear in the class list.
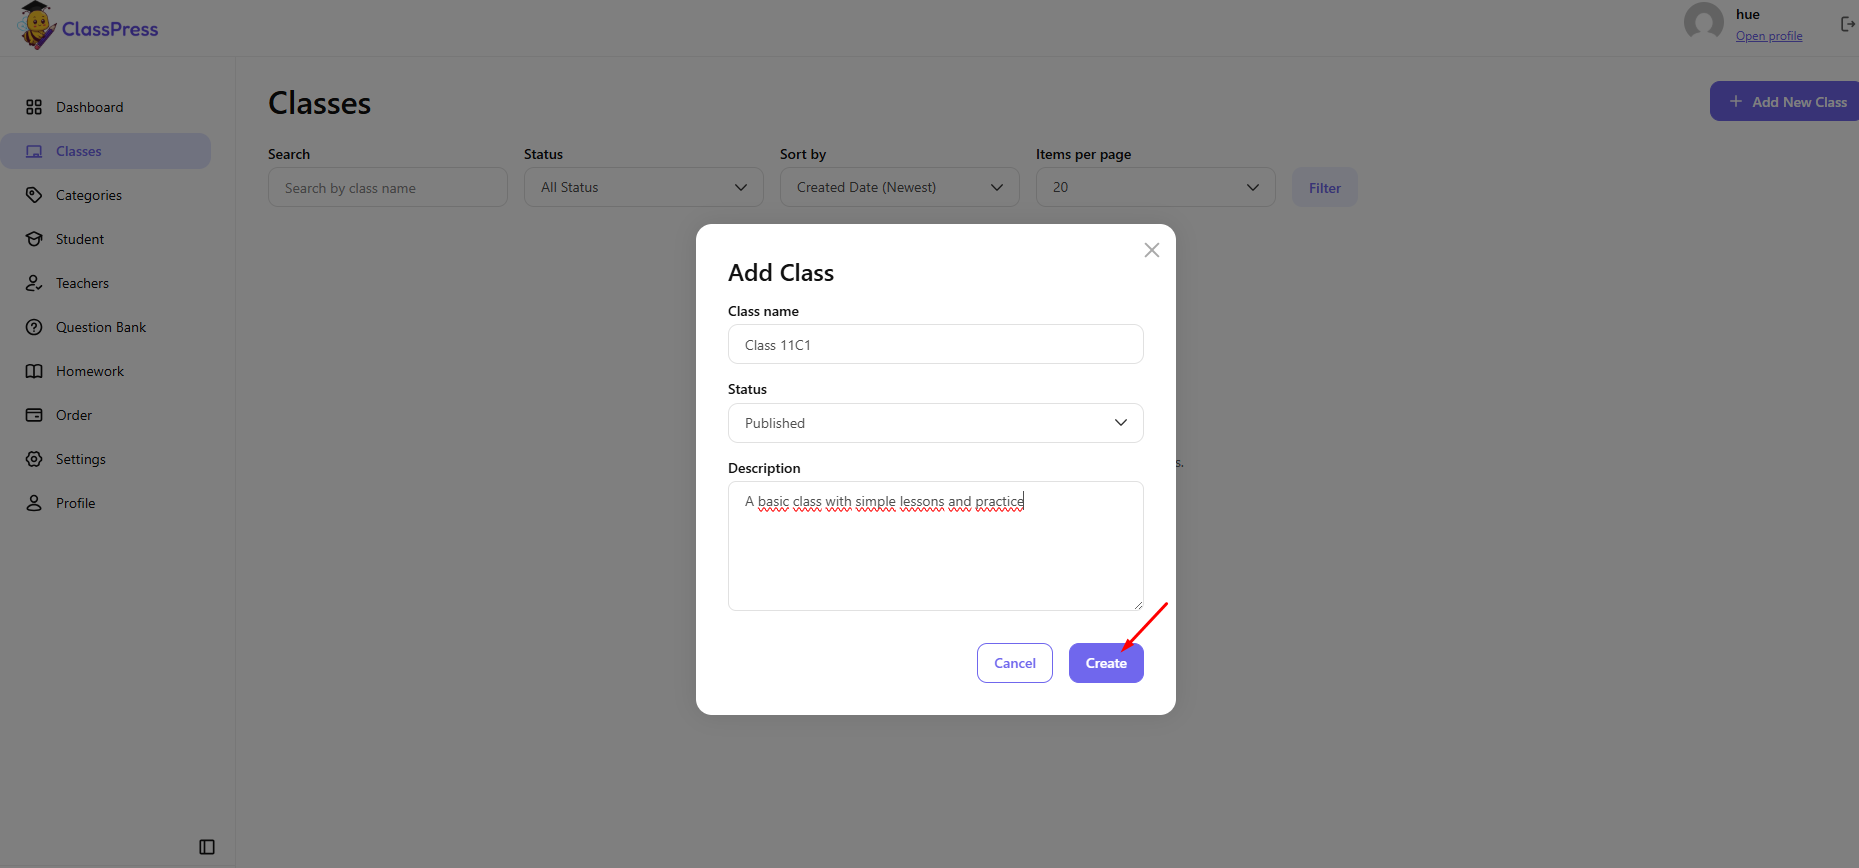
1.1 Add Class
Class Name
Enter a descriptive name for the class.
Examples include:
- English Beginner
- Physics 101
This field is required.
Status
Select the status for the class.
- Draft – The class is saved as a draft and is only visible to administrators. It can be edited before being published.
- Publish – The class is published and becomes visible to both students and teachers. Administrators can continue editing the class after it has been published.
Description
Optionally, enter a description for the class
Once your class is created, you’ll be redirected to the detail page where you can start customizing it
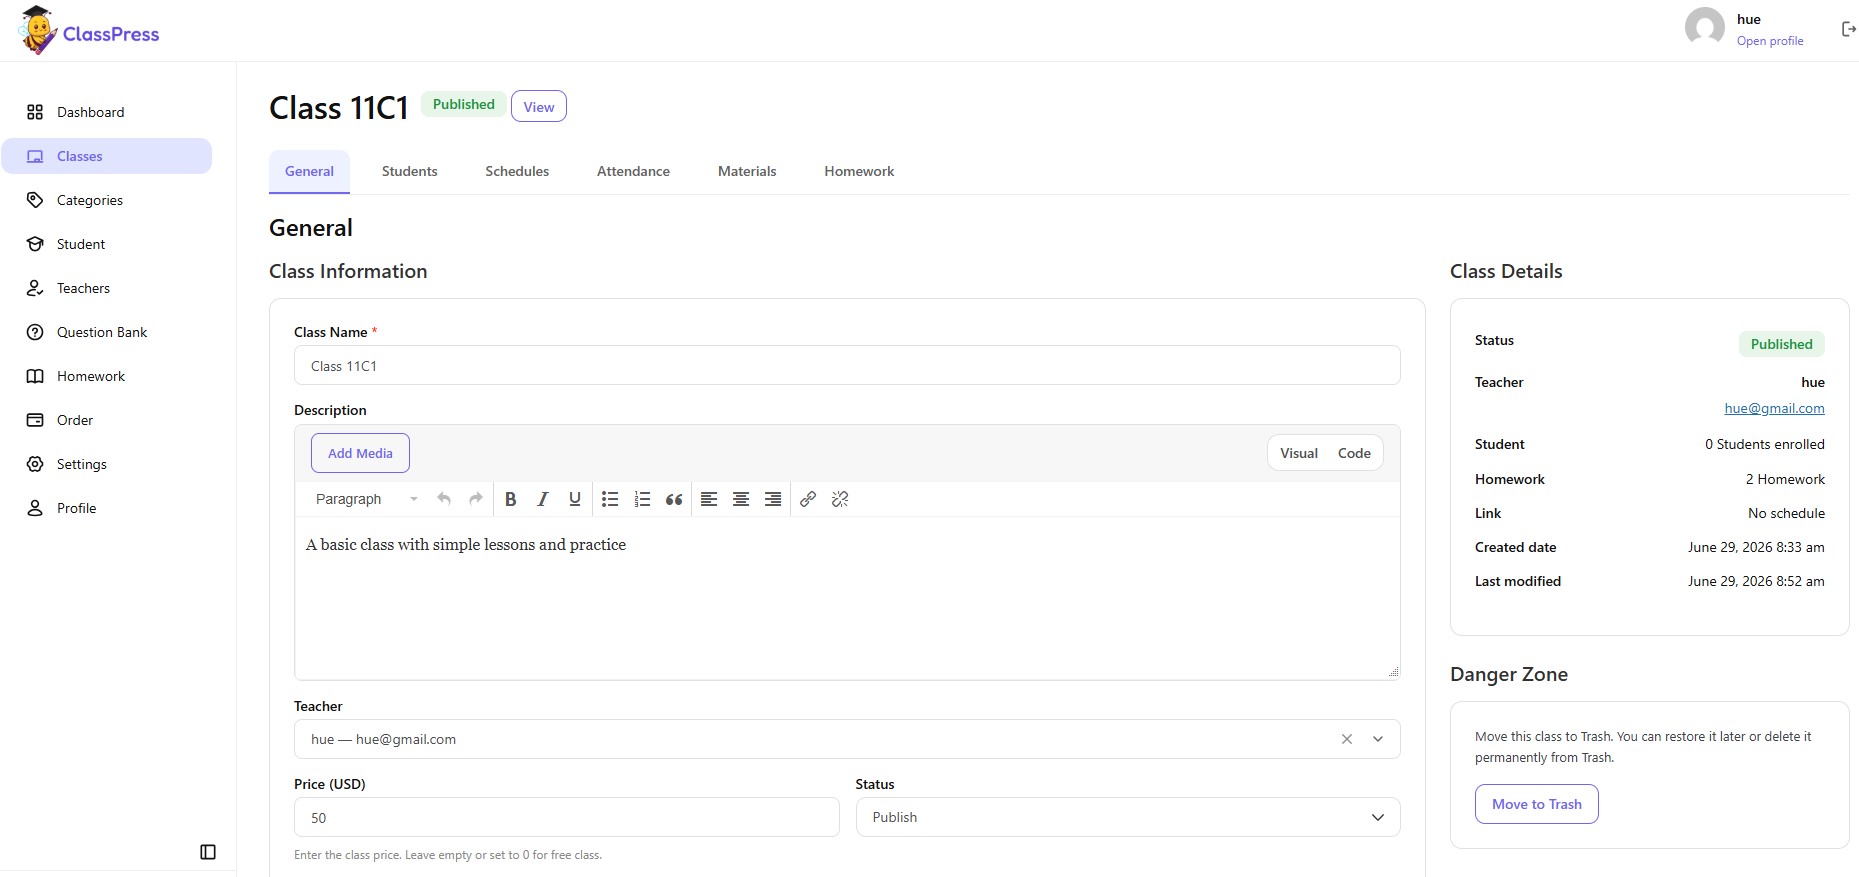
In the General section, you can customize several settings as shown below
- Price: Set the course price. Enter 0 if the course is free.
- Featured Image: Upload a featured image to display on the course listing page.
- Categories: Create new categories or select from existing ones.
After making any changes, don’t forget to click ‘Save Changes’ to save them.
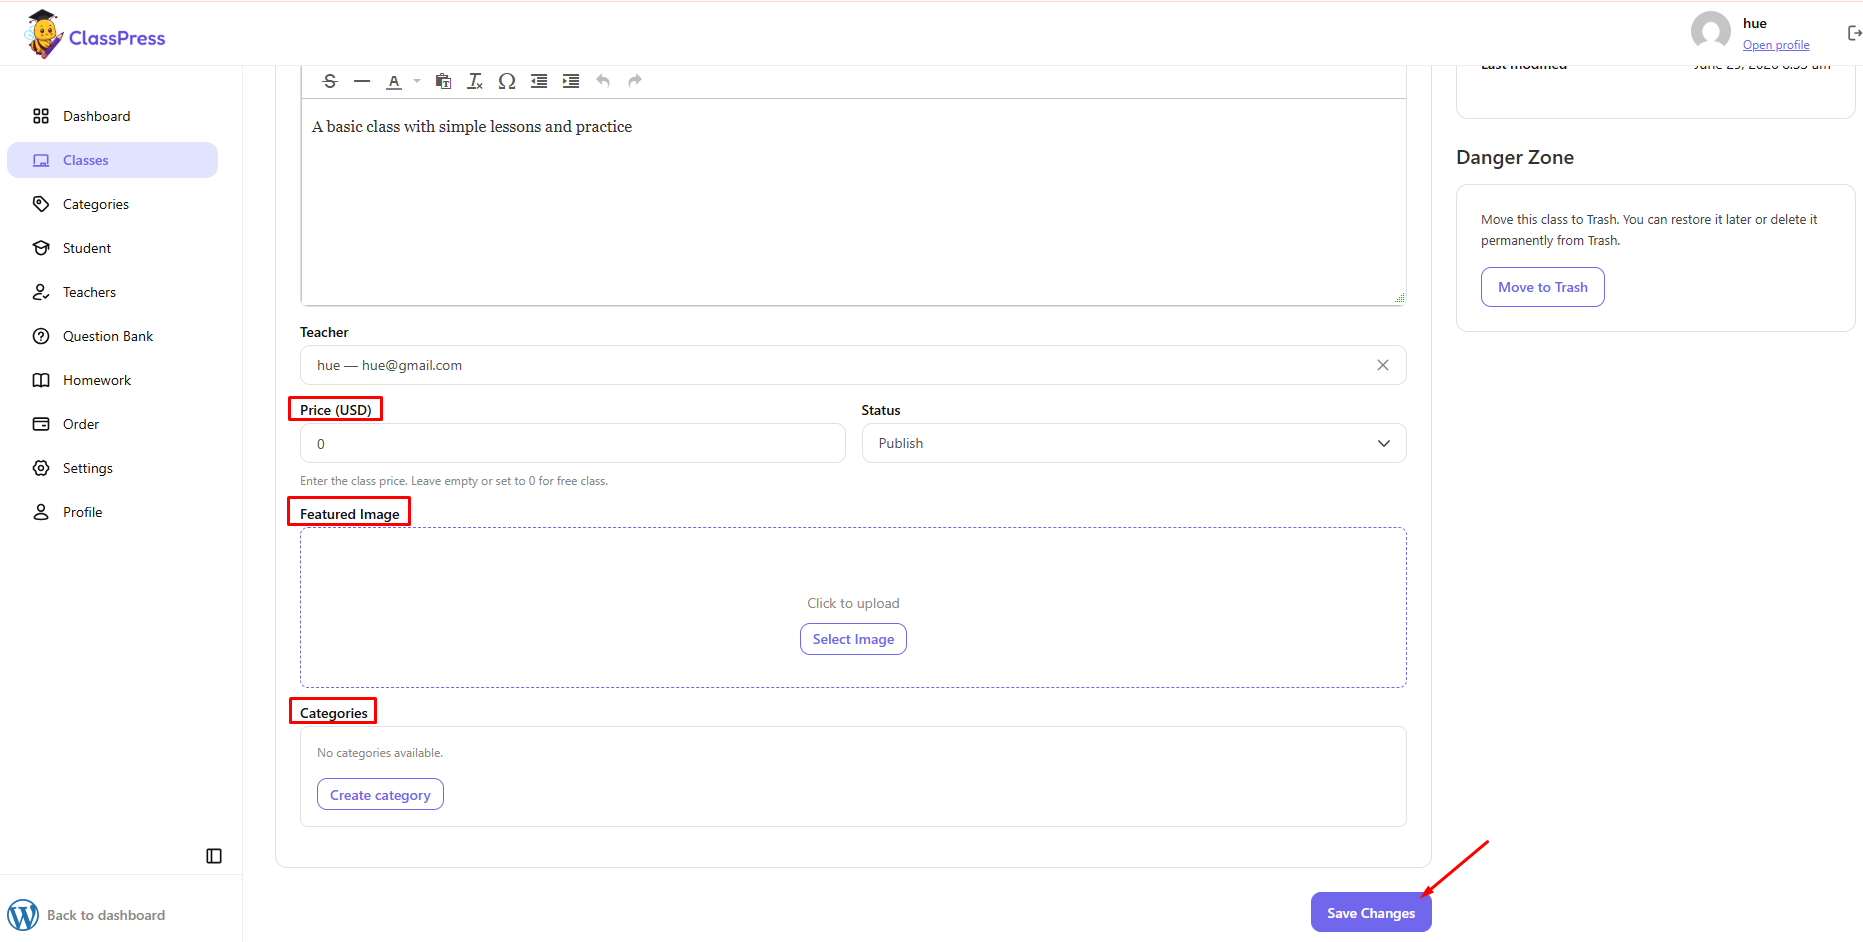
After completing all settings in the General tab, you can move on to the Students section
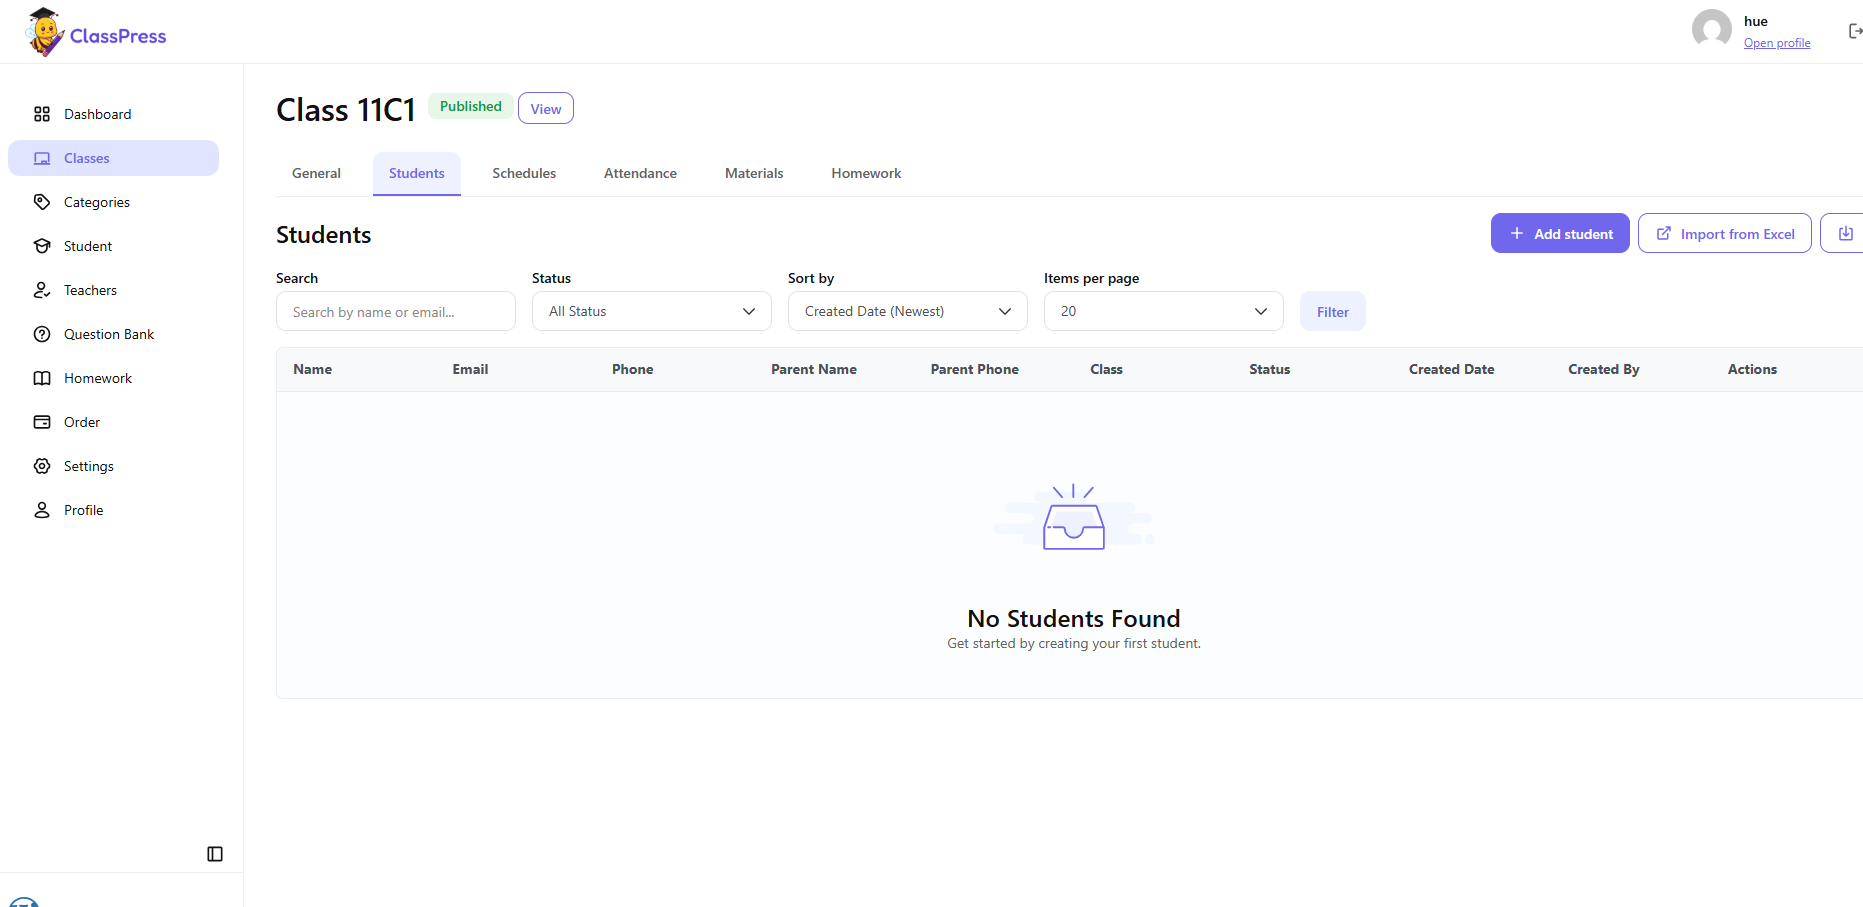
1.2. Edit a Class
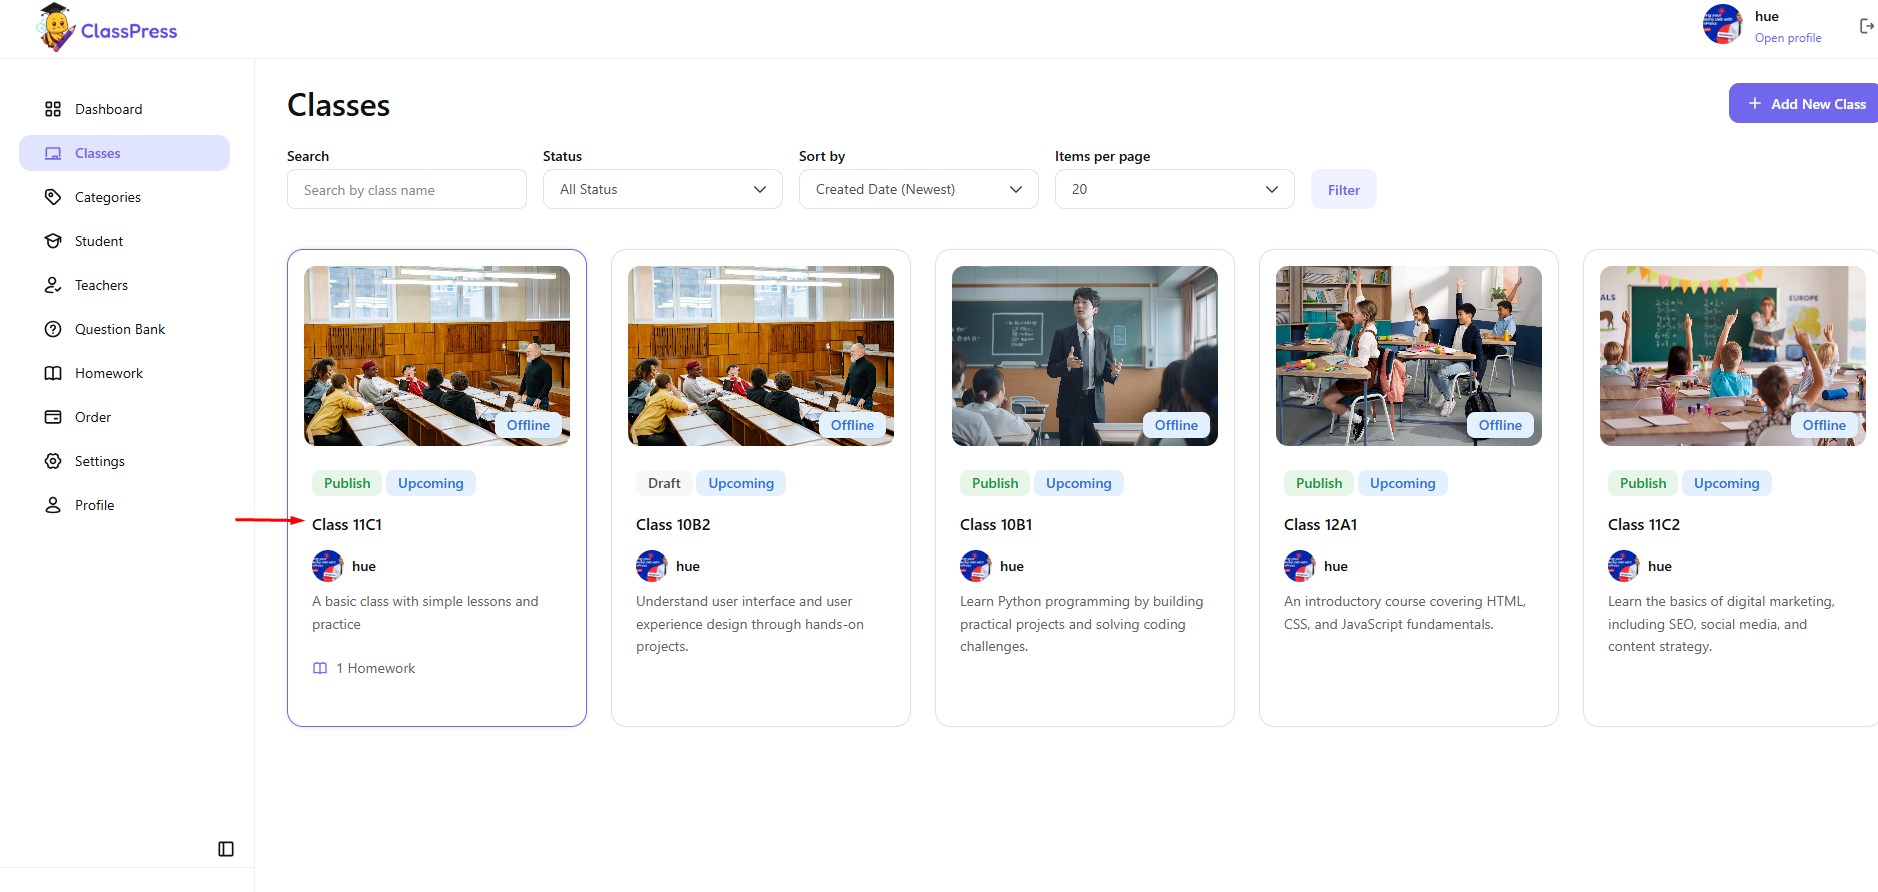
To edit a class, simply click the class title or the featured image on the Classes page.
You will be redirected to the class detail page, where you can update the class information, such as the title, description, pricing, categories, and other settings.
Published classes can still be edited at any time by administrators. Any changes will take effect after saving.
1.3. Delete Class
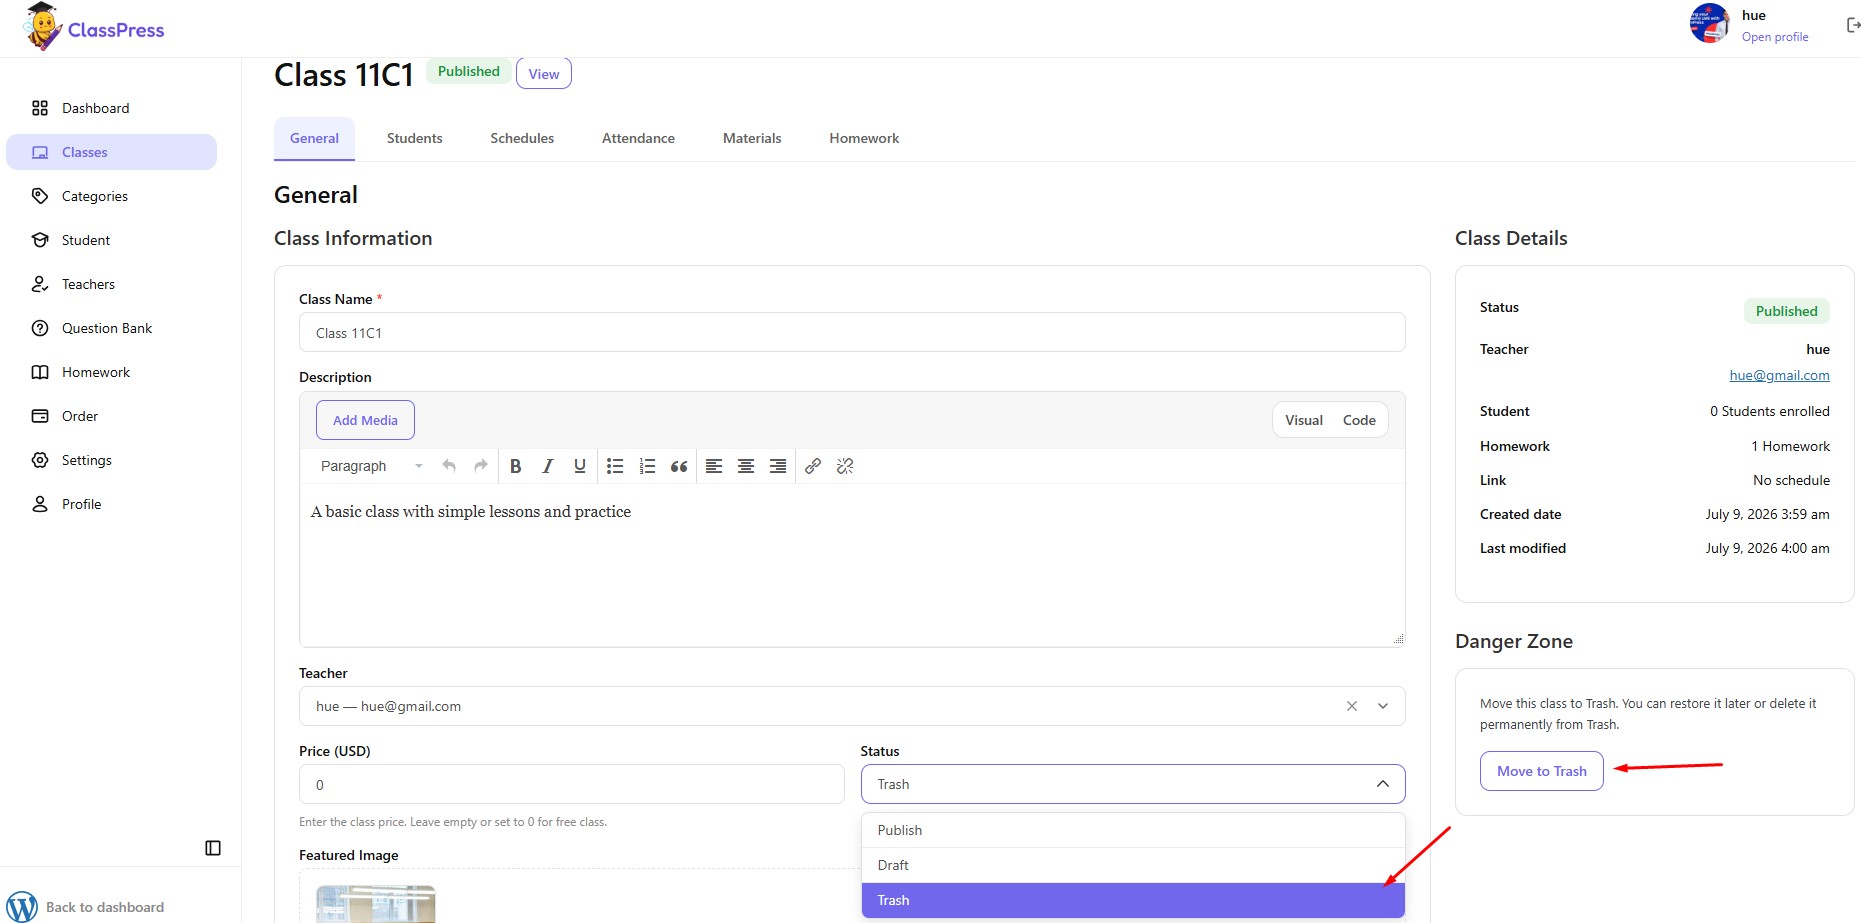
You can remove a class in one of the following ways:
Option 1: Move the class to Trash
Open the class you want to remove, then click Move to Trash in the Danger Zone panel.
The class will be moved to the Trash, where it can be restored later or permanently deleted.
Option 2: Change the class status to Trash
Open the class, then change the Status field from Publish or Draft to Trash.
After saving your changes, the class will be moved to the Trash.
Note: Moving a class to Trash removes it from the class list and makes it unavailable to students and teachers. The class can still be restored or permanently deleted from the Trash.
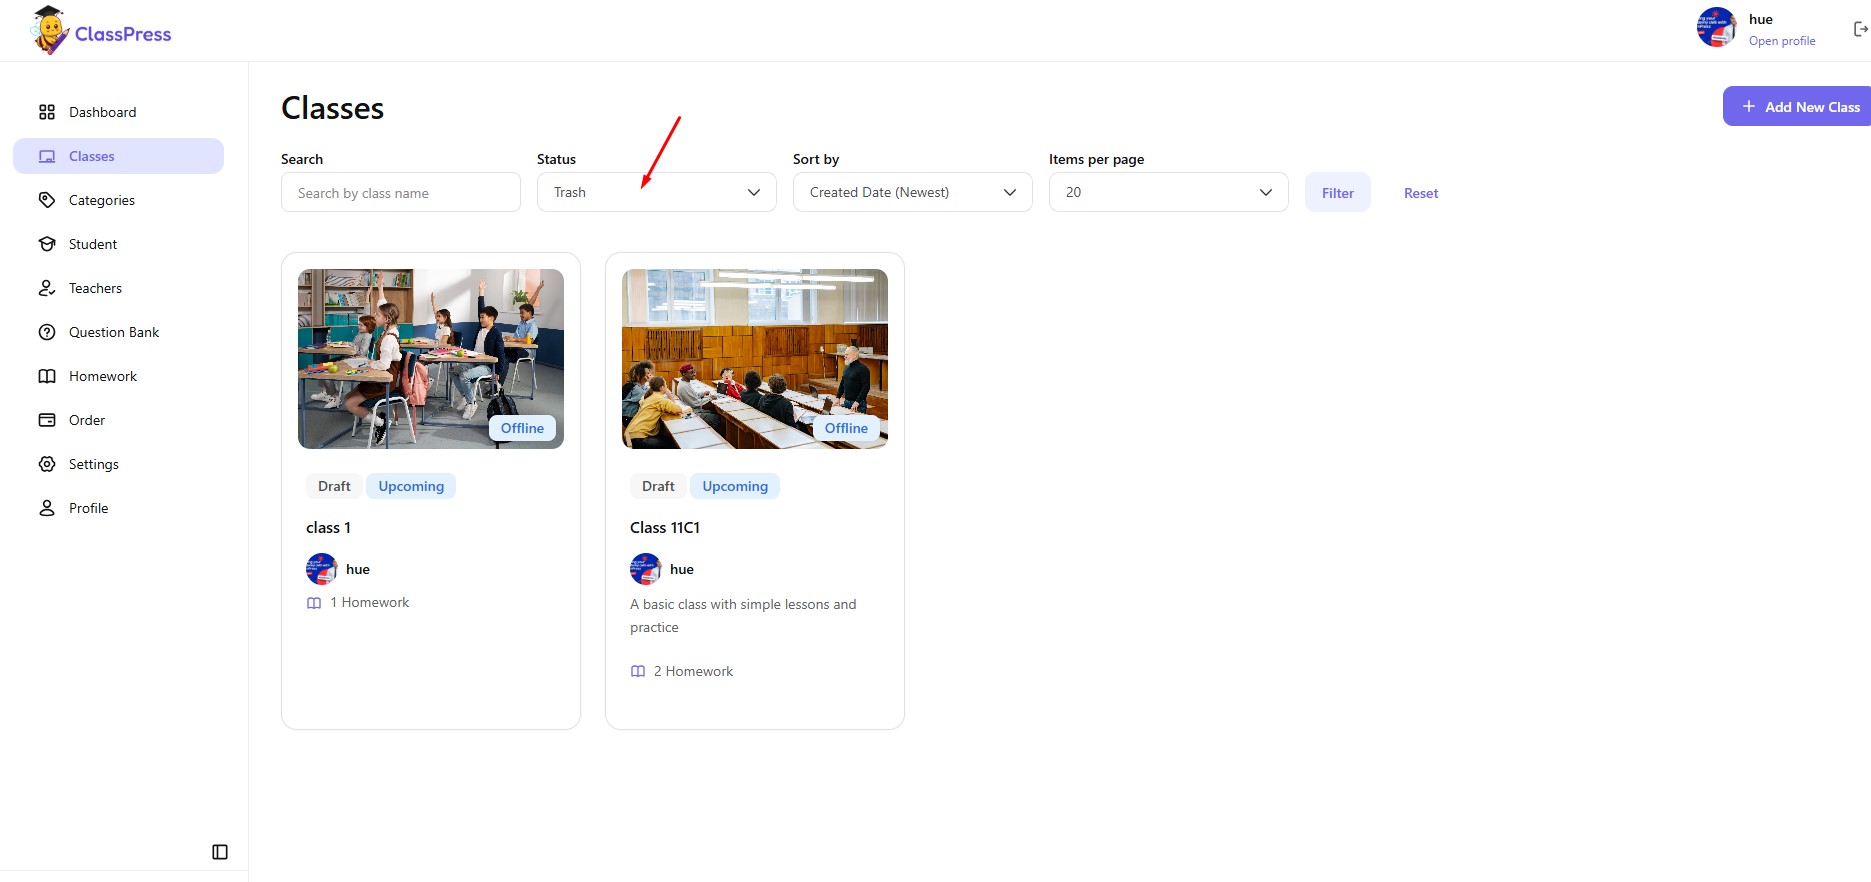
After moving a class to Trash, you can use the Status filter on the Classes page and select Trash to display all trashed classes.
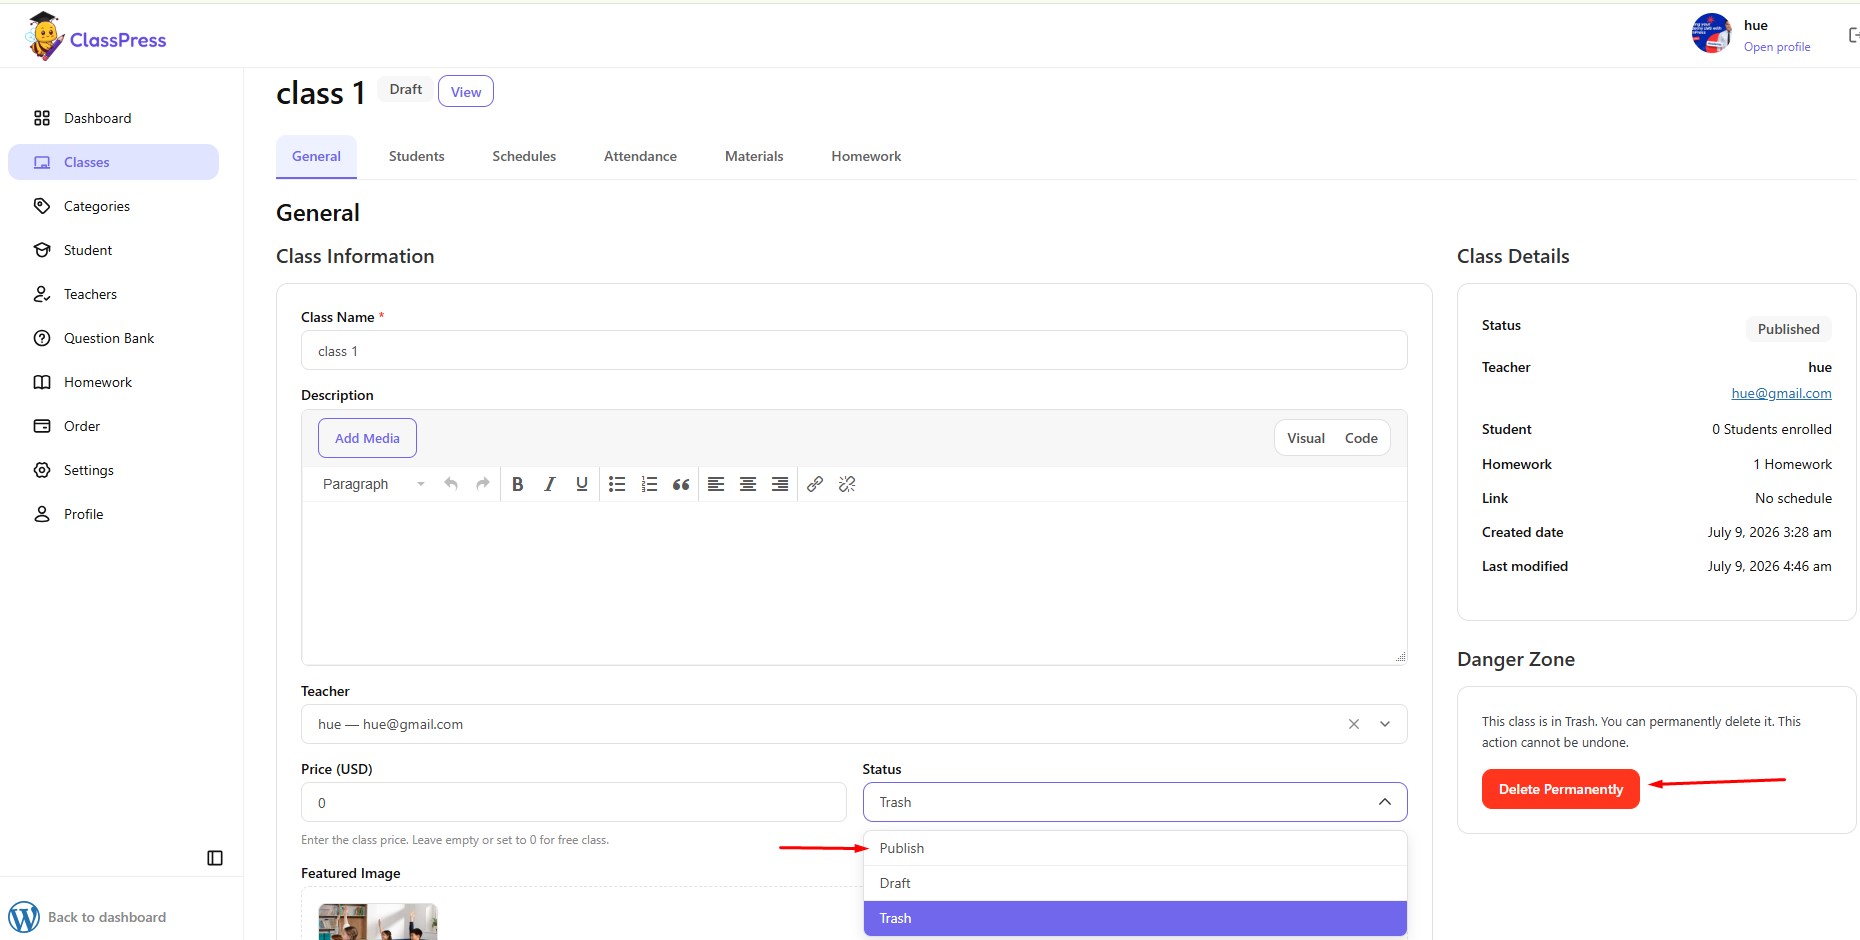
From there, you can:
- Restore the class if you want to make it available again.
- Delete Permanently to remove the class and all of its data from the system.
Note: A permanently deleted class cannot be recovered.
2.Adding Students to a Class
After creating a class, you can create a new student or add an existing student to the class.
To add a student:
- Click Add Student.
- Fill in the required student information.
- Click Save Changes.
Once the student has been added successfully, they will appear in the student list for the selected class.
To enroll an existing student:
- Click Add Student.
- Click Enroll Existing
- Search for the student by name or email.
- Select the student you want to enroll.
- Click Enroll.
Once enrolled successfully, the student will appear in the student list for the selected class.
Import Students from Excel
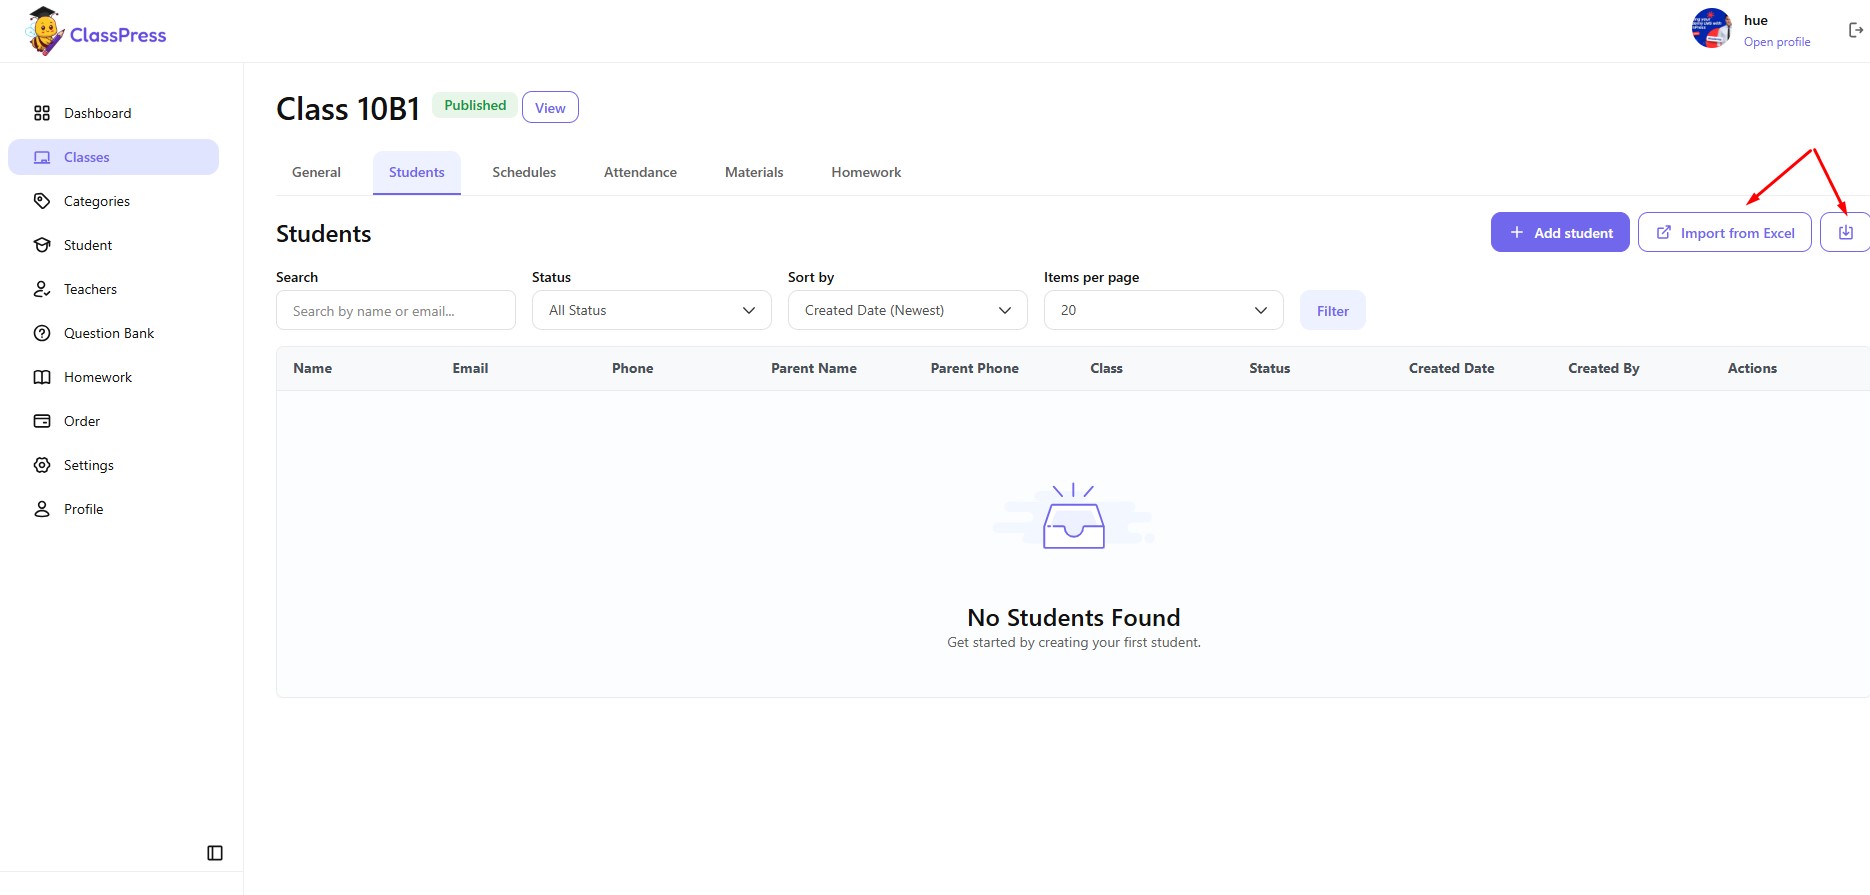
Instead of adding students one by one, you can import multiple students into a class using an Excel file.
To import students:
- Open the Students tab of the class.
- Click Import from Excel.
- Download the sample template.
- Fill in the student information following the template format.
- Save the completed file and upload it.
- Confirm the import to add the students to the class.
The template includes fields such as:
- Student ID
- Username
- Student Name
- Phone
- Parent Name
- Parent Phone
- Note
- Student Status
- Enrollment Status
- Class Name
Note: If the uploaded file contains duplicate users or invalid data, those records may be skipped during the import process. Make sure the information follows the template format before uploading.
3.Managing Schedules
The Schedules tab allows you to create and manage class schedules.
To access this page:
- Click the Schedules tab.
Schedule Calendar
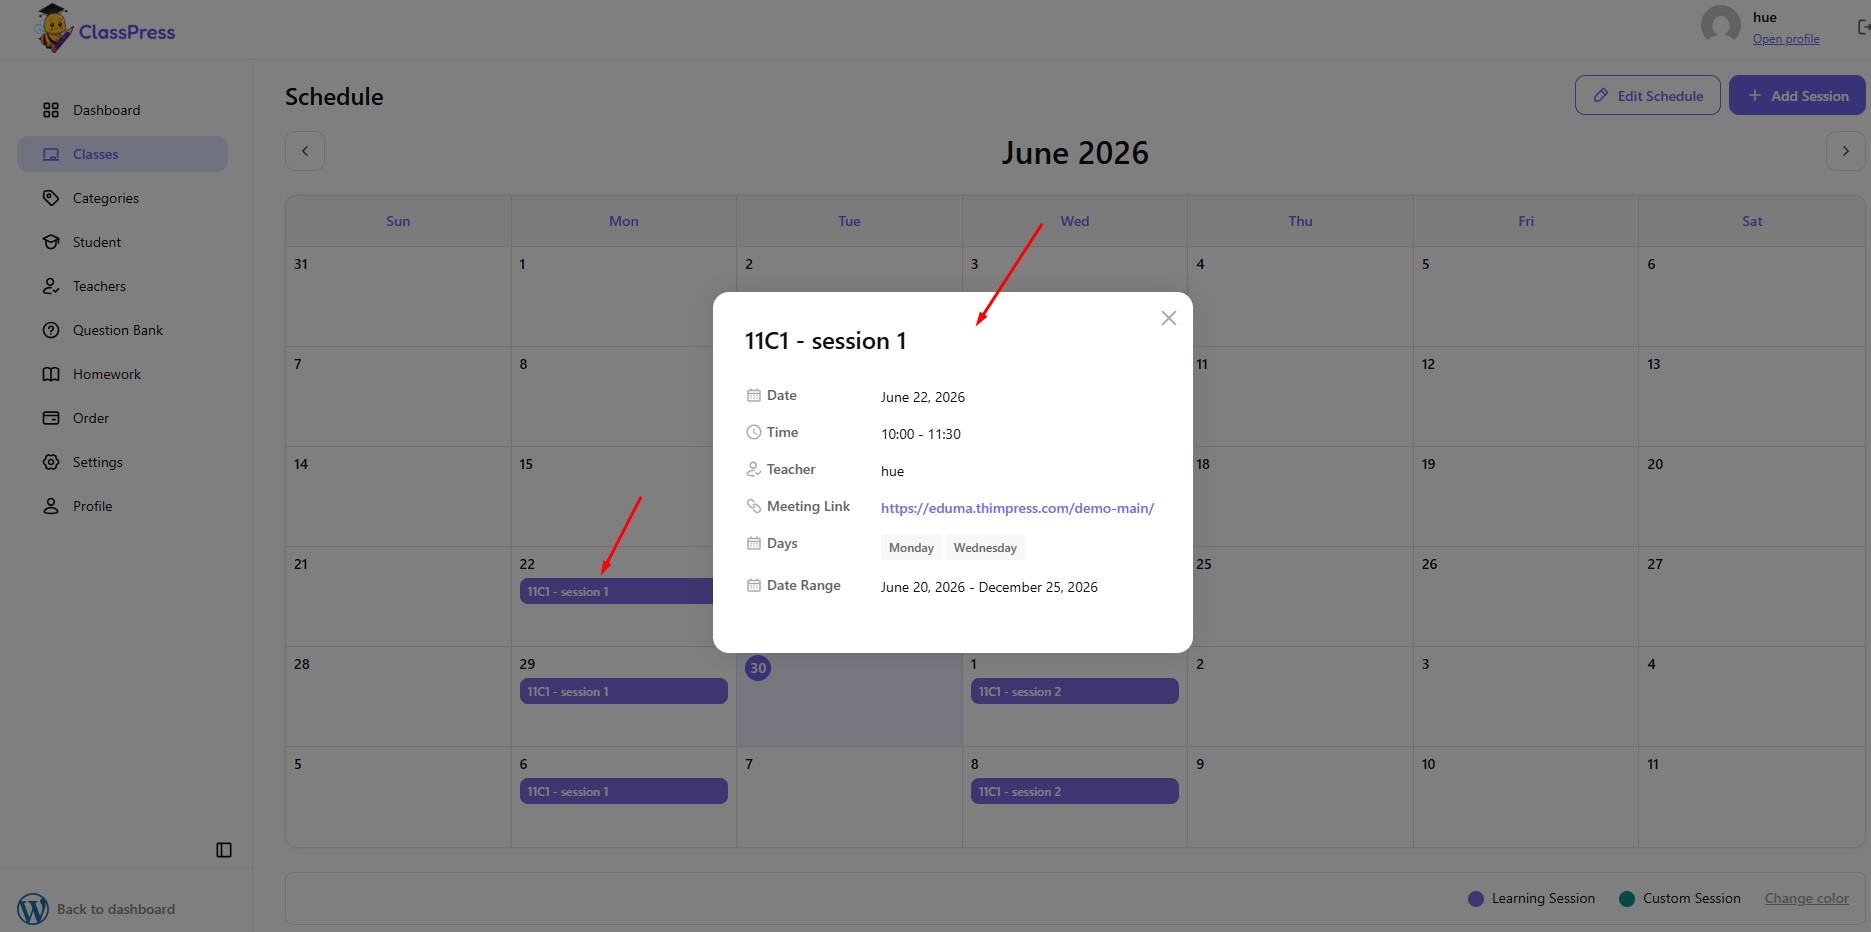
The Schedules tab displays a calendar view of the class schedule.
Click the Previous or Next arrows to navigate between months.
If no schedule has been created, the calendar will be empty.
To create a schedule, click Add Schedule.
Creating a Schedule
To create a schedule:
- Open the Schedules tab.
- Click Add Schedule.
- Complete the schedule information.
- Click Add Schedule to save.
After the schedule has been created successfully, it will be displayed on the class calendar.
4.Attendance Overview
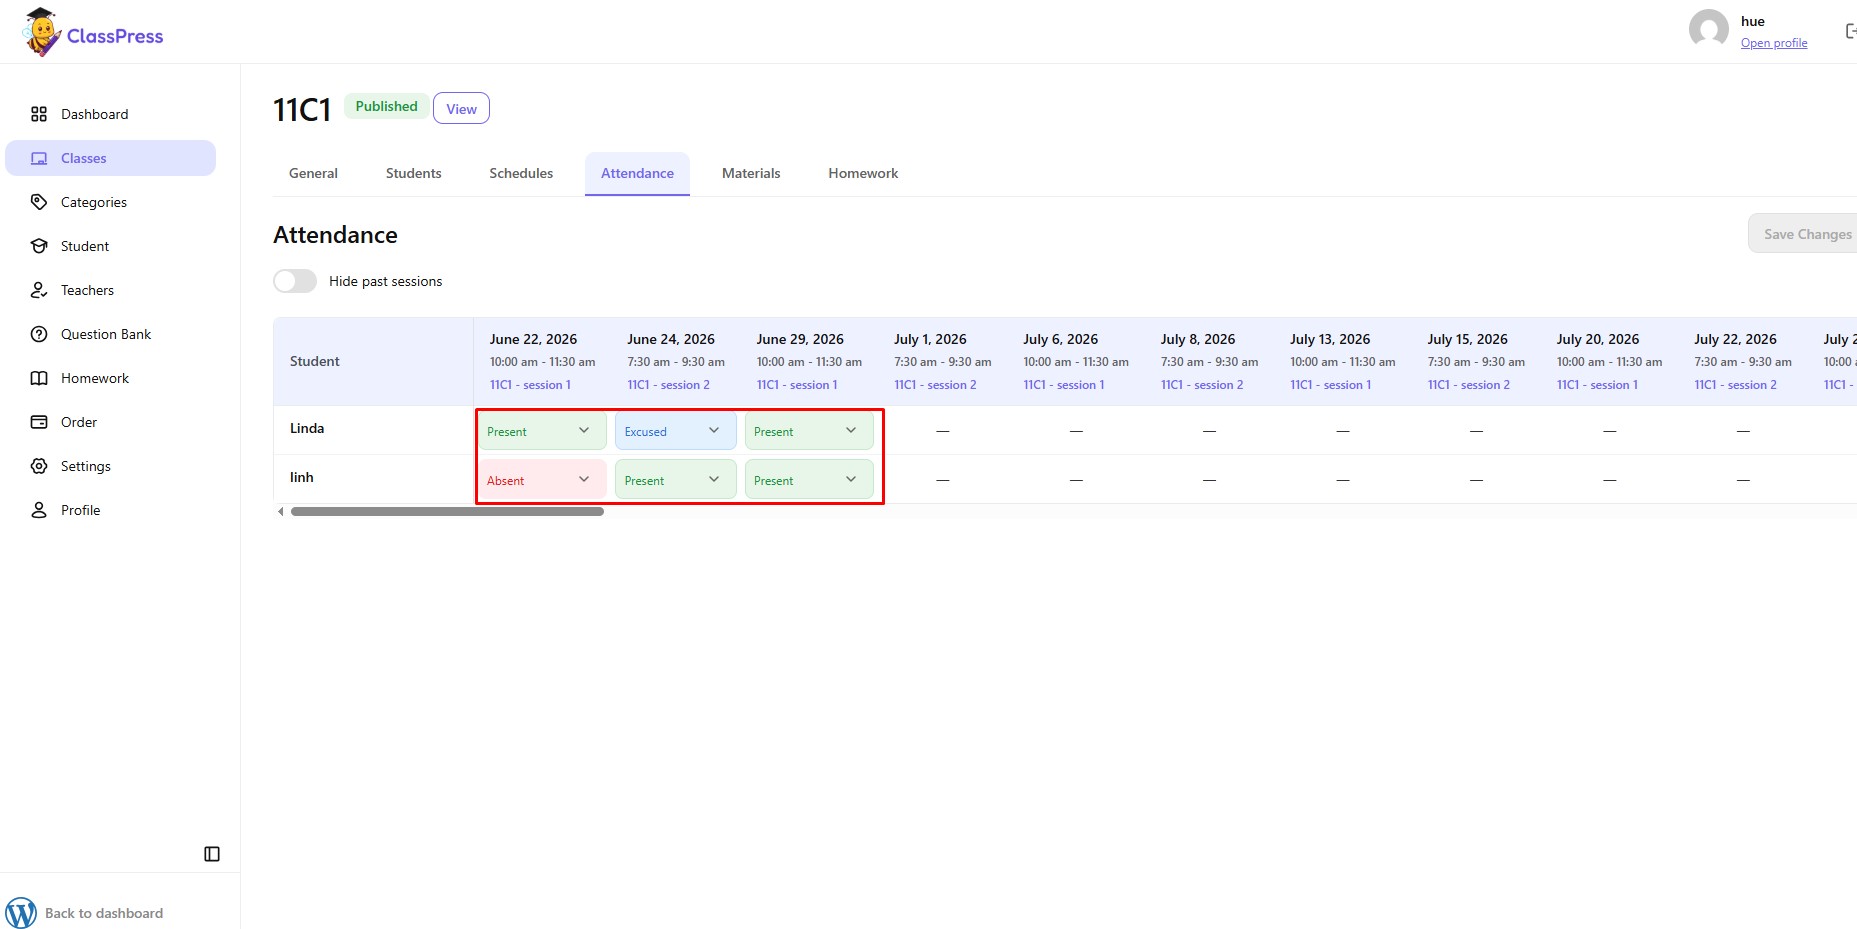
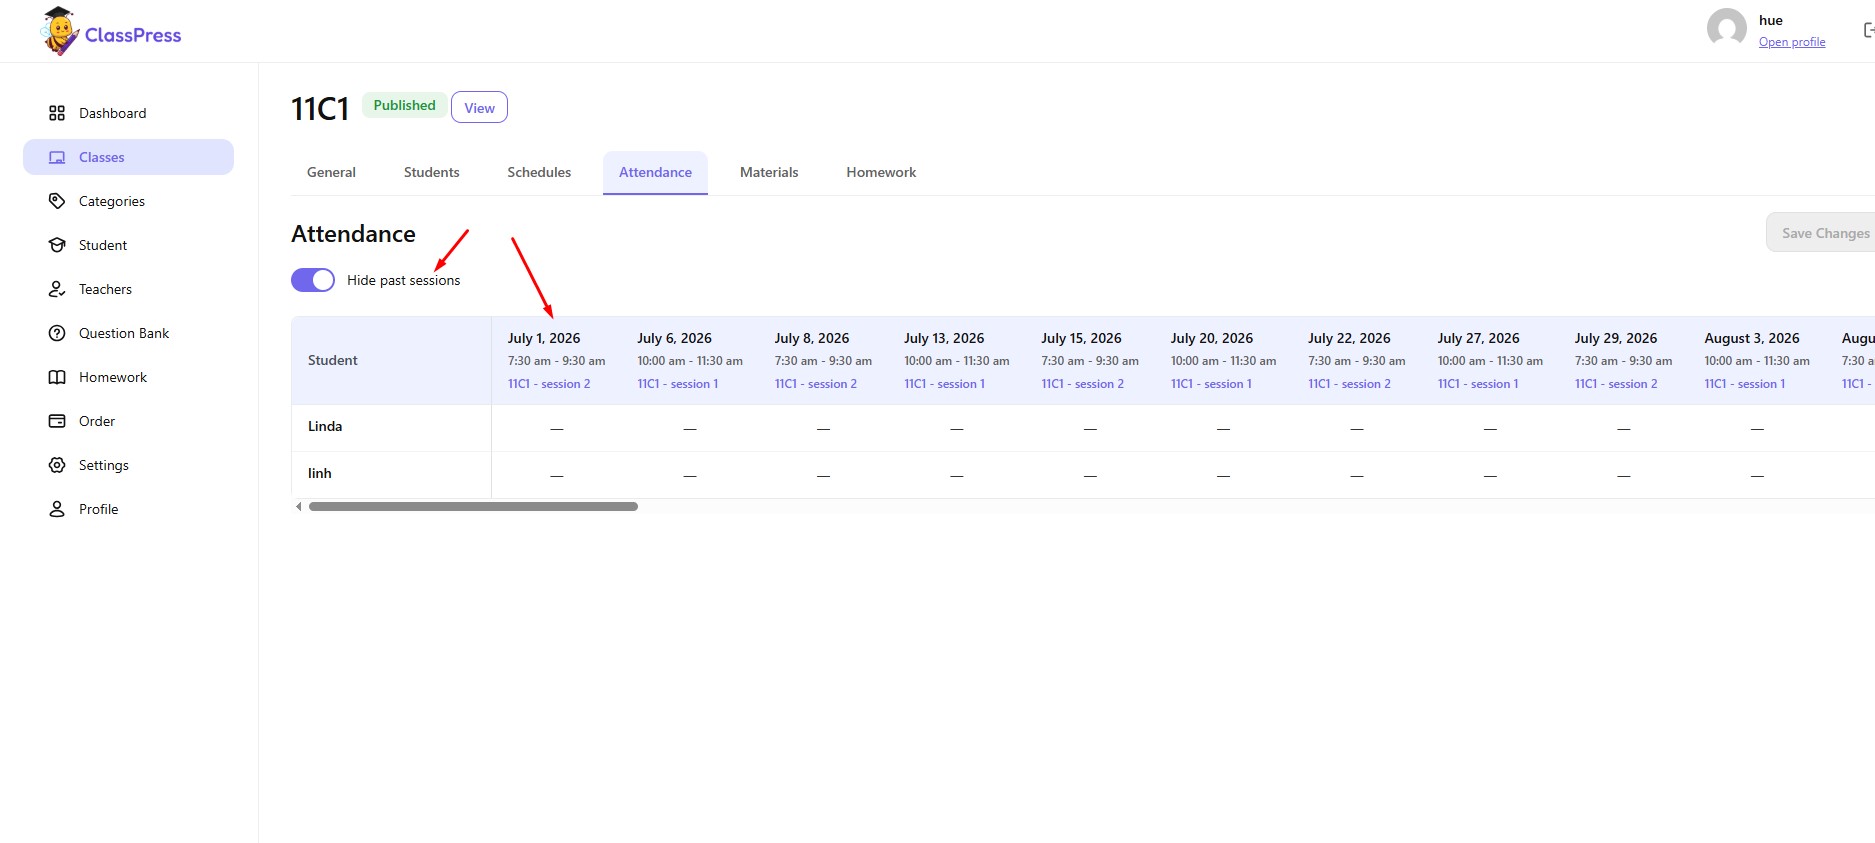
The attendance table displays all enrolled students along with every scheduled class session.
Each column represents a class session, including the session date and time, while each row represents a student enrolled in the class.
You can update attendance for each student directly from the table.
Recording Attendance
To record attendance:
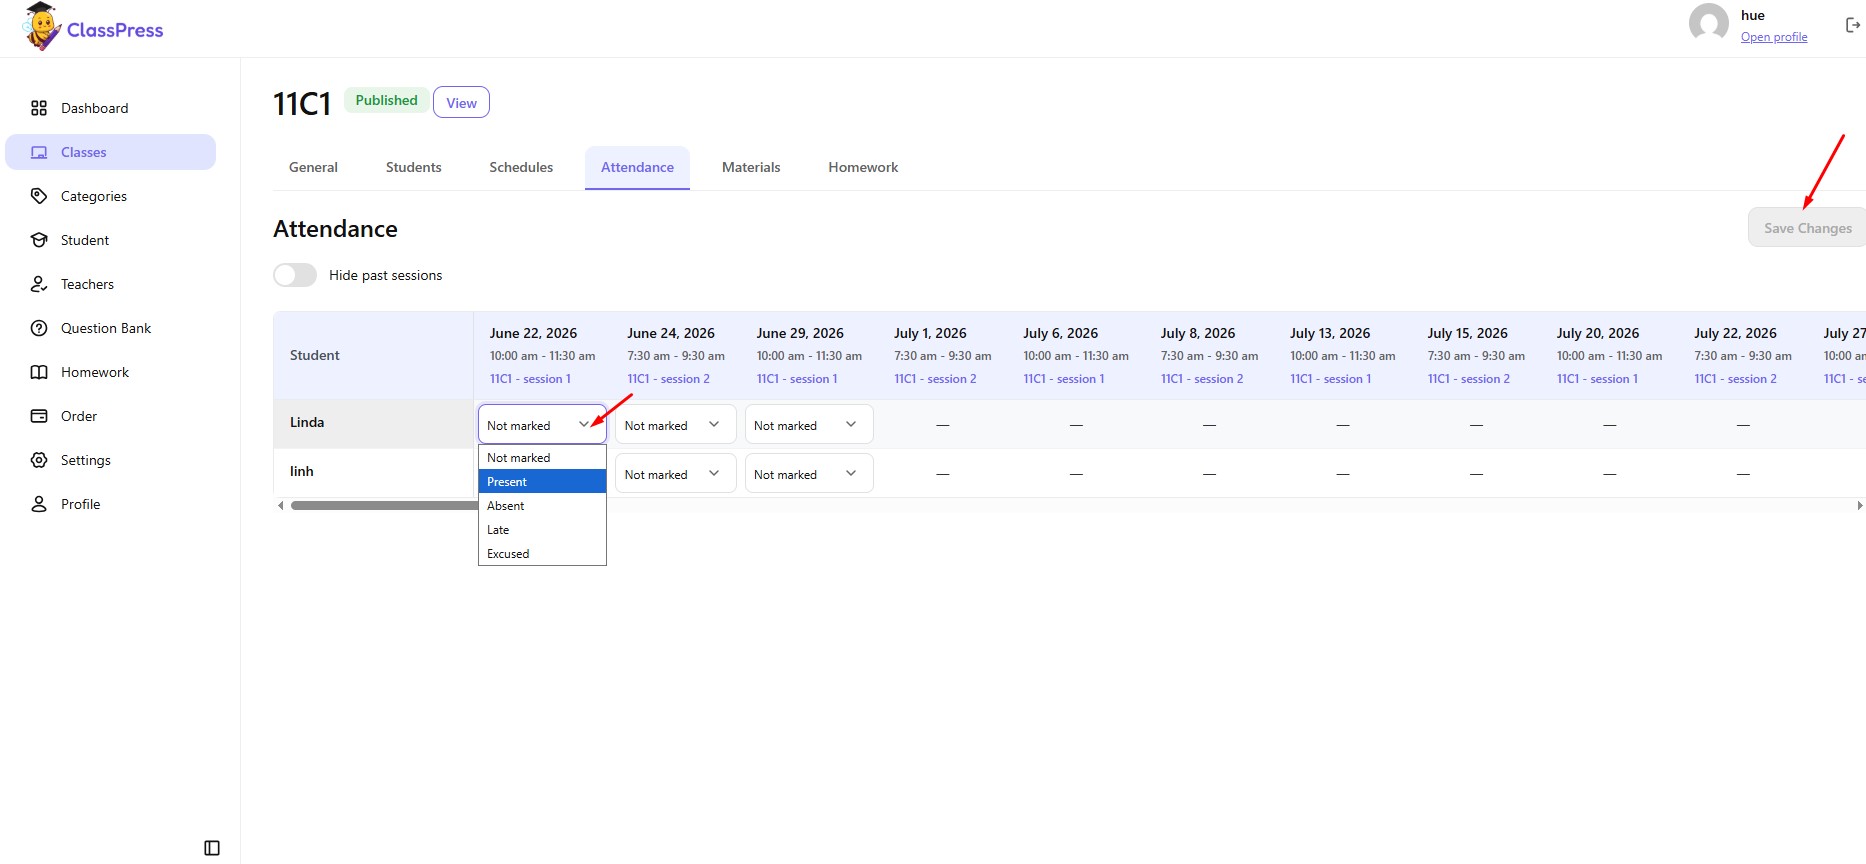
- Locate the student in the attendance table.
- Find the corresponding class session.
- Click the attendance dropdown.
- Select the appropriate attendance status.
- Click Save Changes to save your updates.
Attendance Status
Each attendance record can be assigned one of the following statuses:
- Not marked – Attendance has not been recorded.
- Present – The student attended the class.
- Absent – The student was absent.
- Late – The student arrived late.
- Excused – The student was absent with an approved excuse.
Hide Past Sessions
Enable Hide past sessions to hide completed class sessions from the attendance table.
This option helps you focus on current and upcoming sessions, making attendance management easier when a class contains a large number of sessions.
You can disable this option at any time to display all previous sessions again.
Saving Attendance
After updating one or more attendance records, click Save Changes to save your modifications.
Once saved successfully, the attendance records will be updated for the selected class.
5.Materials Overview
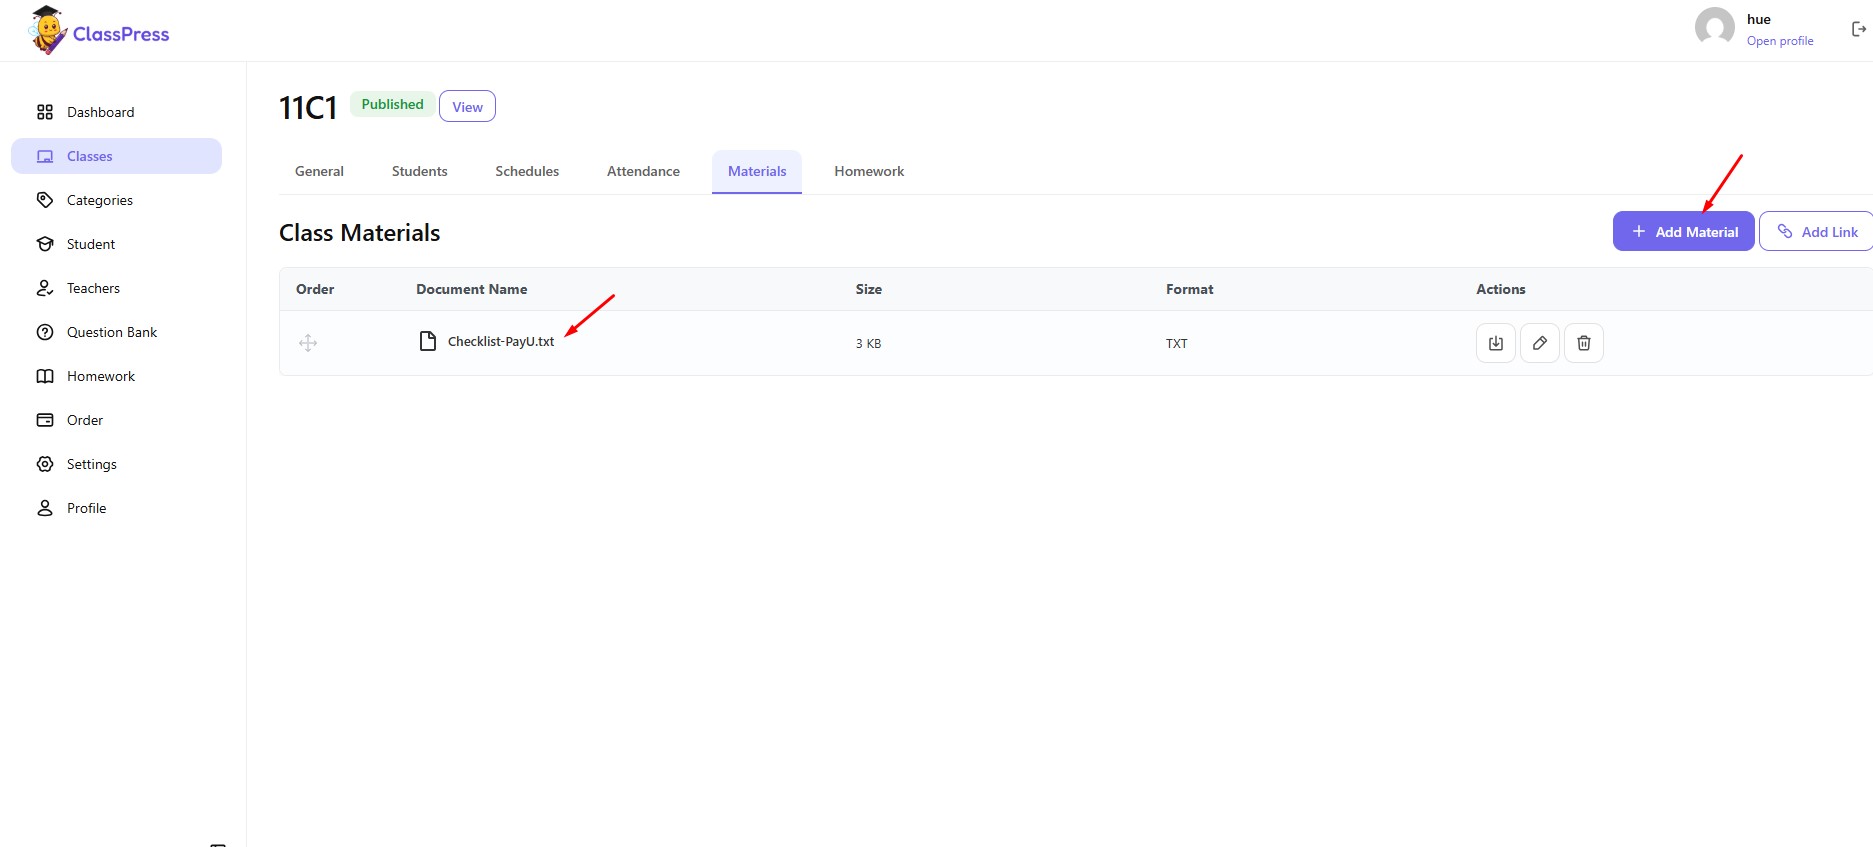
The Materials tab helps you organize and share learning resources with students enrolled in the class.
You can add two types of materials:
- Upload files such as documents, presentations, images, videos, or compressed files.
- External links to online resources, websites, or cloud storage.
Adding Materials
To upload a new file:
- Click Add Material.
- In the upload dialog, click Upload File.
- Select a file from your computer.
- Click Upload to save the material.
Adding External Links
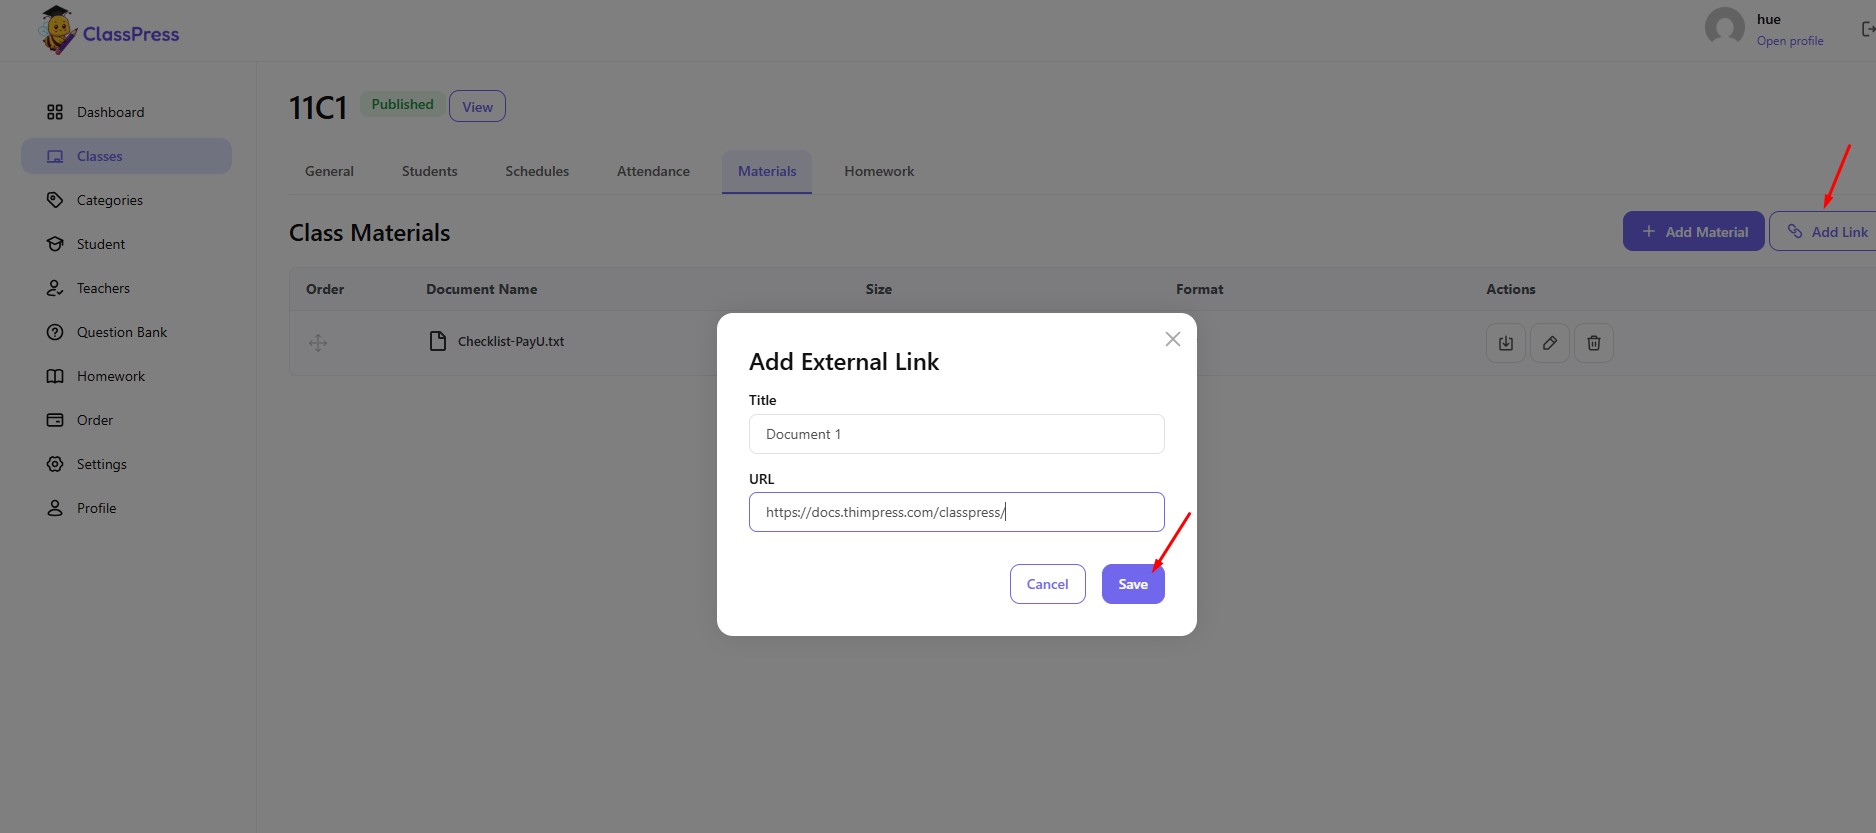
Instead of uploading a file, you can add an external resource.
To add an external link:
- Click Add Link.
- Enter a Title for the resource.
- Enter the URL of the website or online document.
- Click Save.
Managing Materials
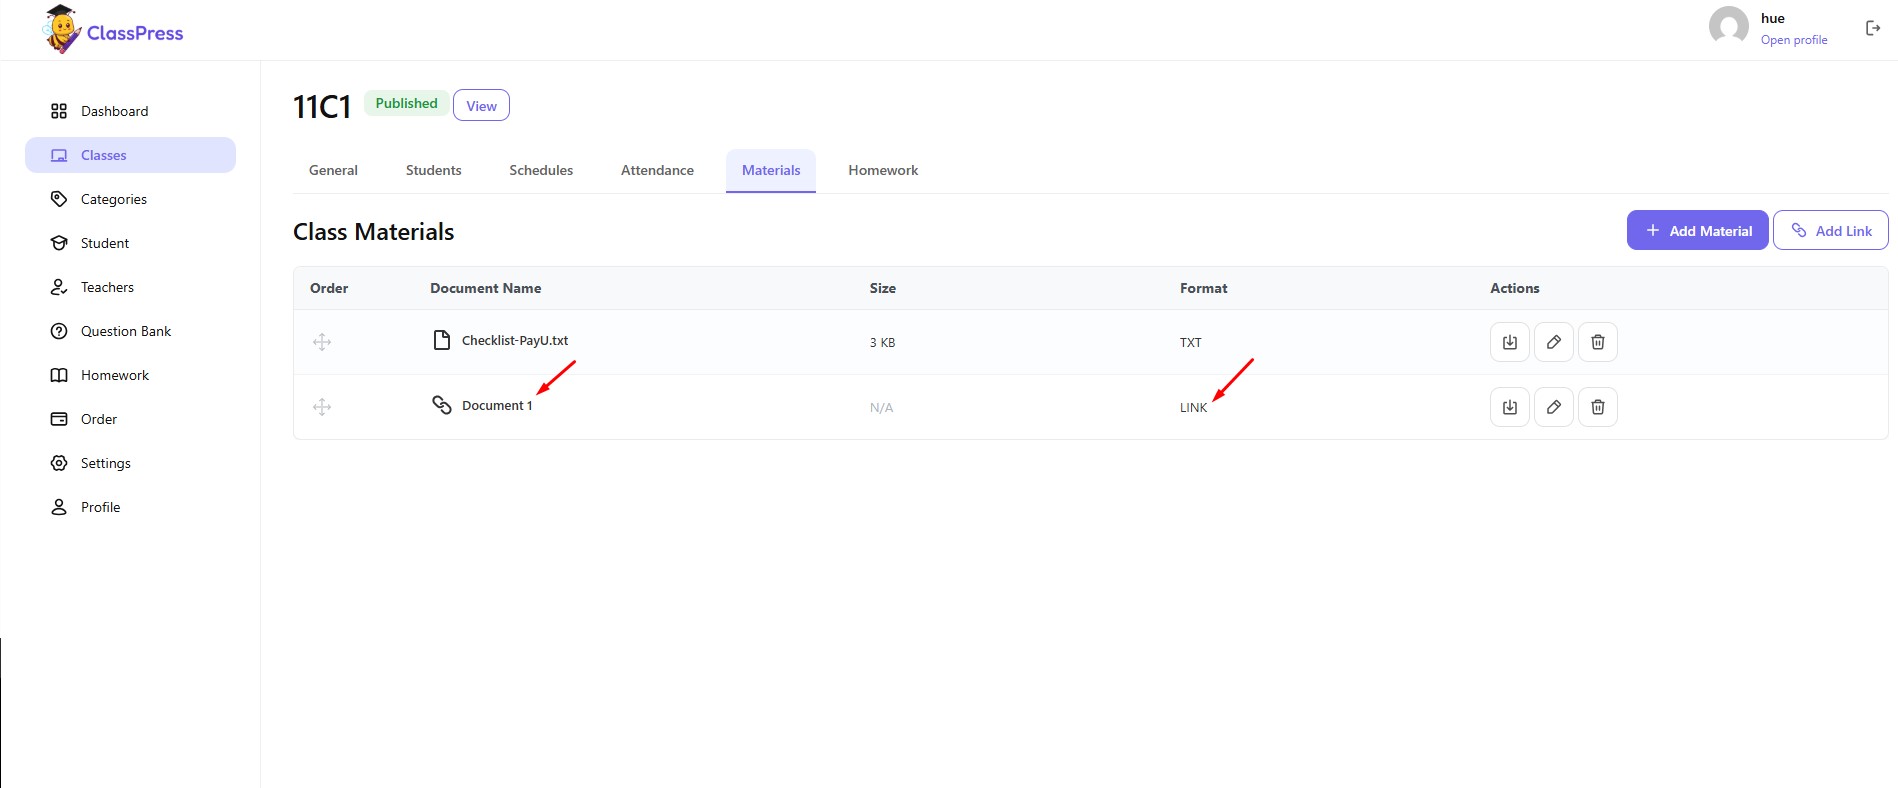
After a material or external link has been added successfully, it will appear in the class materials list.
Teachers and students can access these resources directly from the class whenever needed.
6. Managing Homework
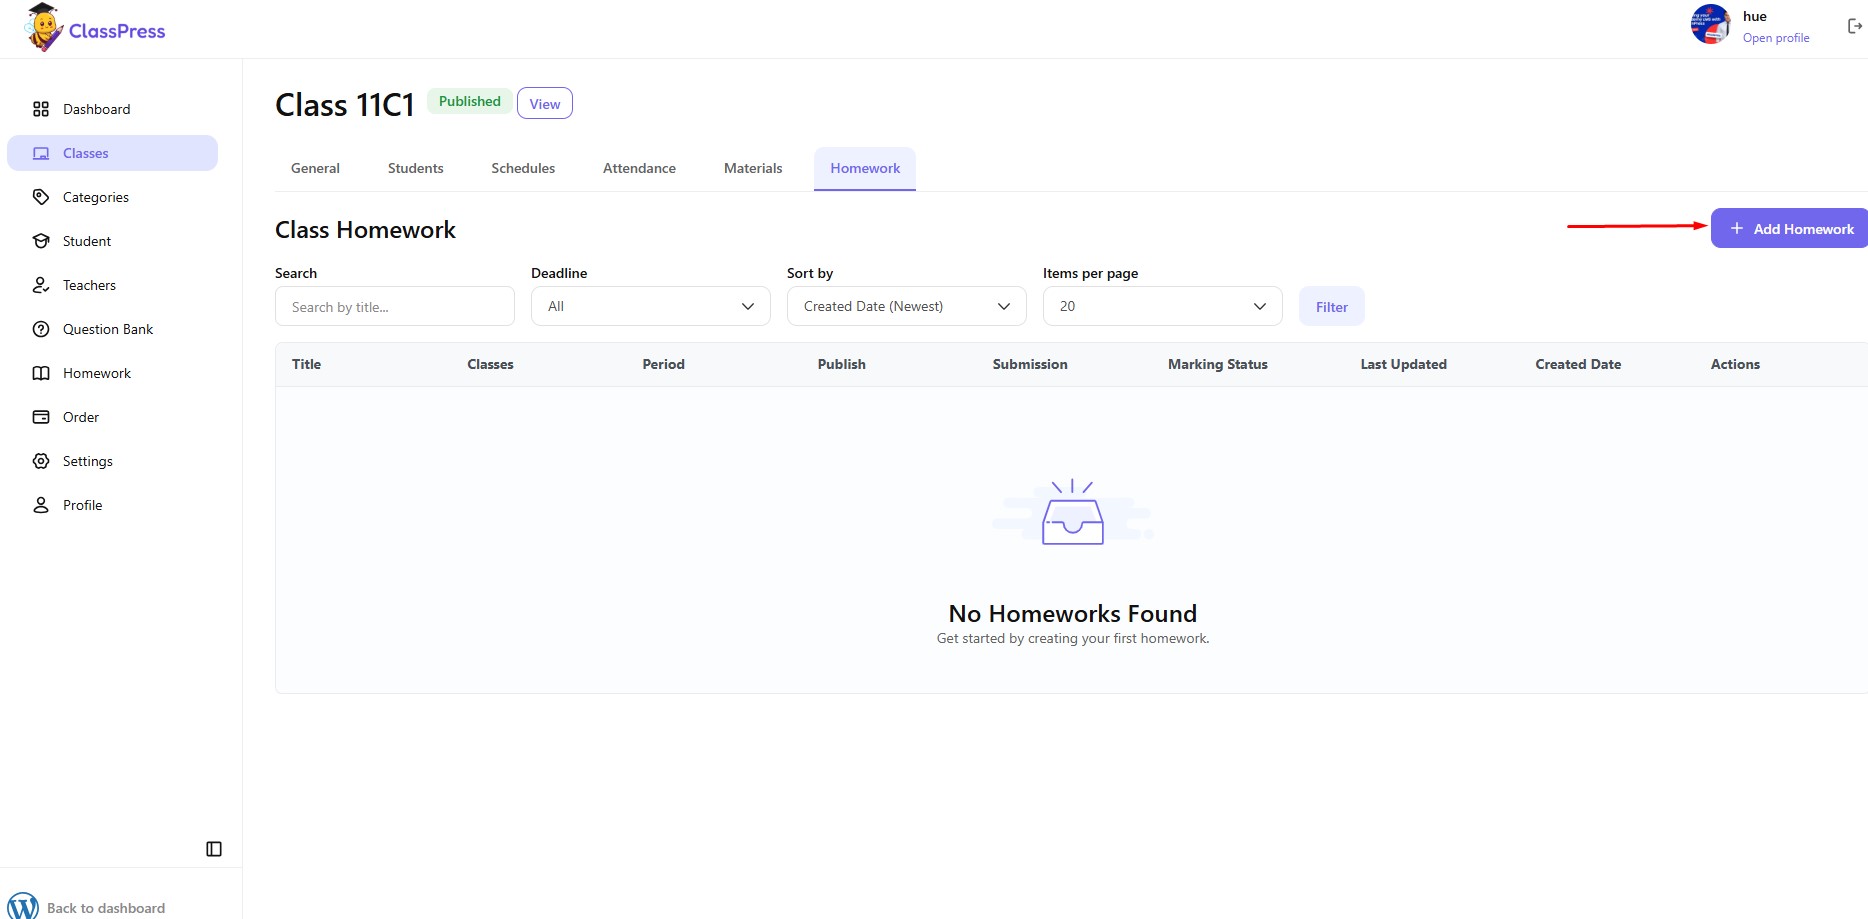
The Homework tab allows administrators and teachers to create, assign, and manage homework for a specific class.
The homework list displays all assignments created for the selected class.
If no homework has been created yet, ClassPress displays a No Homeworks Found message.
Creating a New Homework
To create a homework assignment:
- Click Homework tab.
- Click Add Homework.
- Complete Step 1 – Information.
- Save the homework.
- Continue to Step 2 – Content to add questions.
- Click Done when the homework is complete.
Creating homework is divided into two steps to make the setup process easier.
Step 1 – Information
The first step is used to configure the homework information and schedule.
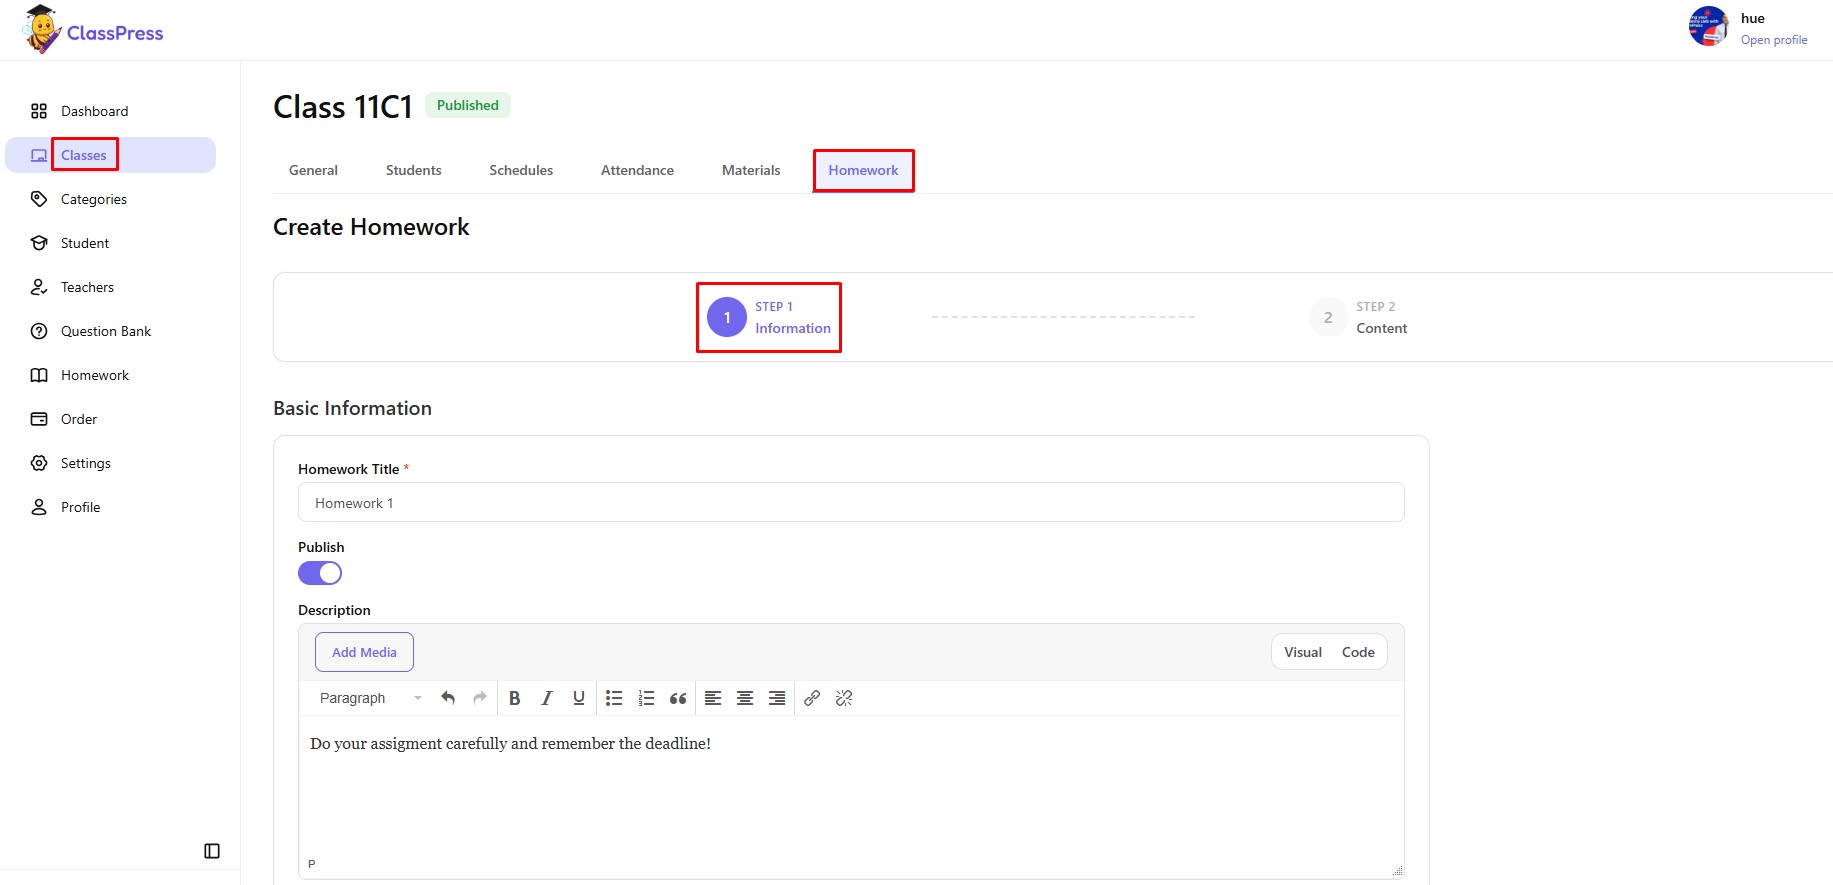
Save Step 1
After completing all required information,” Save and Next” the homework.
Once saved successfully, ClassPress automatically allows you to continue to Step 2 – Content.
Step 2 – Content
The Content step is where you create the questions that students will answer.
At this stage, the homework has already been created, and you can begin building the assignment by adding questions.
To add a new question:
- Click Create Question.
- Complete the question information.
- Save the question.
- Repeat the process until all questions have been added.
- Click Done to finish creating the homework.
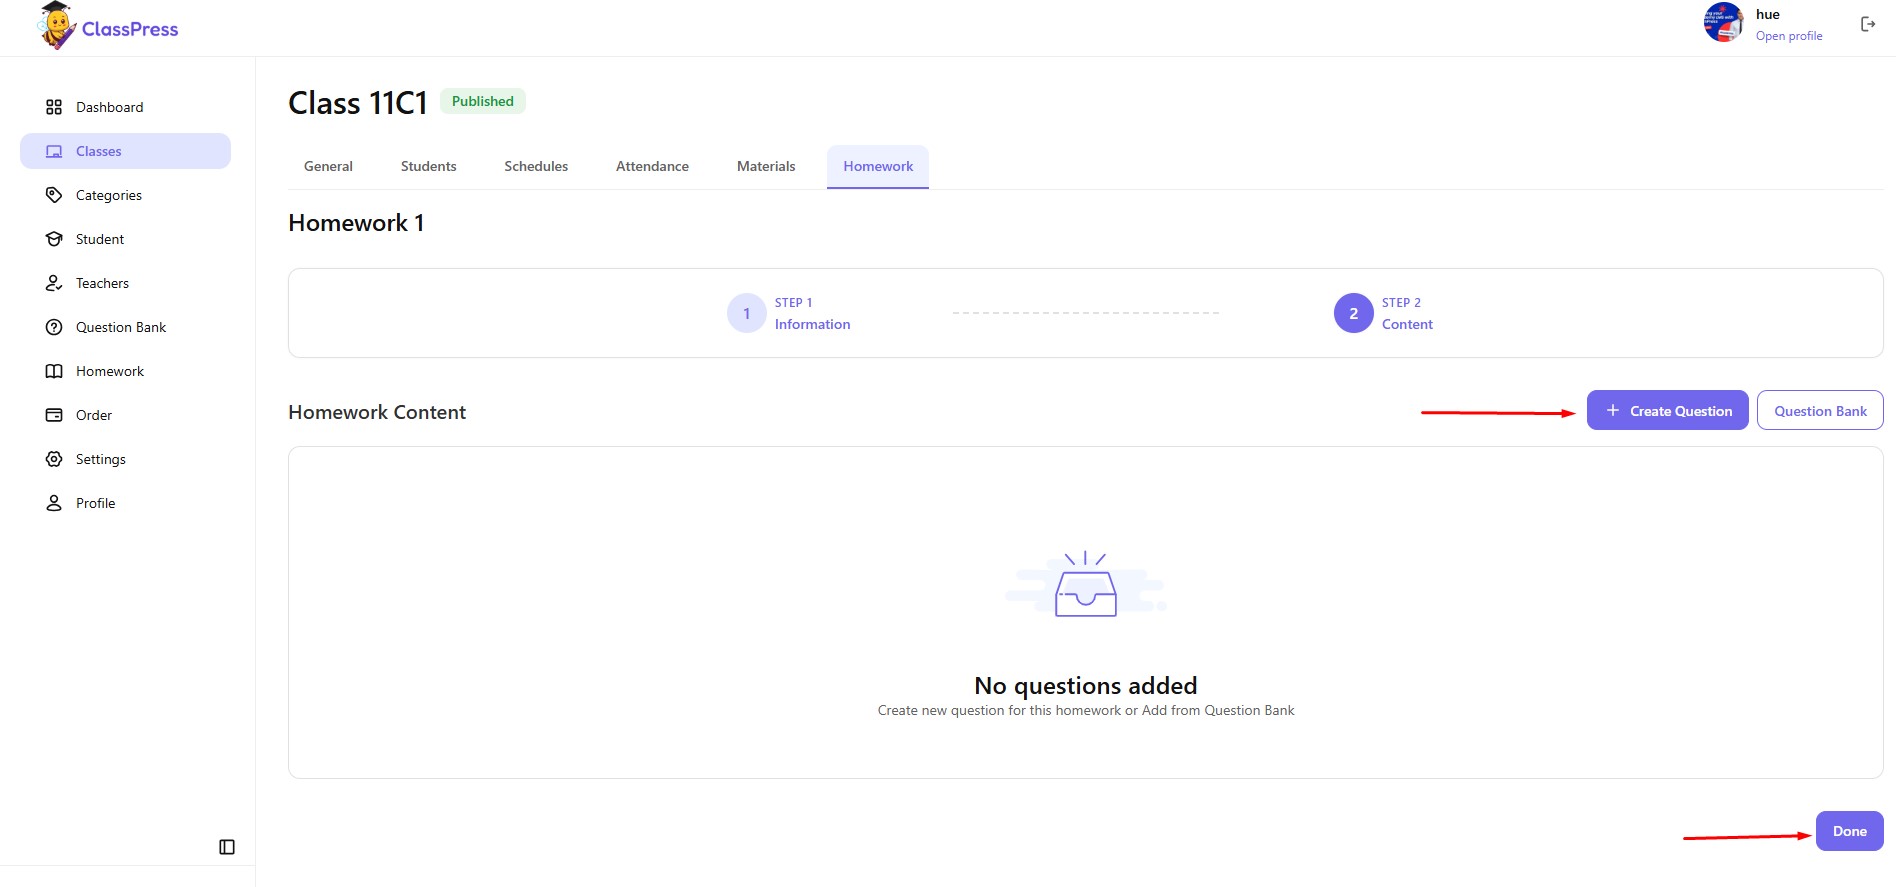
If you need to update the homework information, click Step 1 – Information at the top of the page to return to the previous step. After saving your changes, click Step 2 – Content to continue creating or editing the homework questions.
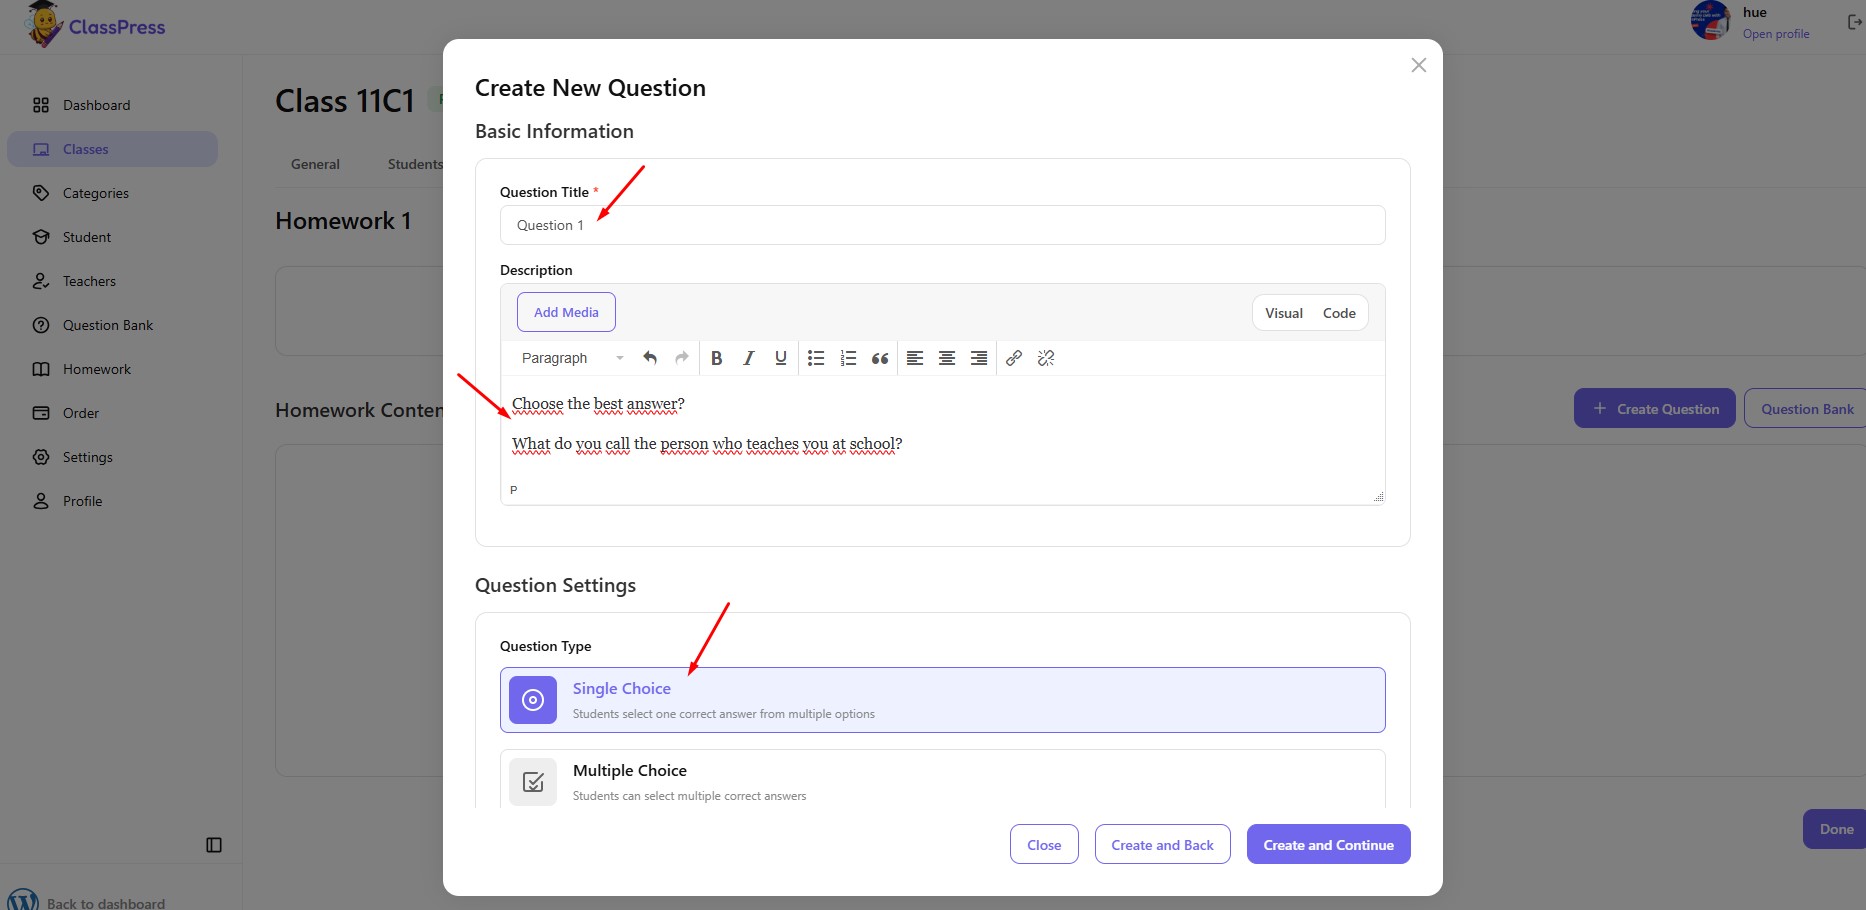
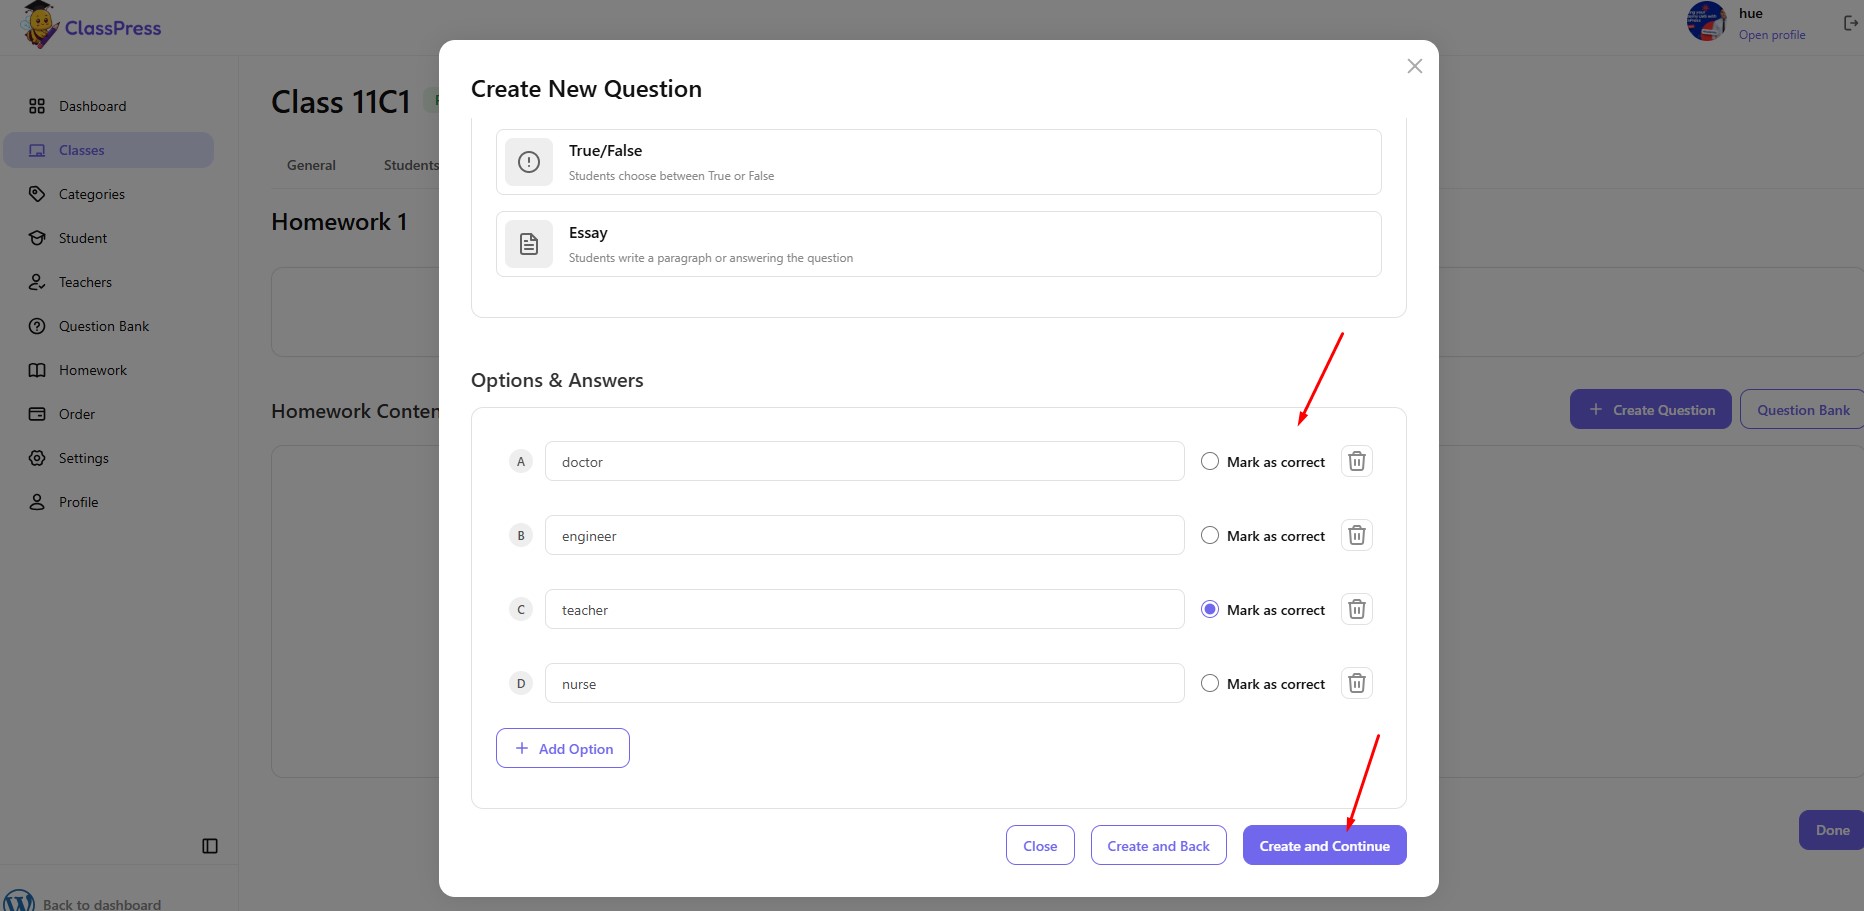
Question Type
Choose the type of question you want to create.
Depending on your configuration, available question types may include:
- Single Choice
- Multiple Choice
- True / False
- Essay
Each question type provides different answer options for students.
Note: If you change the Question Type after entering information in the Options & Answers section, the existing answer options will be cleared automatically. You will need to enter the options again for the newly selected question type.
Ex:
Saving the Question
After entering the required information, you can choose one of the following actions:
- Create and Continue – Save the current question and continue configuring it.
- Create and Back – Save the question and return to the homework content page.
- Close – Exit without creating the question.
Repeat this process until all questions have been added to the homework.
Completing the Homework
Once all questions have been created, click Done to finish the homework setup.
The homework will then appear in the Homework list and can be assigned to students according to its publish status and schedule.
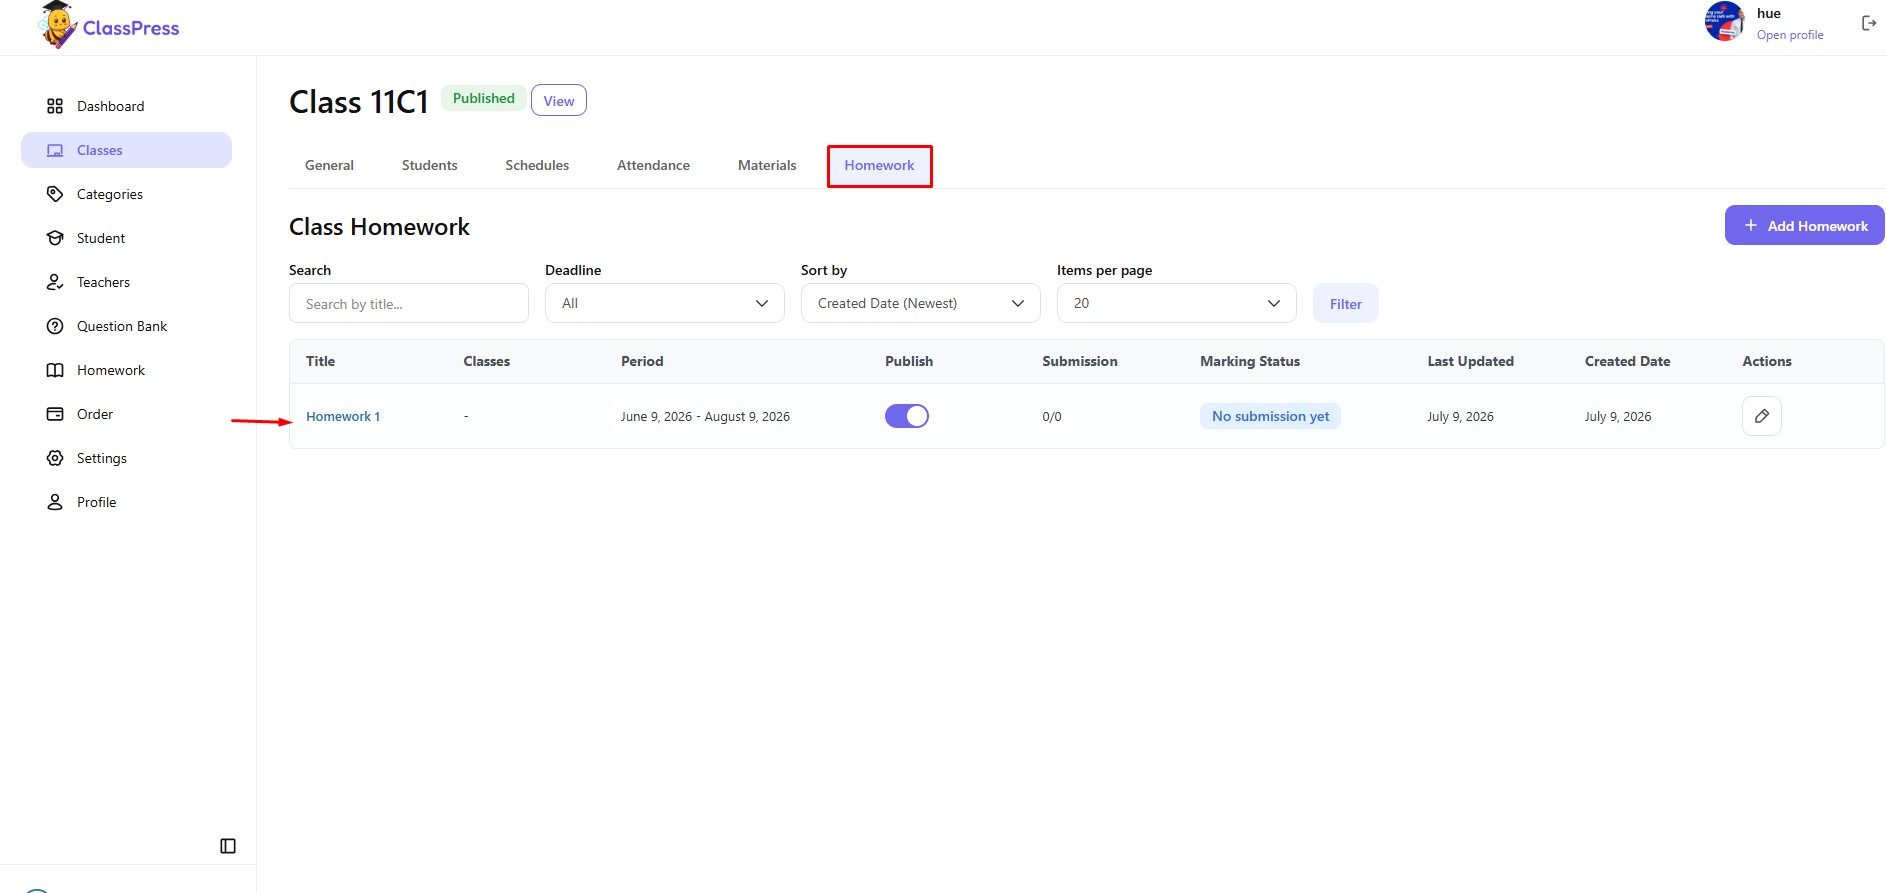
Publish Status
The Publish column includes a toggle that allows you to quickly change the homework’s publish status without opening the homework for editing.
- On – The homework is published and available to students according to its settings.
- Off – The homework is unpublished and will no longer be available to students.
Submission & Marking Status
The homework list also displays additional information to help you monitor student progress:
- Submission – Shows the number of student submissions compared to the total number of students in the class.
- Marking Status – Displays the current grading status of the homework, such as No submission yet, Pending marking, or Completed.
- Last Updated – Shows when the homework was last modified.
- Created Date – Shows when the homework was created.