1. Main Menu
Elearningwp theme is so flexible that you can choose where you want to use the menus. Theme supports custom WordPress menus, with multiple levels of drop down for the main menu. There are 2 areas of the theme where you can display a menu: the Main Menu and the Footer Menu. In this section you will learn how to create a new menu, and customize the Main Menu.
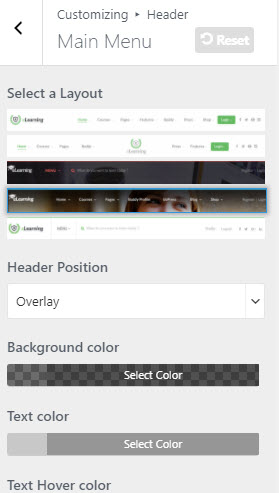
Theme comes with some general options for the Main Menu. Go to Dashboard >> Appearance >> Customize >> Header and expand Main Menu section.
Main Menu Options:
Elearning theme offers several theme options to customize the menu. They are located in Appearance > Customize > Header >> Main Menu tab. Users can customize the fonts, change color and height of menu text.
How To Setup A New Menu:
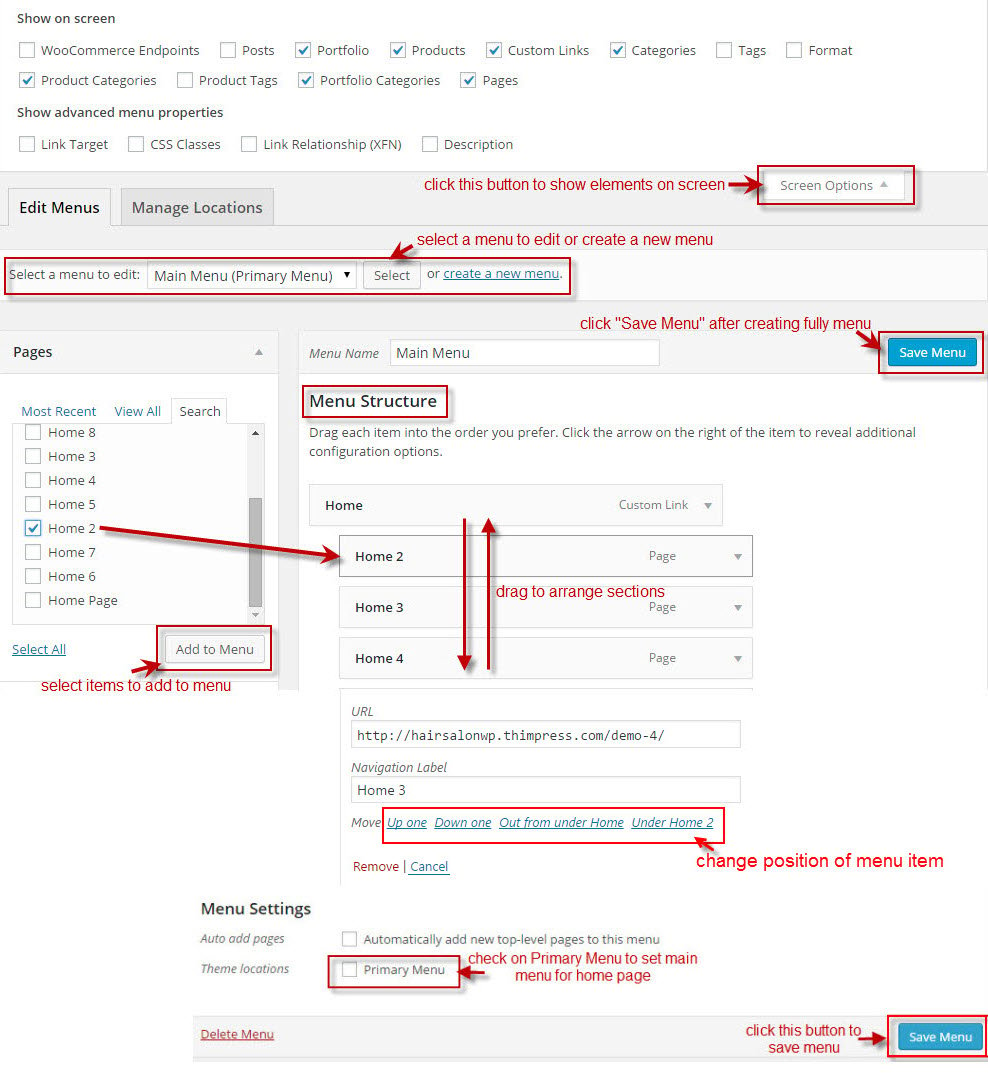
Step 1 – Navigate to Appearance >> Menus section of your admin sidebar.
Step 2 – Click the Create A New Menu link to make a new menu. Enter the name then click the Create Menu button.
Step 3 – To add a menu item, select one of your created pages on the left hand side and click the Add to Menu button. You can also add all kinds of different posts from the left side.
Step 4 – To add a custom menu item, enter a custom name and link into the Links box.
Step 5 – Manage your menus by using the drag and drop functionality. To create a dropdown menu, simply drag a menu item below and slightly to the right of another menu item, and it will lock into place and create a dropdown section.
Step 6 – After setting up your menu, scroll down to the bottom of the page to assign “Primary Menu” in the Theme Locations box if you want this is “Main Menu”.
Step 7 – Once its all done, make sure you click the Save Menu button.
Here is a screenshot that shows you the various areas and descriptions of the menu section described above.
2. Sub Menu
Sub Menu Options:
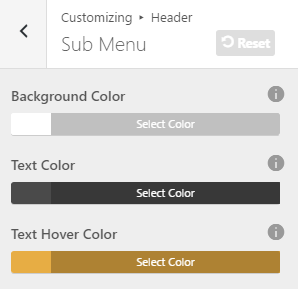
Mag WP theme offers several theme options to customize the sub menu. They are located in Appearance>> Customize >> Header >> Sub Menu tab. Users can change color of background, text, text hover for sub menu.
How To Setup Sub Menu:
After following steps to Setup A New Menu, you need to learn how to setup sub menu. There are 2 ways to create sub menu:
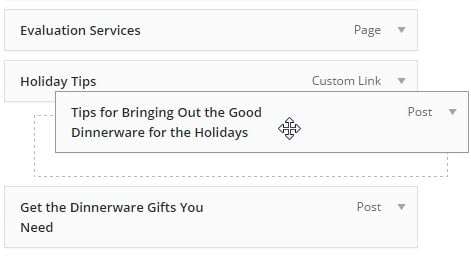
You can drag the sub-menu item to the right until you see that the dashed outline box underneath is indented, then stop dragging:
Or simply use buttons under each menu item to move:
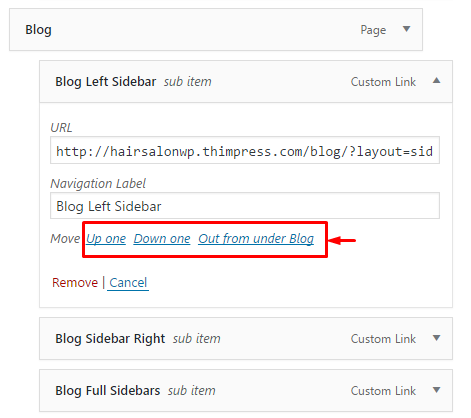
Once you’ve moved your sub-menu items, remember to click Save Menu.
3. Sticky Menu
Elearningwp theme supports to has a sticky header option. For improved usability, as the user scrolls down a page, the sticky header activates ensuring the website’s main menu is always accessible. To manage the sticky header, Elearningwp theme includes several options for styling, as well as visibility options to enable or disable it on various screen sizes.
Sticky Menu Options:
Below is a list of all the available options for the Sticky Menu. These options are located in Dashboard >> Appearance >> Customize >> Header > Sticky Menu.
1. Show Sticky On Scroll: Enable/disable the sticky menu.
2. Select Style: Select style menu when scroll. If select “The same with main menu” then users do not need to configure for main menu when sticky anymore. If select “Custom” then users need to configure color for text, background, text hover for main menu.
