You can install Landscaping theme via 2 ways: Via WordPress or via FTP
1. Via WordPress
Follow these steps below to install the Landscaping theme via WordPress:
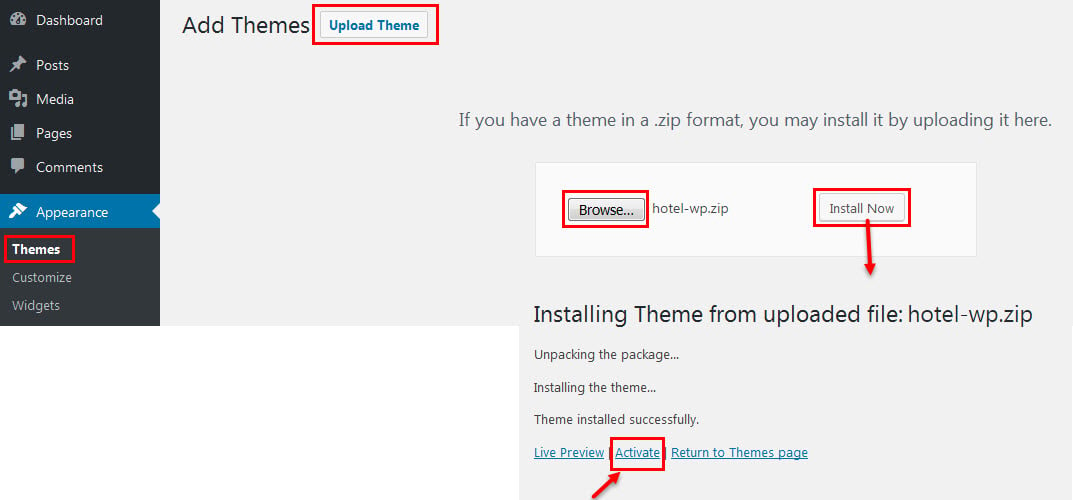
Step 1. Visit Dashboard > Appearance > Themes > Add New.
Step 2. Click Upload Theme.
Step 3. Browse the landcsaping.zip file (not the theme package zip file) on your computer and click Install Now.
Step 4. Activate Landscaping theme.
Step 5. Enable Thim Core to activate the core of Landscaping and start importing the demo data process

*NOTE: One possible problem when importing Demo is that the theme is missing the style.css style sheet.
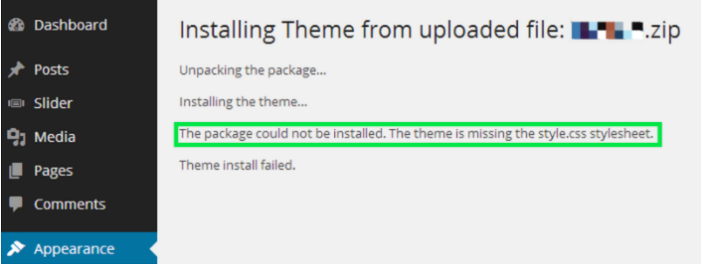
Solution: You can refer to the error correction guide here
2. Via Ftp
Follow these steps below to install Eduma theme via FTP:
Step 1. Login your FTP account via FTP software to access your host web server.
Step 2. Extract landscaping.zip file.
Step 3. Upload the extracted folder landscaping to the wp-content/themes folder.
Step 4. Activate landscaping theme in Dashboard > Appearance > Themes.
Step 5. Enable Thim Core to activate the core of Landscaping and start importing the demo data process.
3. Getting Started
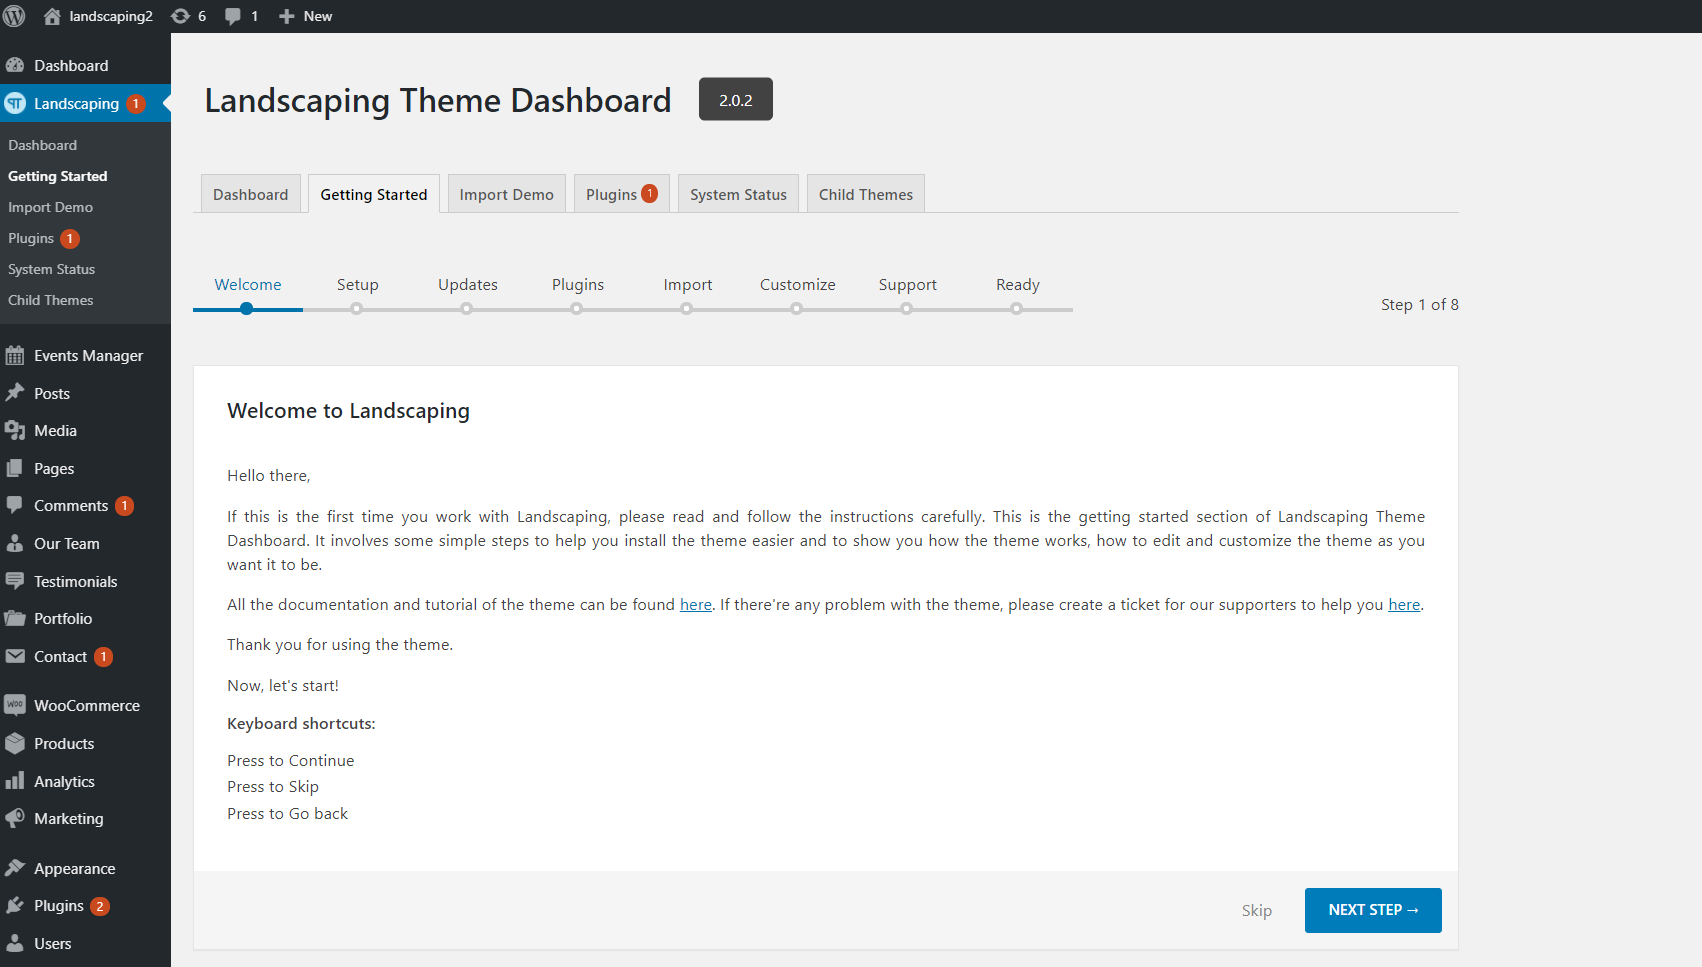
Once you successfully install and activate the Landscaping theme, Landscaping Dashboard will be added to your WordPress menu.
Now you can get started to set up your site with Landscaping. You will walk through the following steps:
- Name your website and site description
- Install and activate required and recommended plugins
- Import Demo Content (Detailed instruction here)
- Sign in your Envato account to get updates
- Customize your site (Detailed instruction here)
- Get support resources
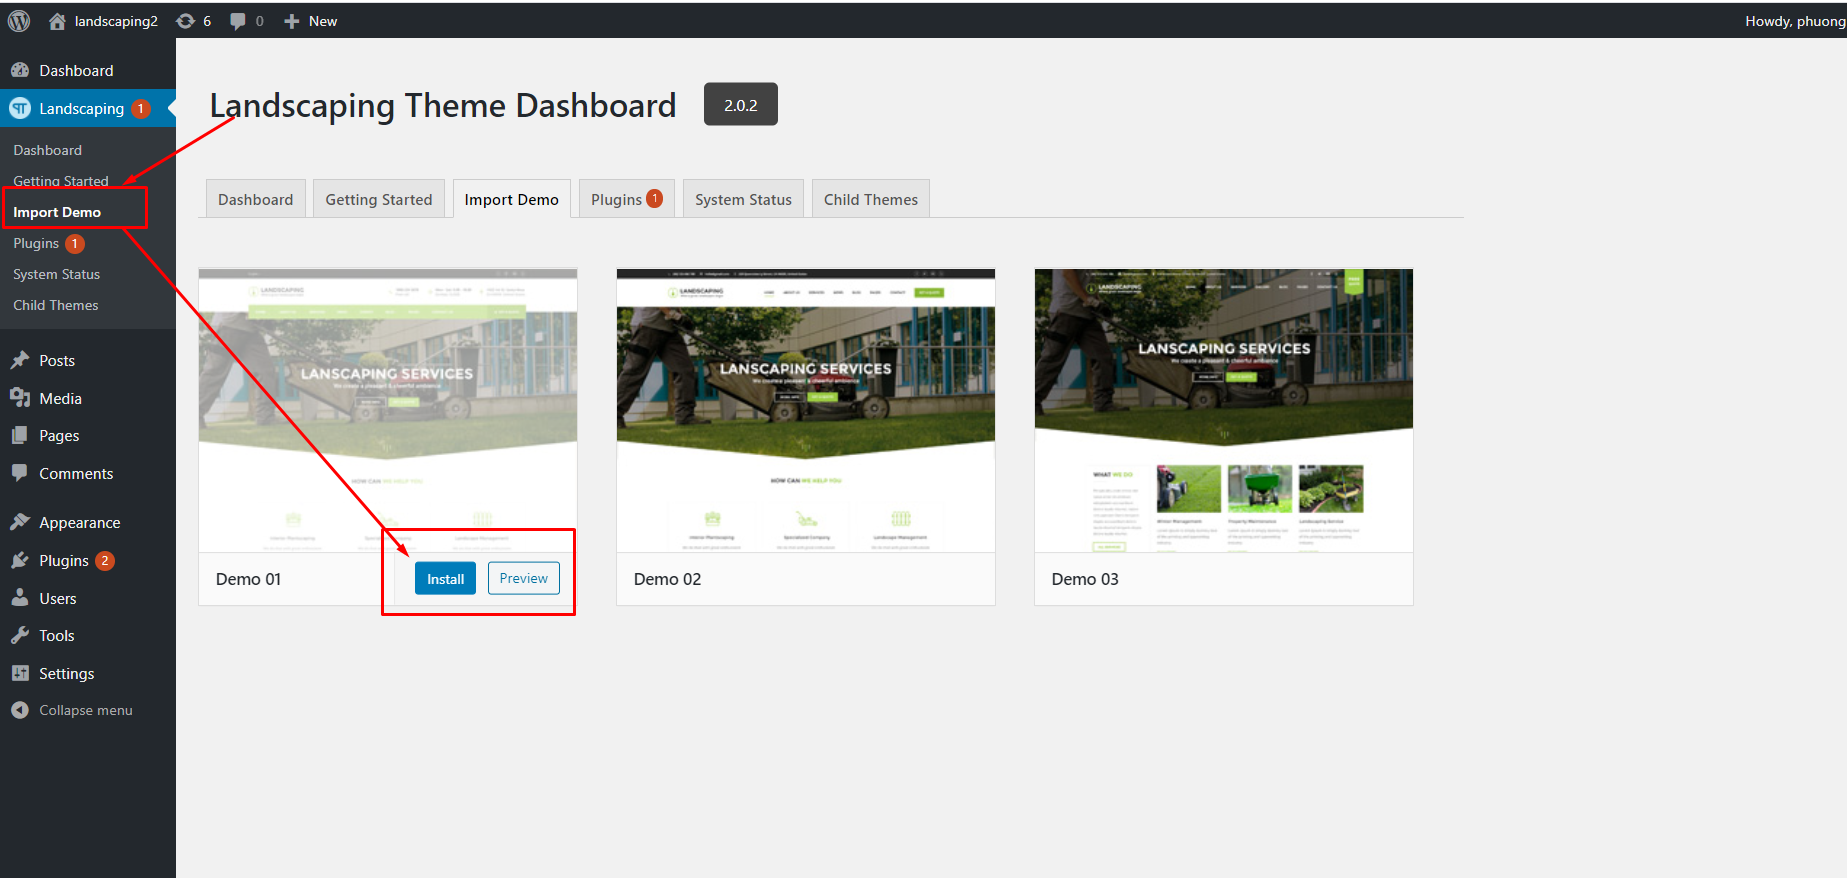
4. Import Demo
Thim Core Demo Importer
Thim Core is a required plugin for the Landscaping theme. This plugin is a demo importer which imports all posts/pages, sample sliders, widgets, customization, and more.
Follow these steps below to import demo via Thim Core:
Step 1 – Visit Dashboard > Landscaping > Import Demo.
Step 2 – Hover on the demo you want and click Install
Step 3 – Select what type of content that you want to import and click Import.
The importing process may take up to 5 minutes.
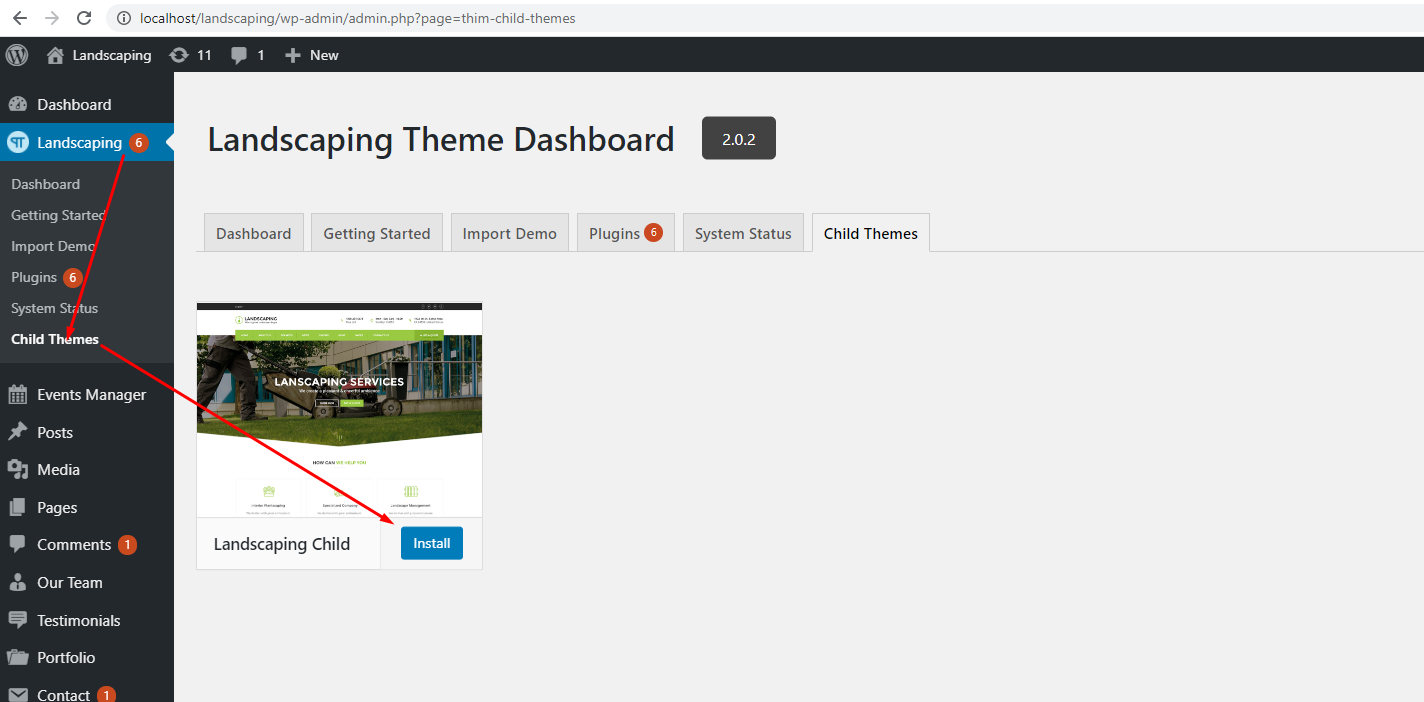
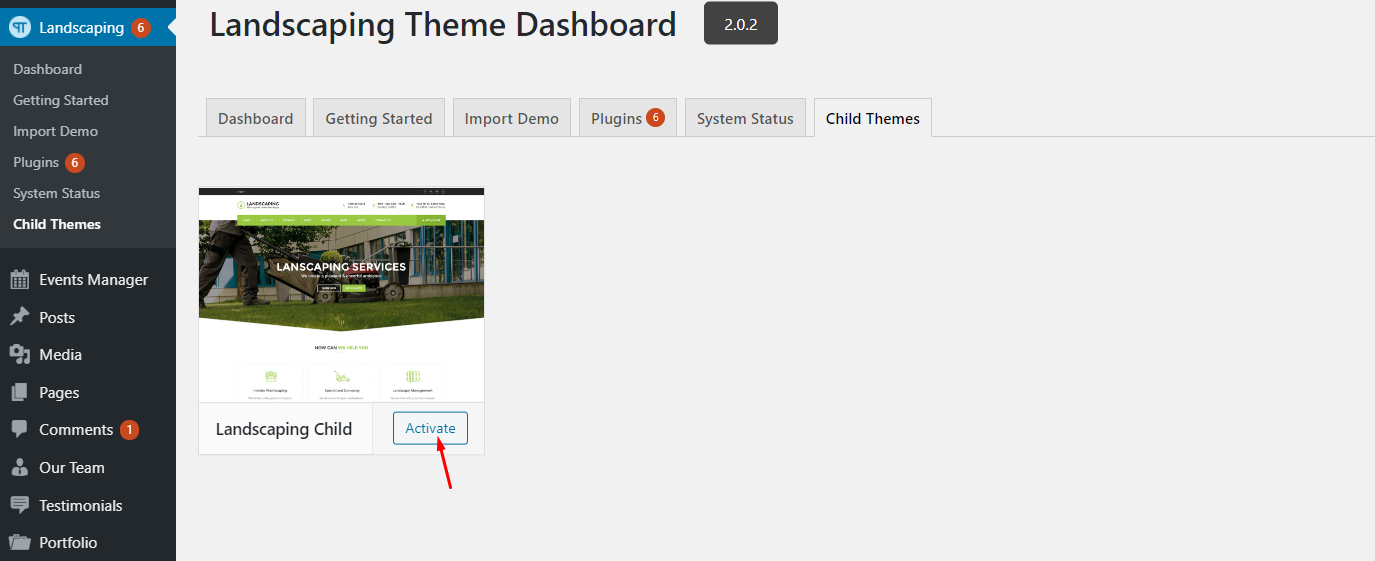
5. Child Them
Follow the steps below to enter Kids Topics:
Step 1 – Go to Dashboard> Landscaping> Child Themes
Step 2 – Click Install / Activity
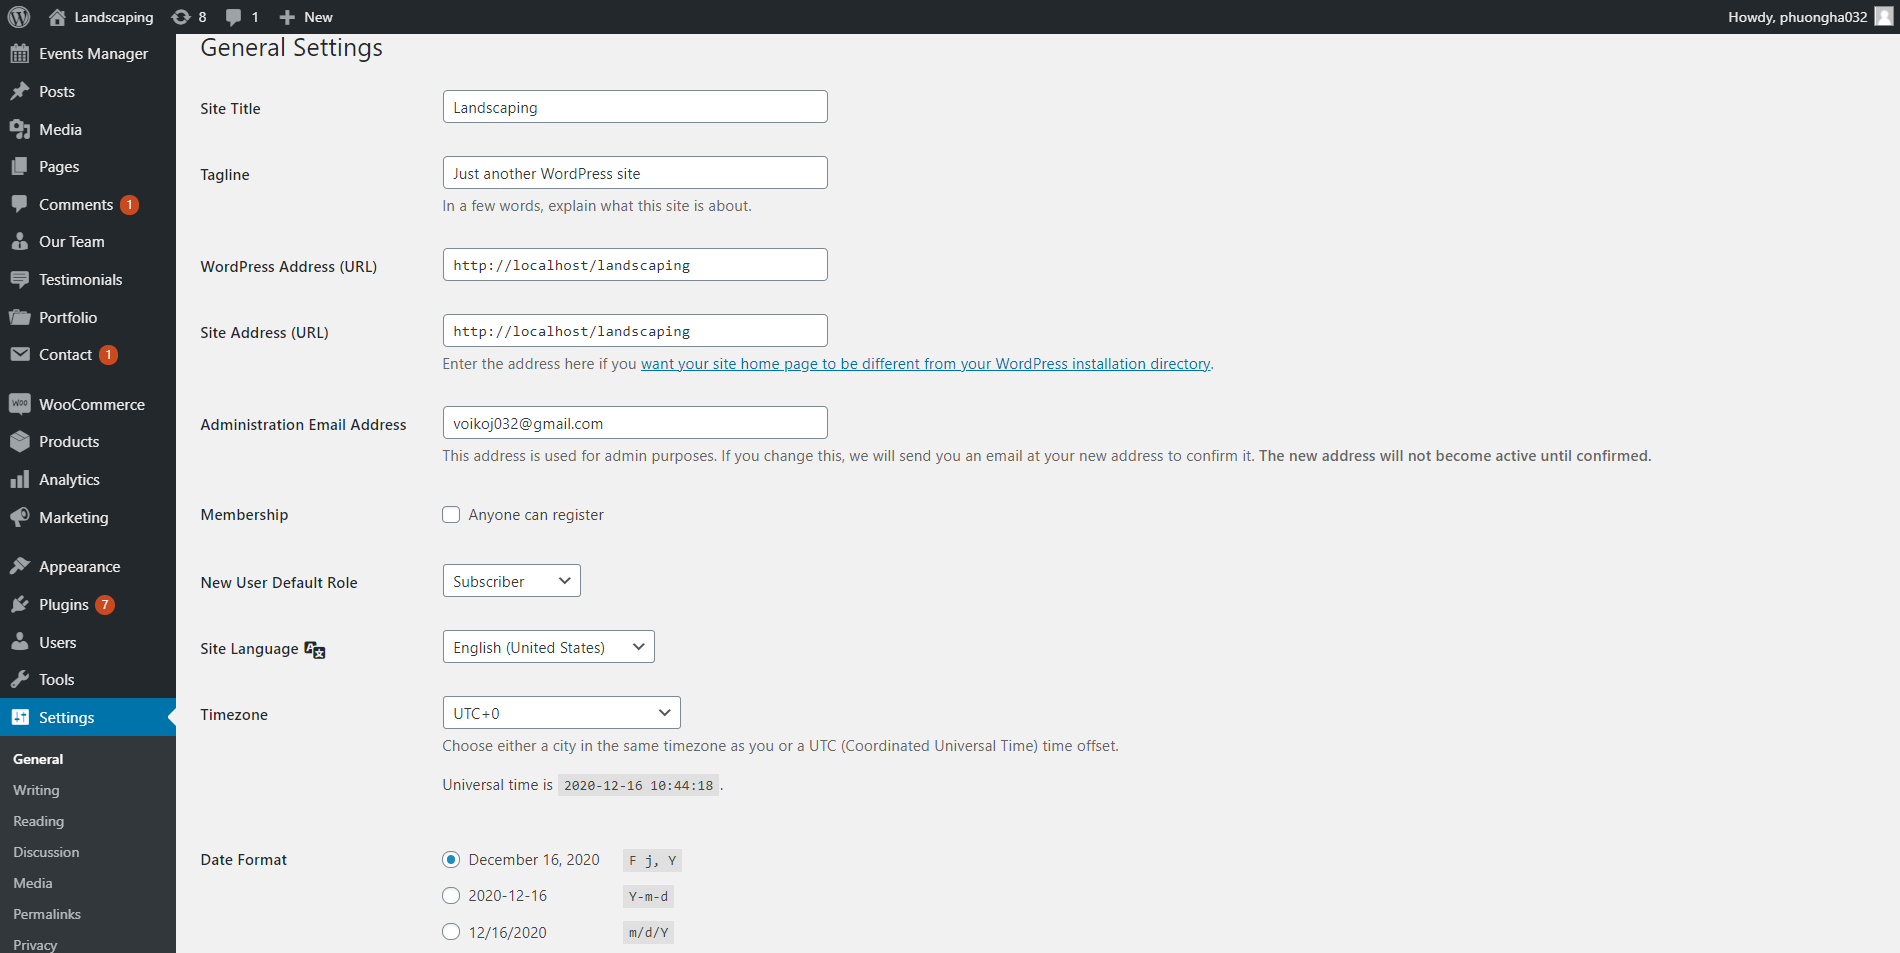
6. Site Identity
To change Site Identity parts like Site Title, Tagline, you need to go to your Dashboard => Settings => General, then edit it.
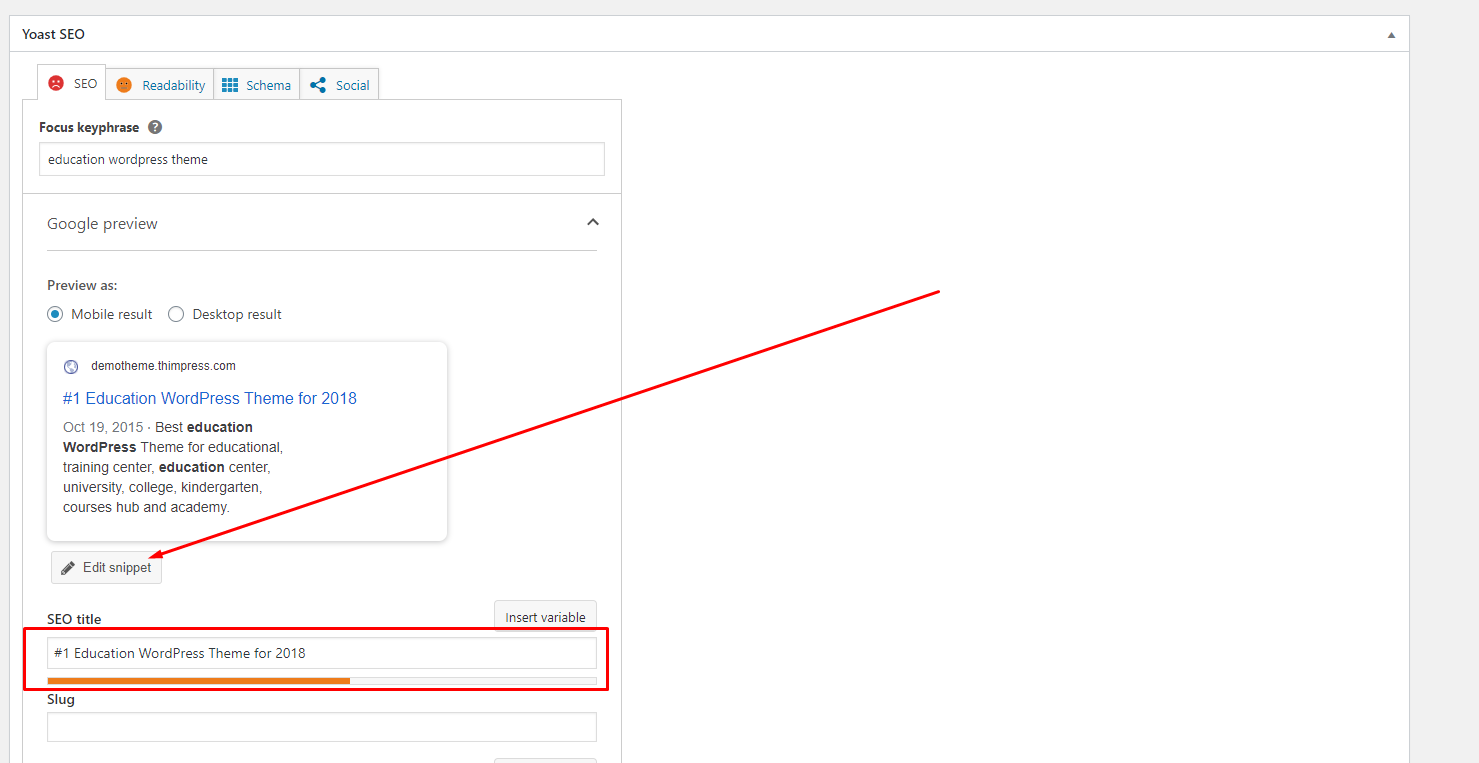
If you use plugin Yoast SEO, you can click “Edit Page” on the admin bar on the home page, then scroll down to the Yoast SEO section => Edit snippet => SEO title, then edit it