In this section, we will show you how to create courses.
1. Create a course
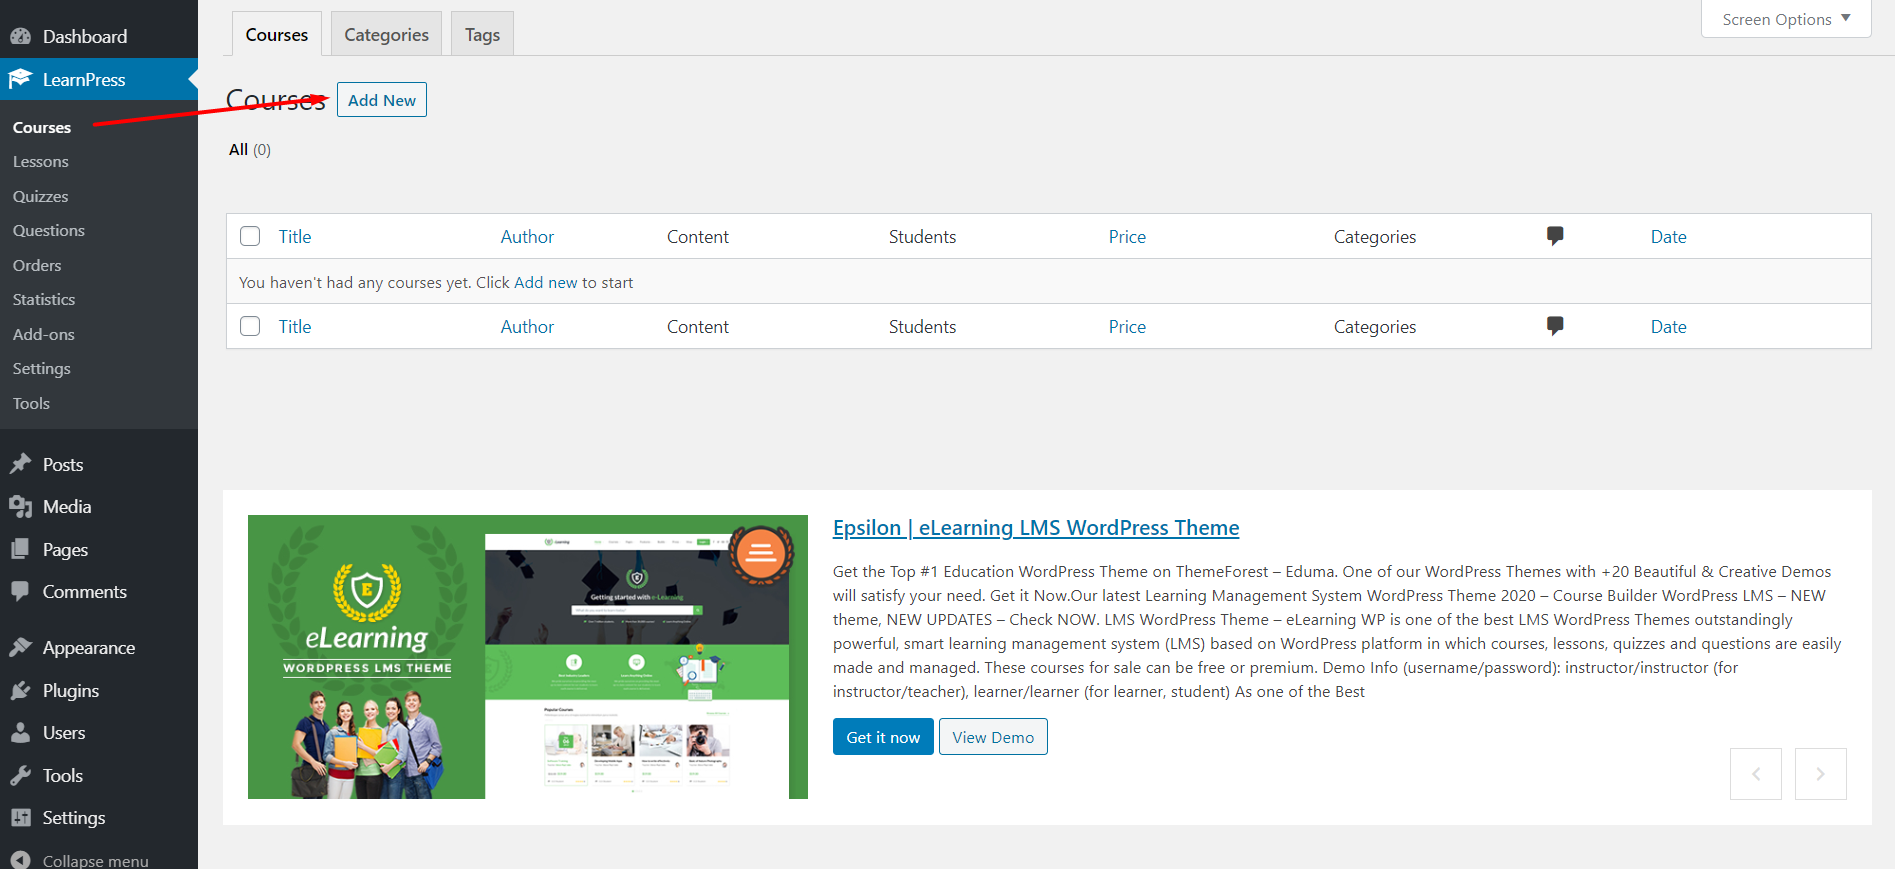
To create a course, you can go to your Dashboard => LearnPress => Course => Add New
There are three sections in a course: Course overview, course curriculum, and course settings.
2. Course settings
There are many options in the “Course Settings” section for you to configure your course.
2.1 General
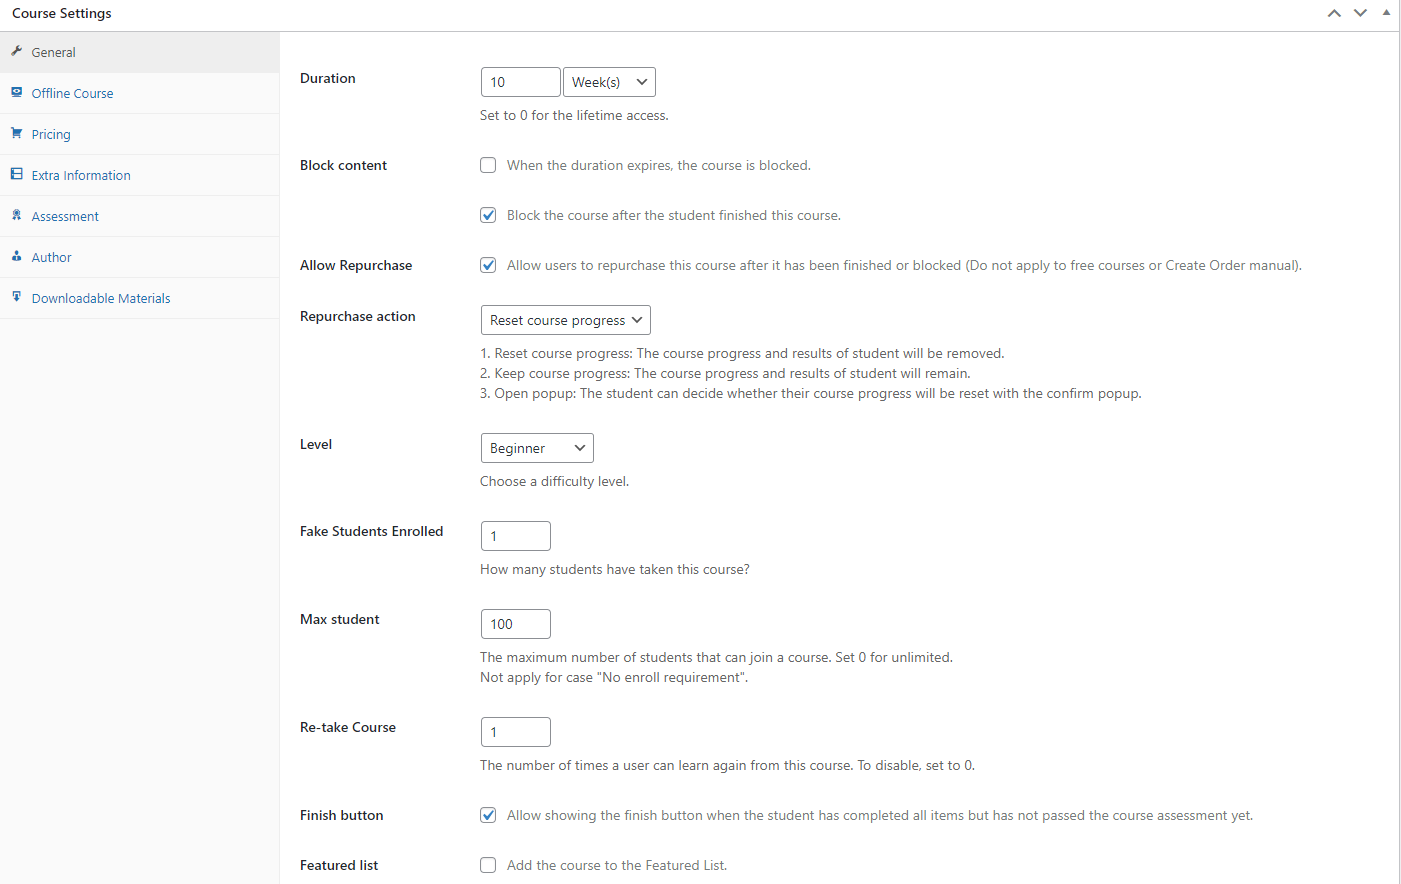
- Duration: The duration of the course. It will be counted from when students enroll in the course.
- Block content: (Enable / Disable) when the duration expires, the course is blocked or Block the course after the student finished this course.
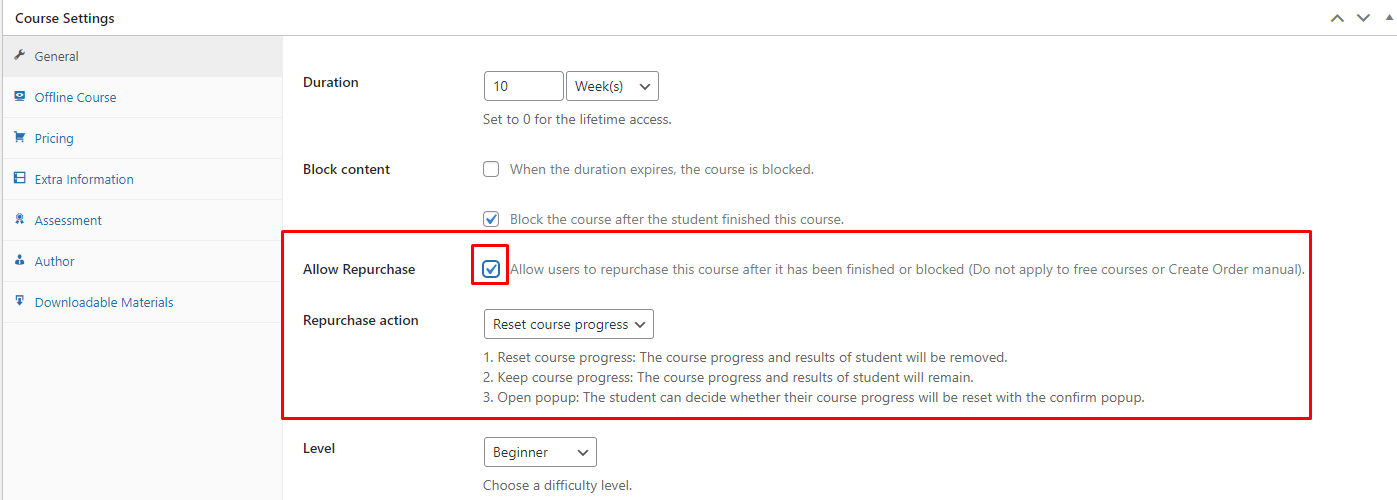
- Allow Repurchase: (Enable /Disable) Allow users to repurchase this course after it has been finished or blocked (Do not apply to free courses or Create Order manual). when enabling this option then have repurchase action
1. Reset course progress: The course progress and results of student will be removed.
2. Keep course progress: The course progress and results of student will remain.
3. Open popup: The student can decide whether their course progress will be reset with the confirm popup.
- Level: Choose a difficulty level for this course
- Fake Students Enrolled: This is like a marketing strategy, you can set a fake number of students who have joined this course
- Max Student: the maximum number of students that can join a course. Set 0 for unlimited
- Re-take course: The number of times a user can learn again from this course. To disable, set to 0.
- Finish button: (Enable/ Disable) Allow showing the finish button when the student has completed all items but has not passed the course assessment yet.
- Featured list: (Enable/ Disable) Add the course to the featured list
- Featured review: A good review to promote the course.
- External Links: Redirect to the link you put. Use this when you want to link the course to the course on another website.
2.2 Offline Course
You can use the offline course function: When you enable the offline course feature, the system will disable some online course functions, such as curriculum, end button, retake course, content blocking, repurchase.
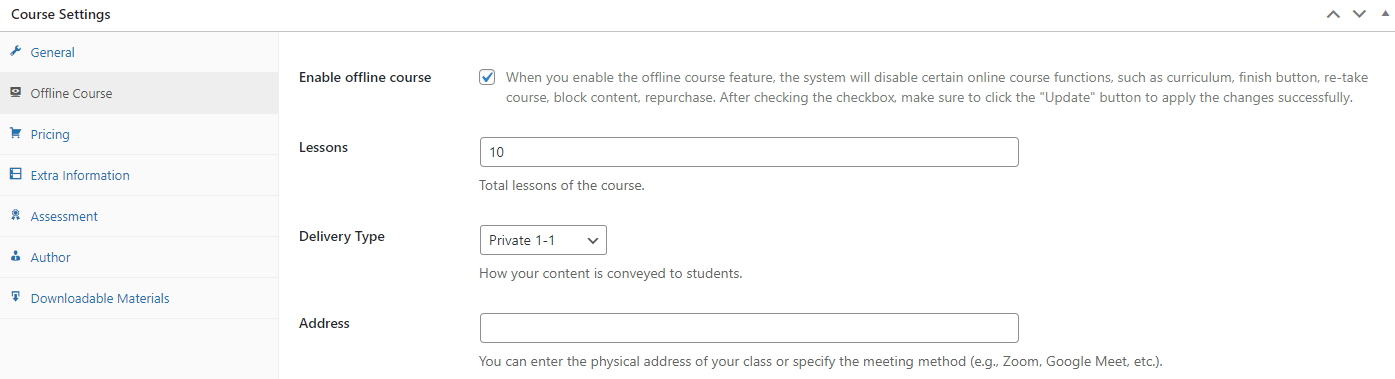
When you enable offline course mode, the course will appear like this
2.3 Pricing
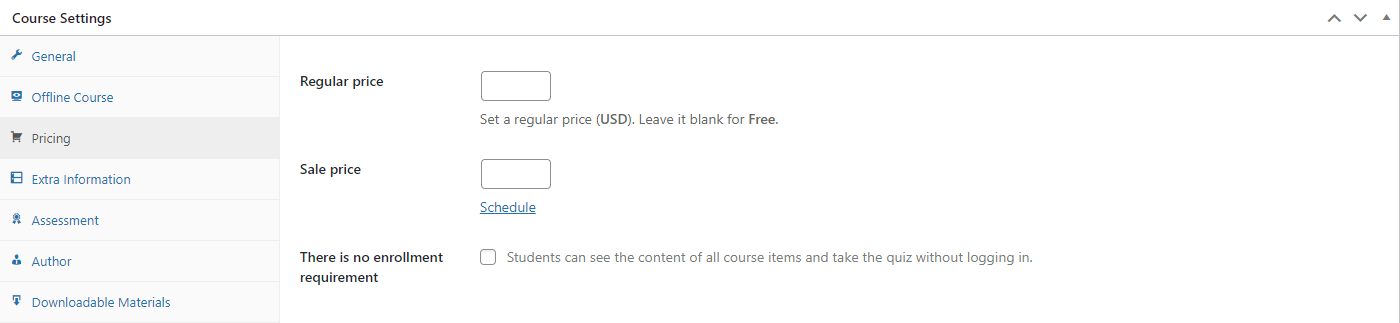
Regular price: Set a regular price default (USD). Leave it blank for Free.
Sale price: Set a sale price. when clicking on “Schedule” then display the sale start date and sale end date
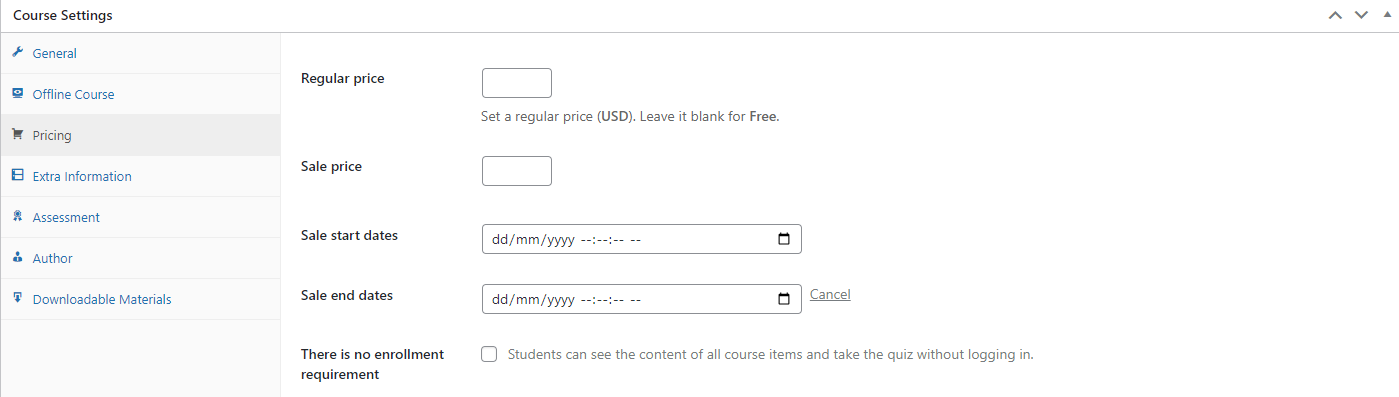
Note: There is no enrollment requirement: (Enable/ Disable) Students can see the content of all course items and take the quiz without logging in.
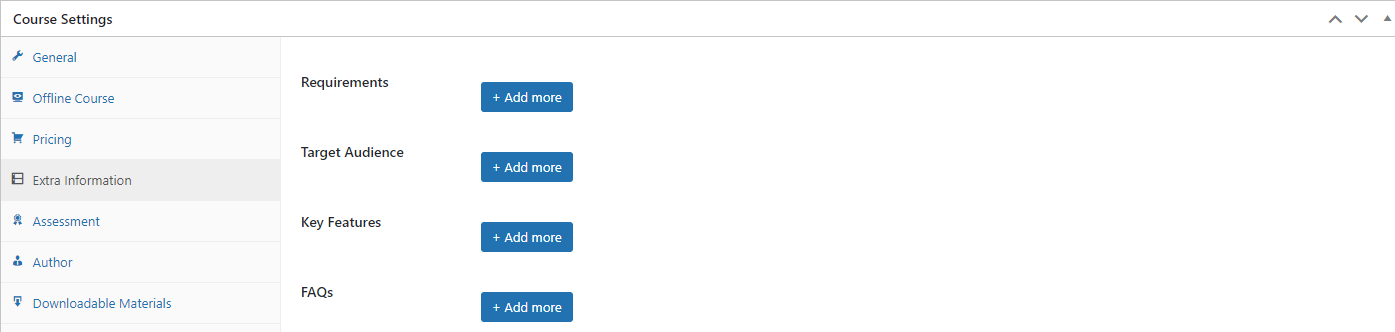
2.4 Extra information
2.5 Assessment
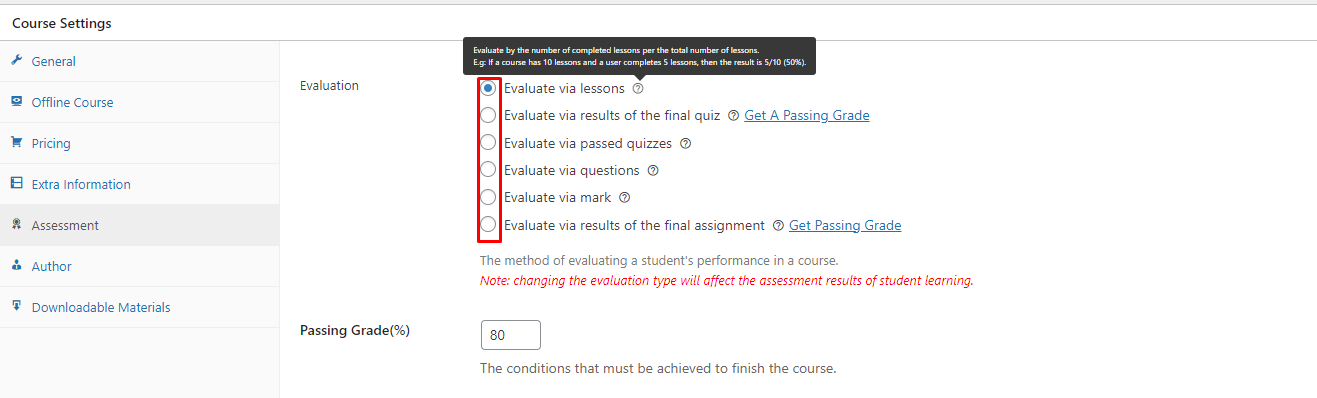
You can choose the Passing Condition for a course with the Assessment tab. We have 6 basic options for a course. You can hover the mouse over the question mark to see their descriptions and examples.
2.6 Author
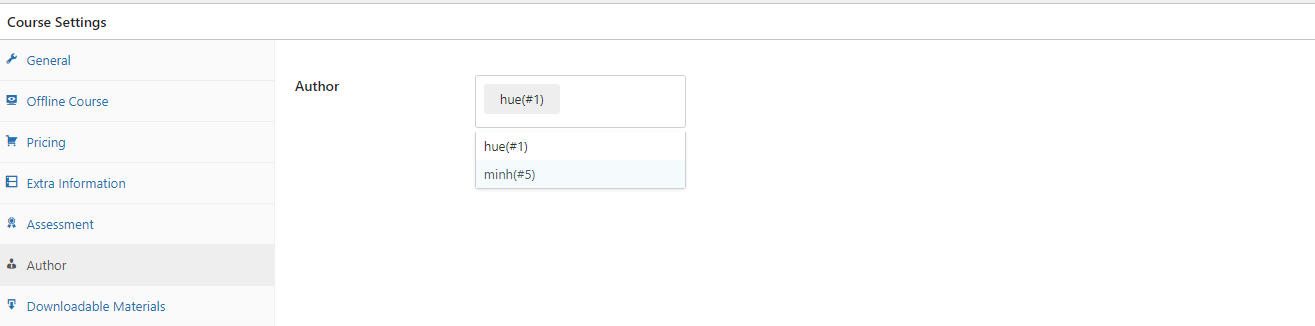
As an admin, you can change the course’s author, you can assign the course to another instructor. LearnPress only supports to set one author for a course, if you want to assign more than one instructor to a course, you can use our plugin “Co-instructor add-on for LearnPress”, you can find it here: https://thimpress.com/product/co-instructors-add-on-for-learnpress/
2.7 Dowloadable Materials
When you click on the “Add Course Materials” button. You’ll see a table where you can upload your files.

You need to enter a File Title, choose a Method (Upload or External) for uploading your file, and Choose file or enter a file URL.
After you have added your files, you can either click on the Save field to save your changes or click on Remove to delete the file from the table.
The course materials you upload will be visible to everyone who visits your course page. They can download the files by clicking on the Download button next to each file.

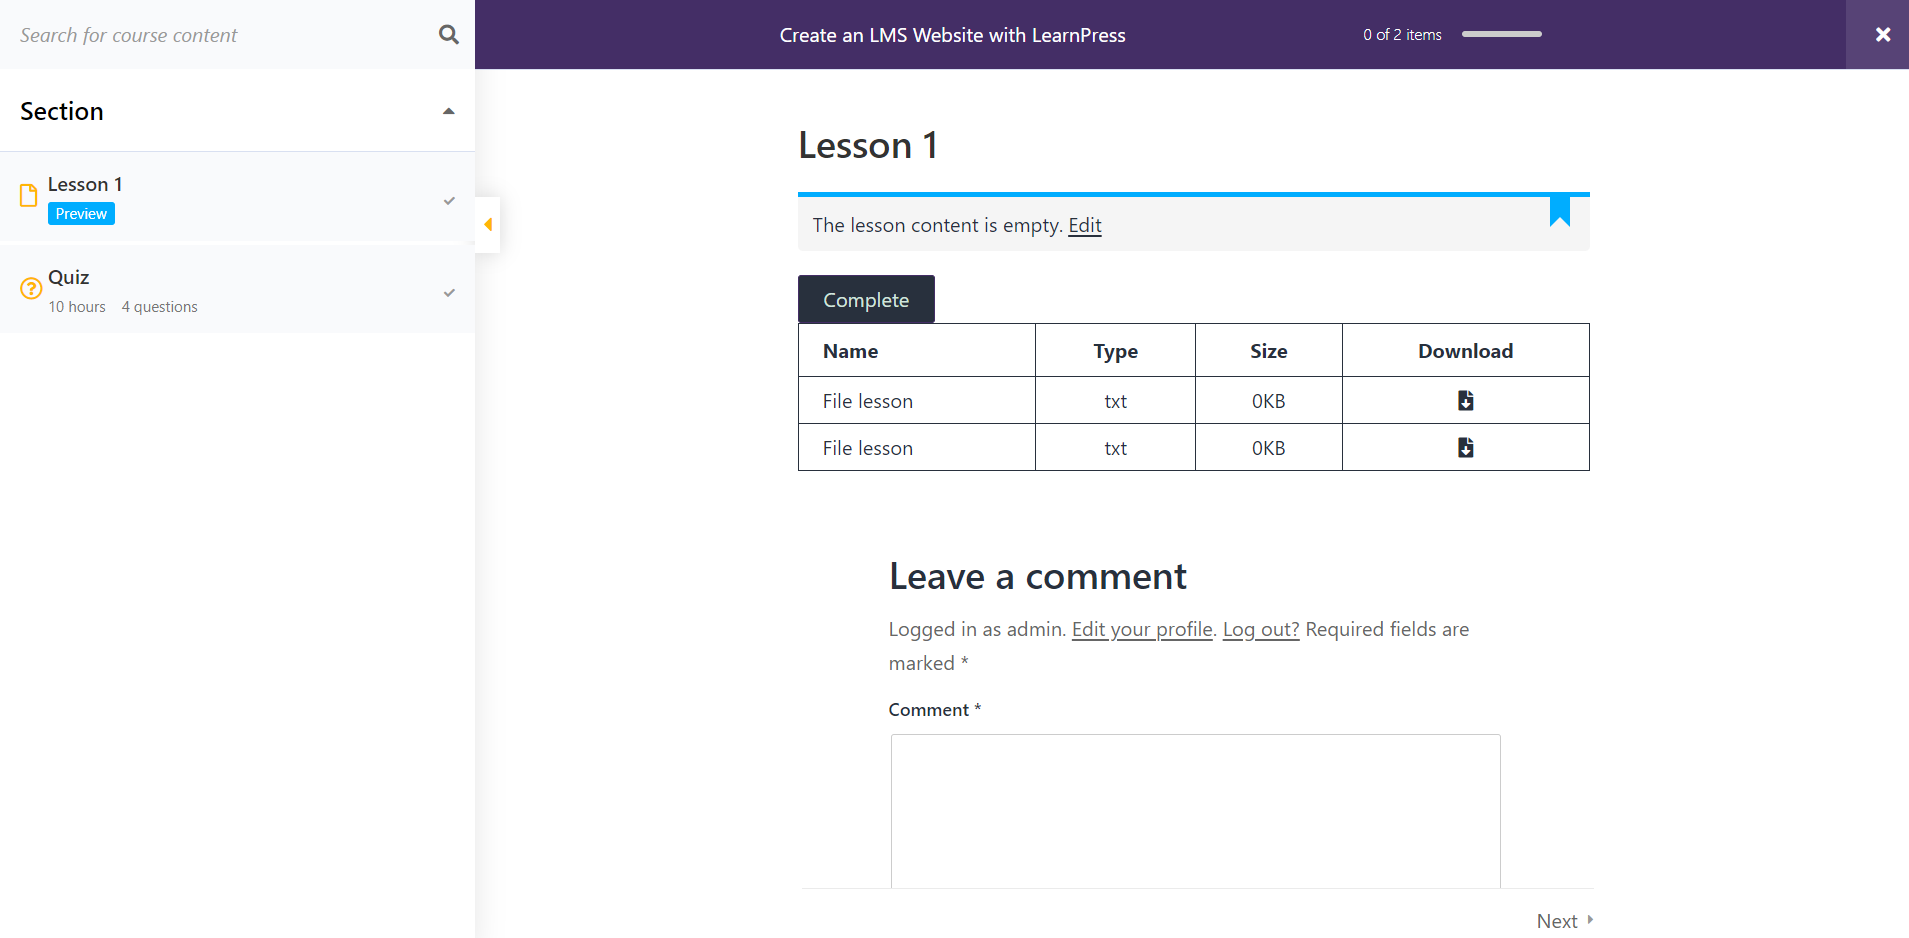
Note: You need to enroll in the course first before you can access the materials.
To set up the material, please go to LearnPress -> Settings -> Courses -> Materials Settings.

You can set the file type, upload files, file size limit, and file per page for the material.
- File type: You can select the type of file you want to upload, such as Docx, Txt, Odt, or more.
- Upload files: Enter the maximum number of files you want the user to upload. Set to 0 to disable.
- File size limit: Set maximum attachment size for upload (MB).
- File per page: The number of displayed files per page (Enter -1 to display all files, set to 0 to disable).
Click the ‘Save Settings’ button to save the settings.
3. Course overview
 In the Course Overview section, you can set name and introduction to the course, what you wrote will be displayed in the Overview tab in the single course page.
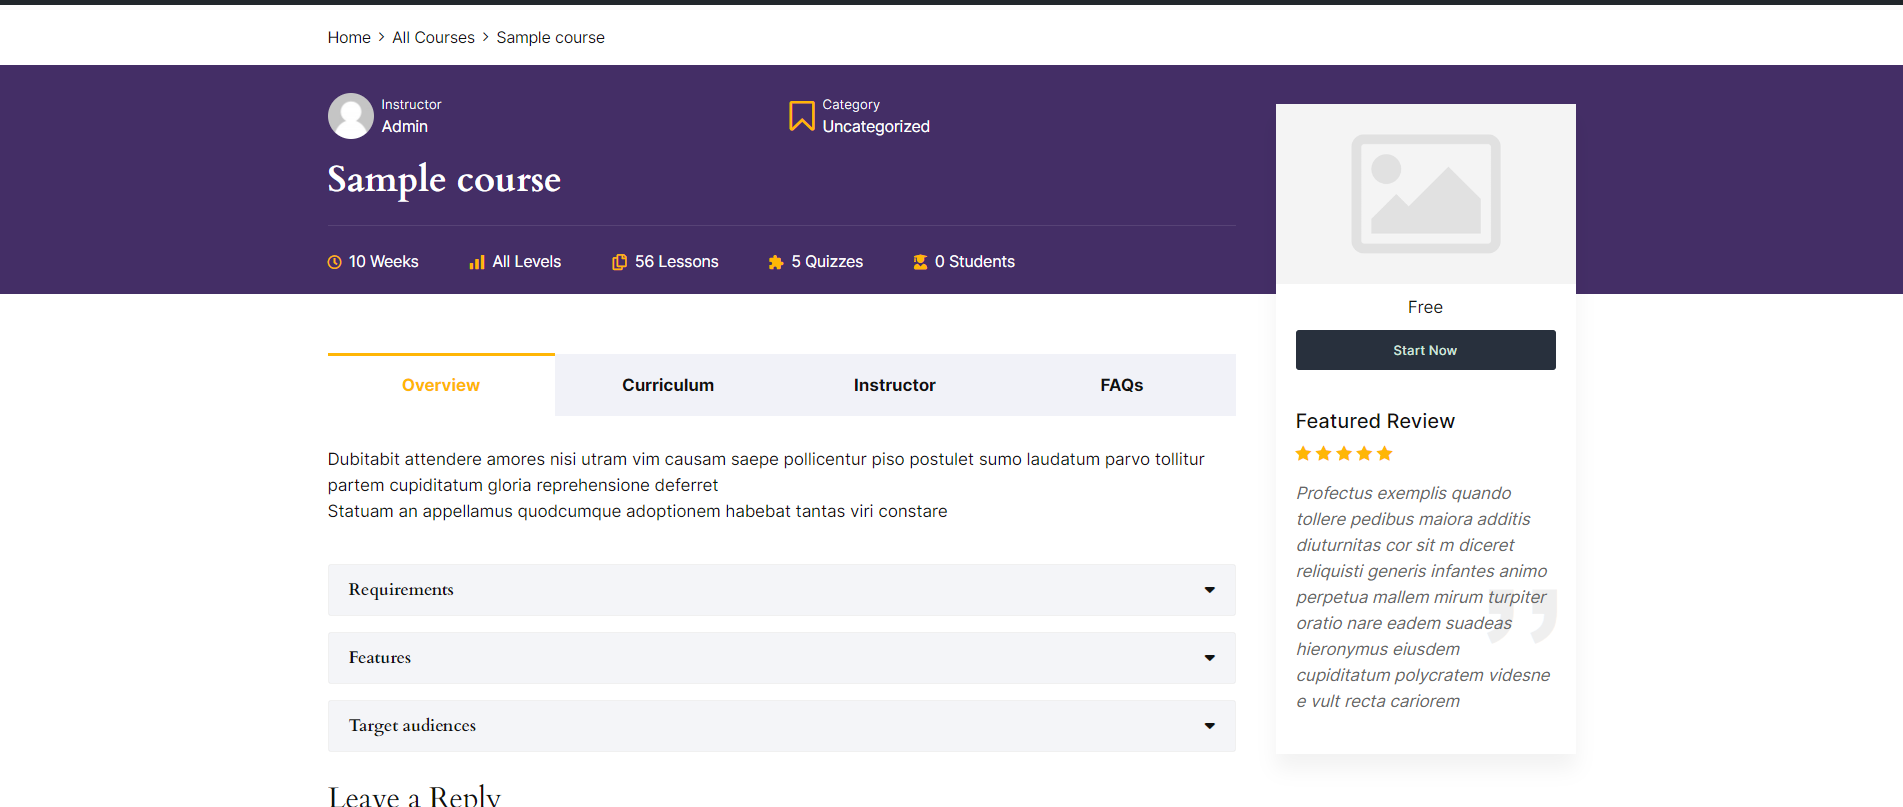
You also can set the publish date of the course, student can only see and enroll the course when it is published.
You can choose to assign a course to one or many categories in the “Course Categories” area. You should choose the “Featured image” for all courses, the feature images will be displayed on the Courses page. If you don’t set the “Featured image” for a course, our system will display the default image.
And you should preview your course before you publish it.
4. Course curriculum
All the sections, lessons, quizzes of the course will be displayed here.
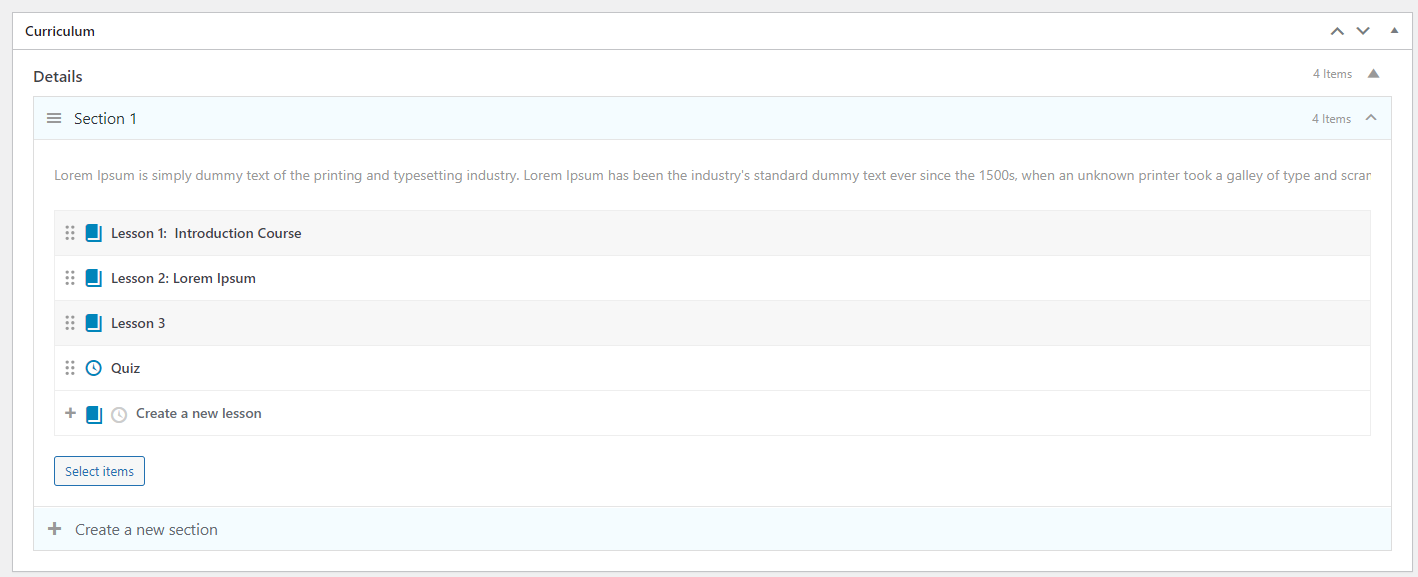
You can click to the “Select items” button to select the items (lessons, quizzes) you want to add to the course. Please note that you only can add the course that has not been assigned to any course. You are able to create lessons, quizzes in this section, the book icon is a lesson, the clock icon is a quiz, you can click “Edit” to edit the item on the new tab.
5. Free course

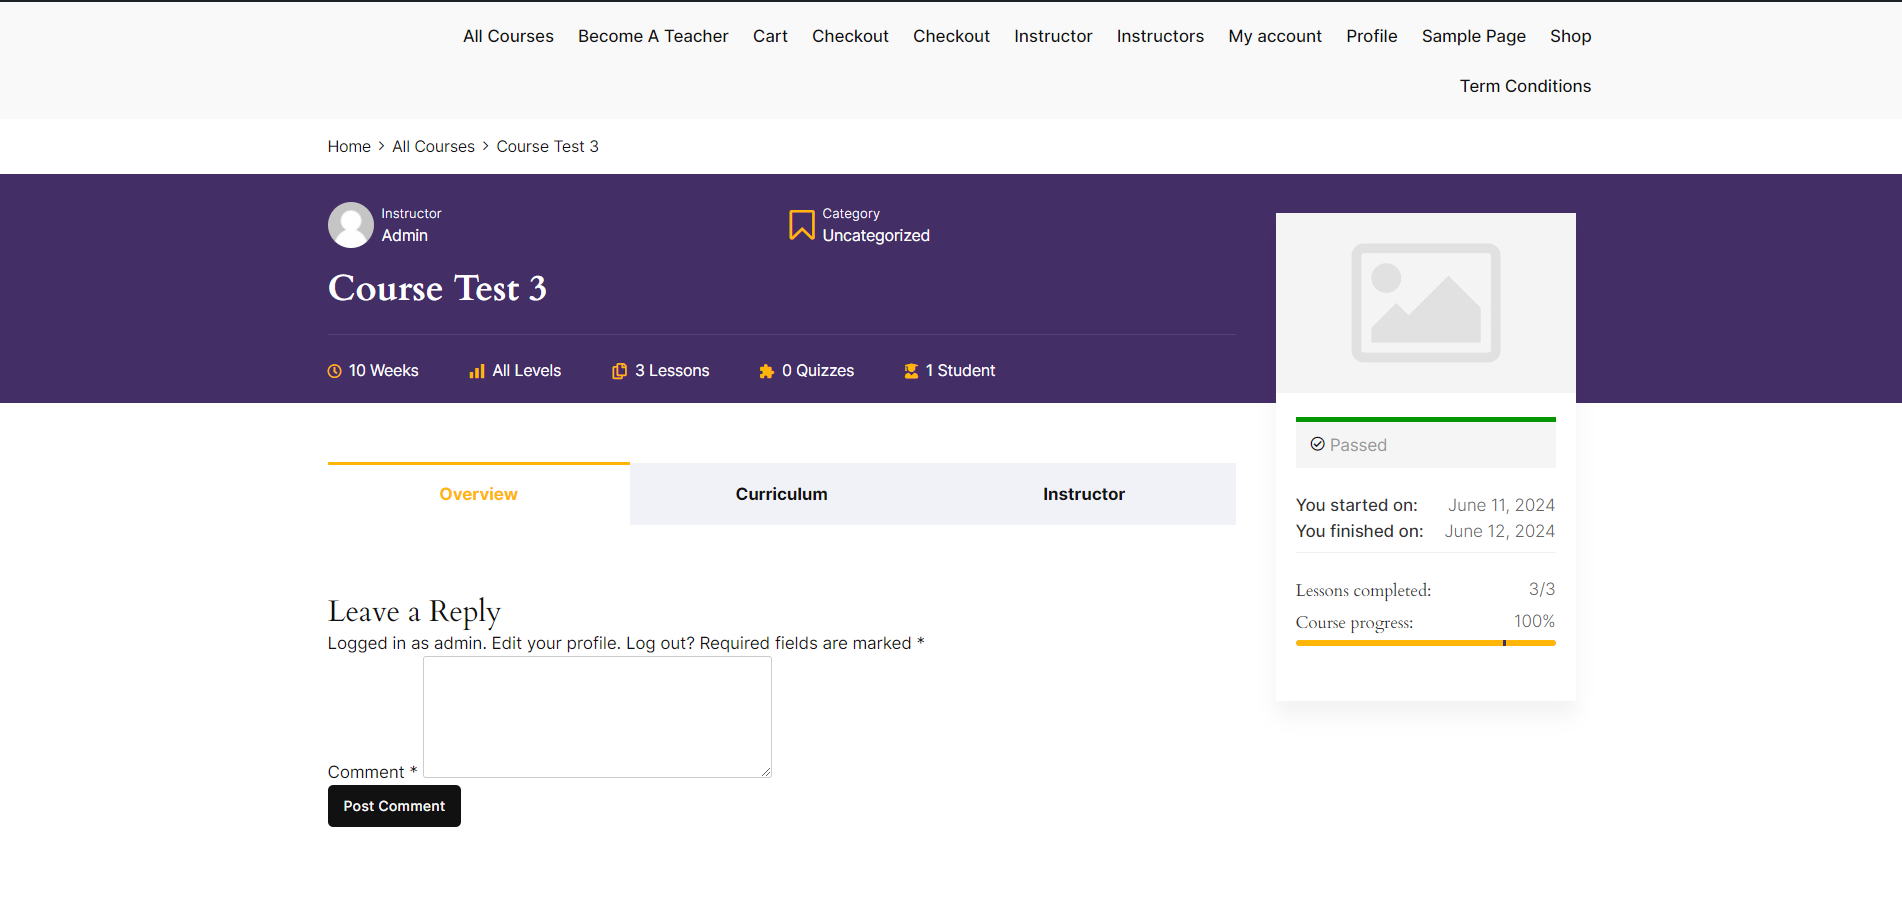
The repurchase function does not work with free courses. After the user finishes the course, the “Buy now” button will not be displayed. If Instructor set “Retake” for that course, the “Retake” button will be displayed.
6. Paid Course
6.1. Buy course via Lp-checkout
a) Enable the Repurchase option in the Course setting.
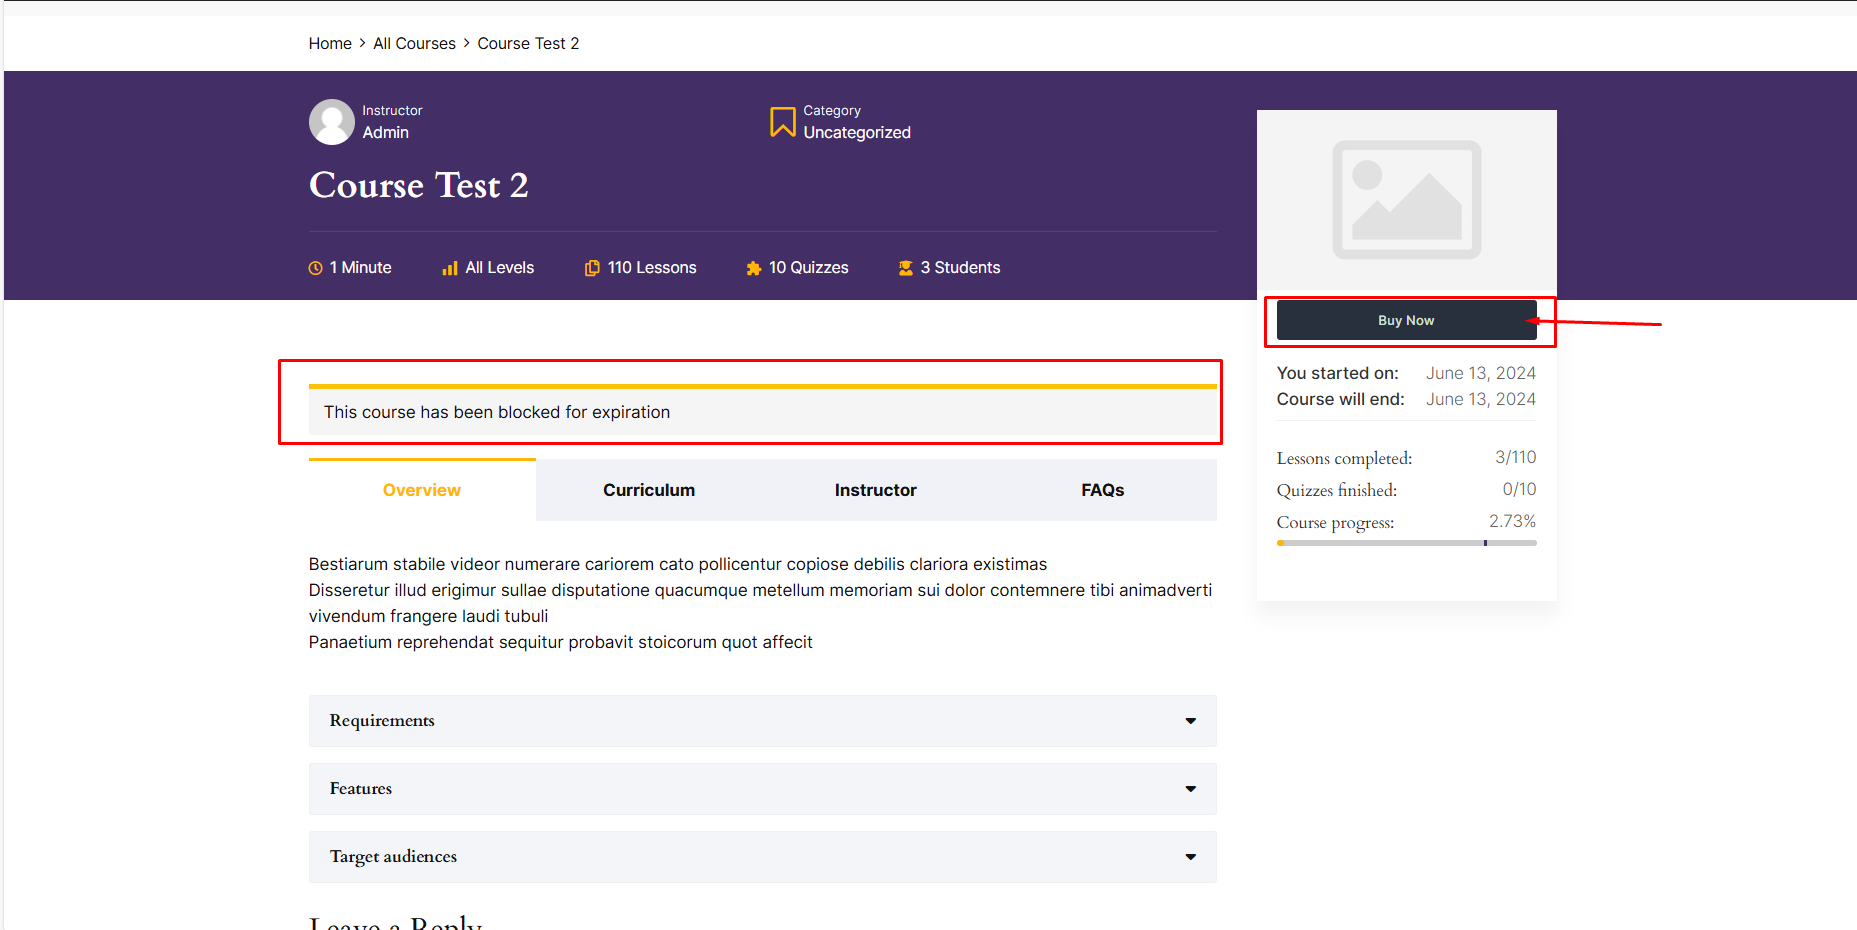
– After students finish the course, the “Buy Now” button will display.
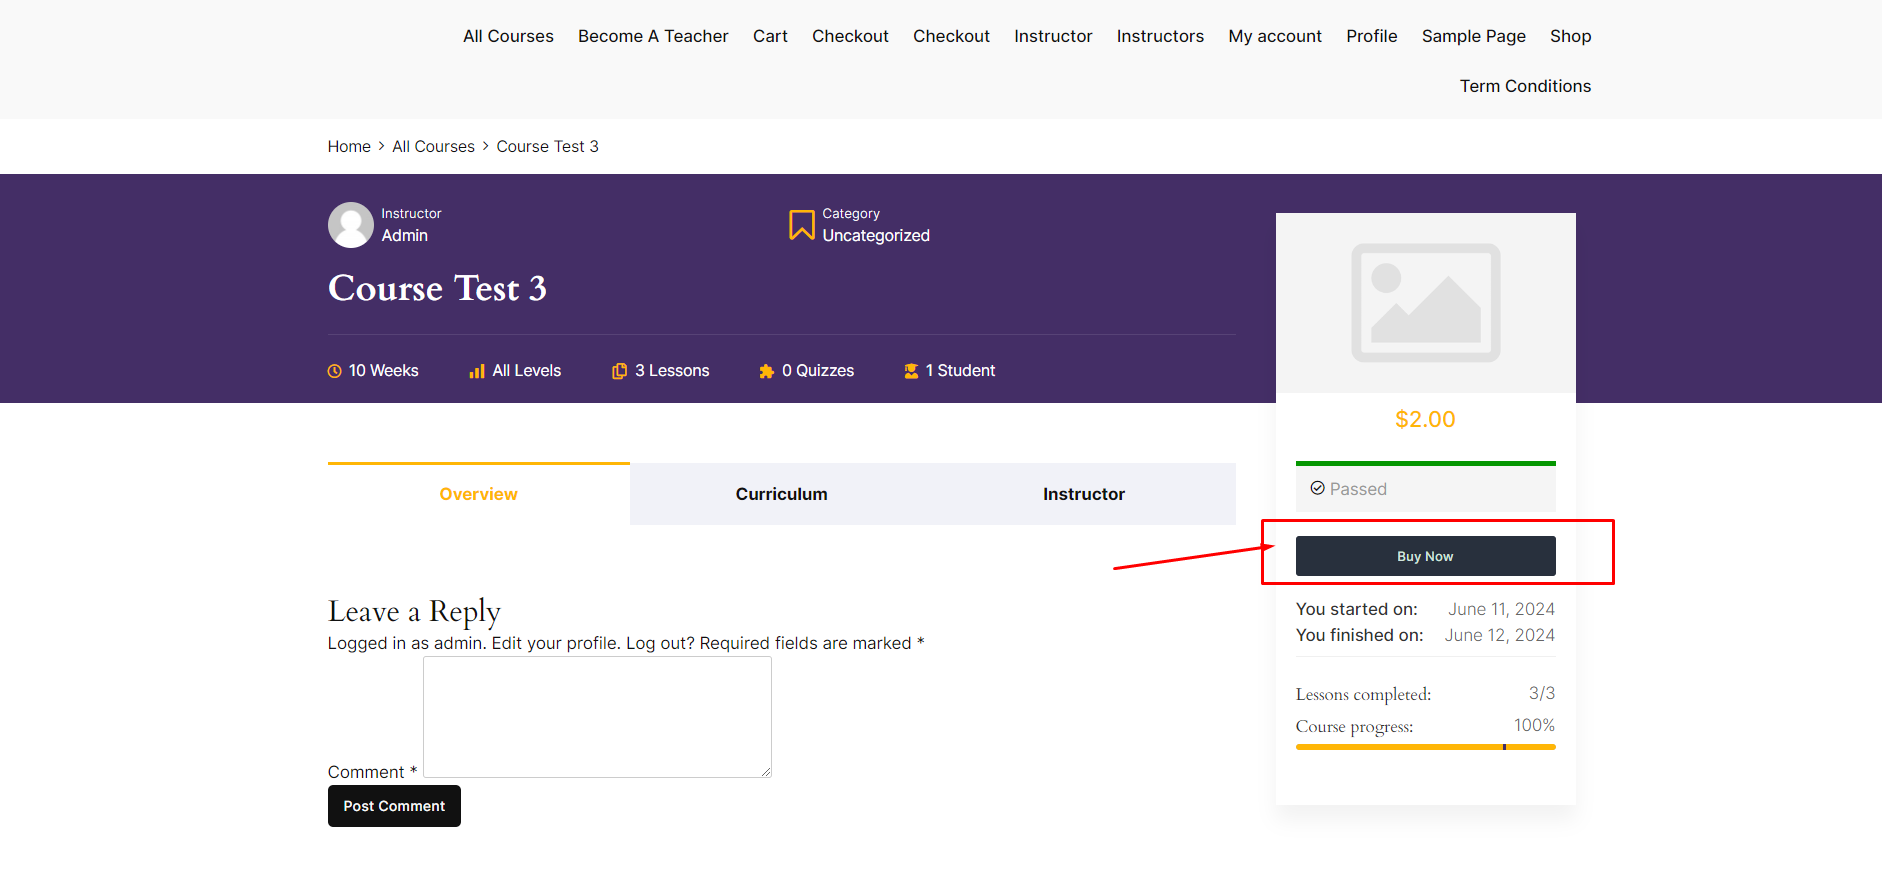
– When the duration expires, if the option “Block course when the duration expires” is enabled, the button “Buy Now” will be displayed.
– In case The number of times a user can learn again from this course
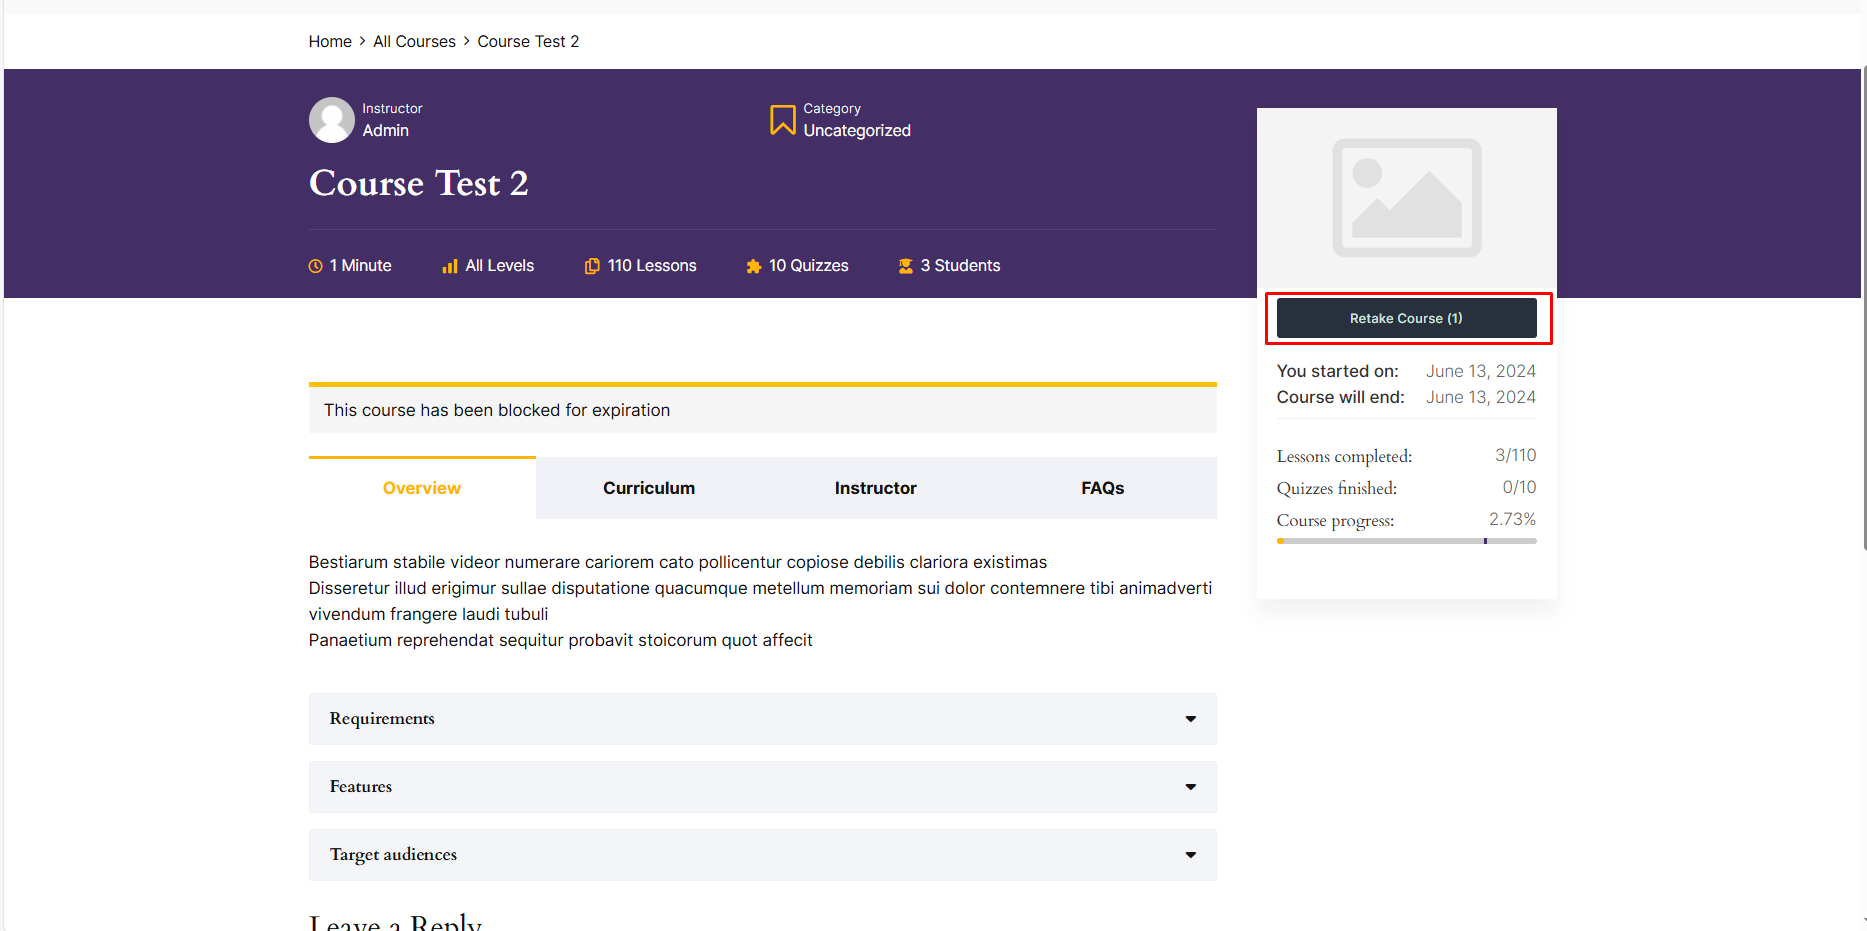
If the users used up the “retake course” for this course, a ‘Buy now’ button will appear.”

b) Disable the “Allow Repurchase” option in the Course setting.
– After students finish the course, the “Buy Now” button will not be displayed.
– After duration expires, if the option “Block course when the duration expires” is enabled, the button “Buy this course” will not be displayed.
– In case students can retake the course, when a user has used up the “Retake” times, the “Buy Now” button will not be displayed.
6.2. Buy course via Woocommerce
Similar to LP Checkout, just change the “Buy Now” button to the “Add to cart” button.
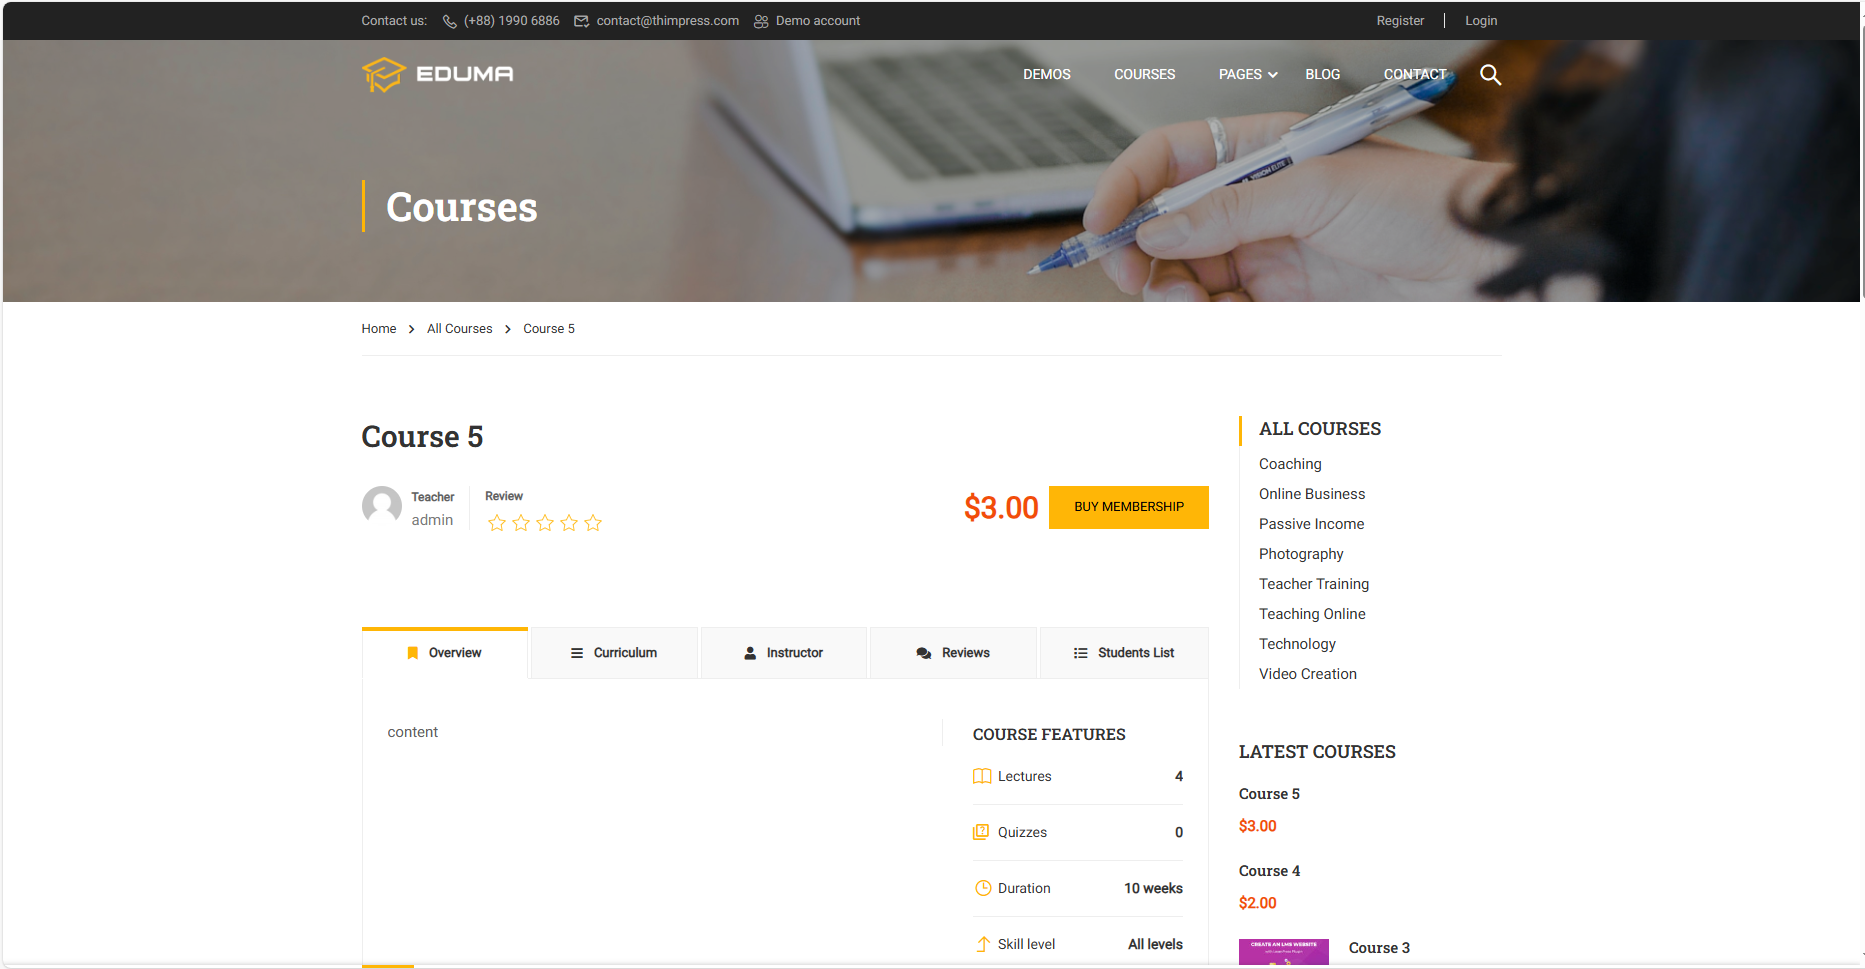
6.3. Buy course via Membership
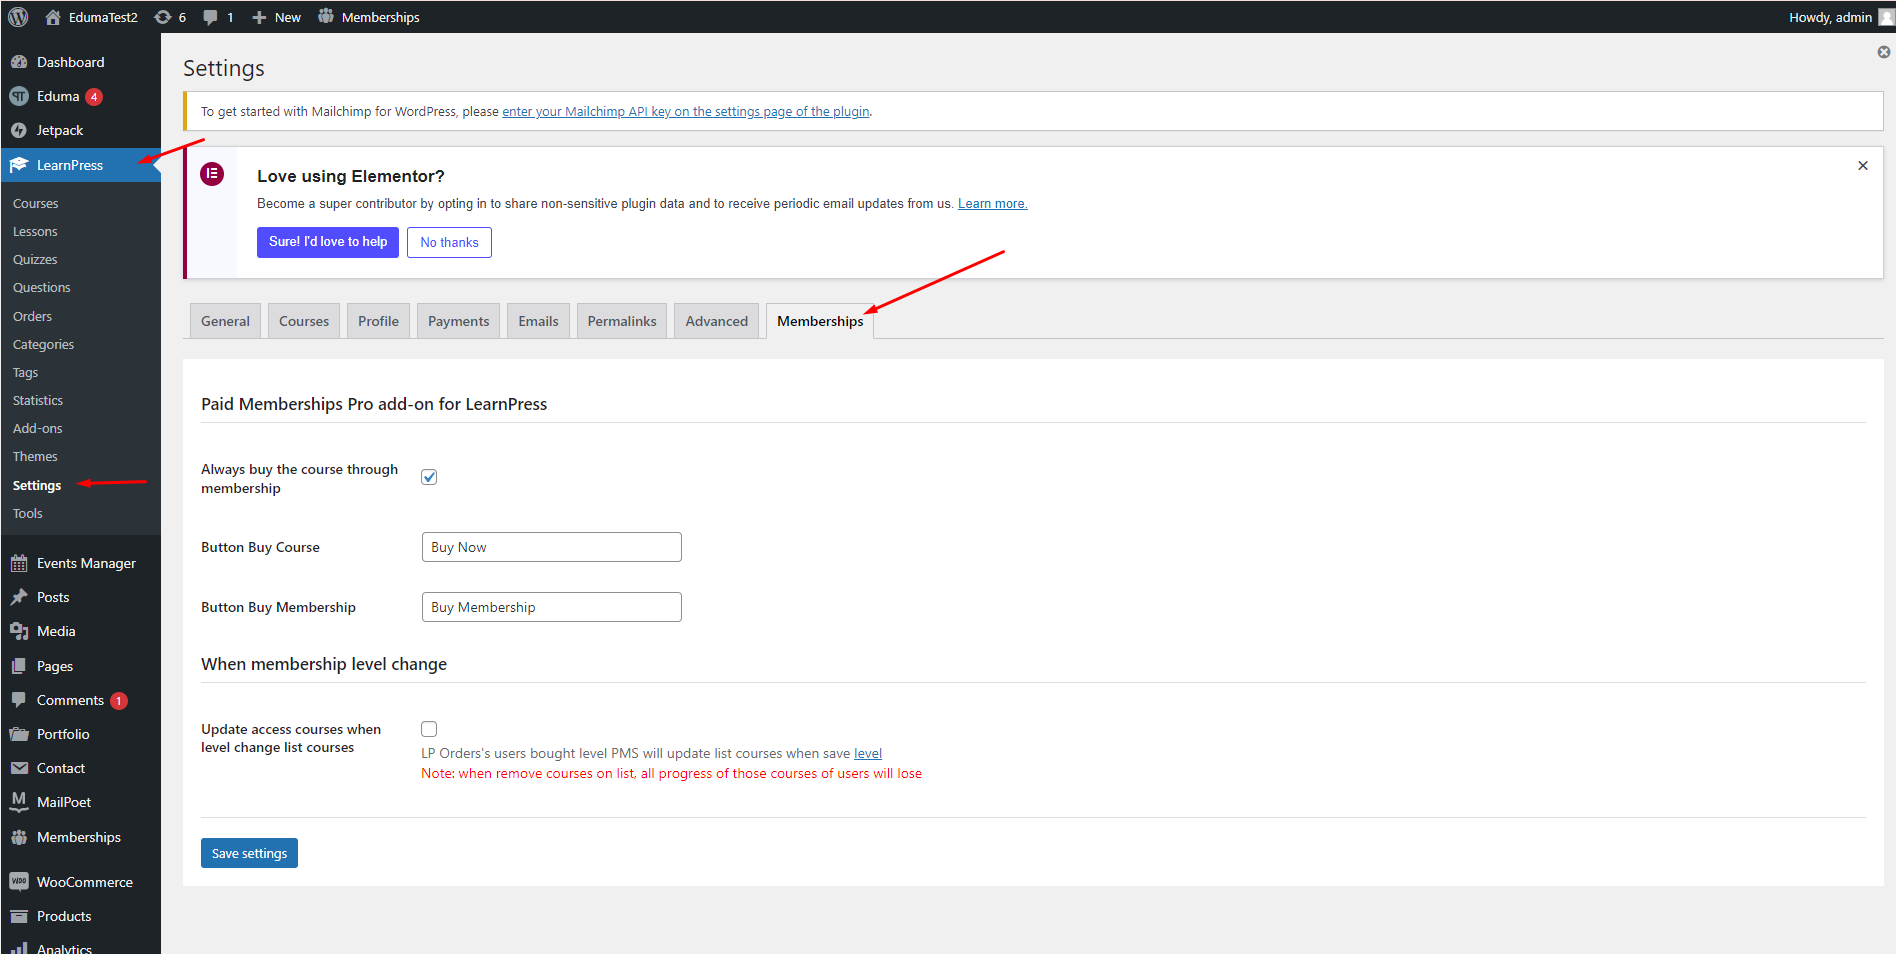
You can reference set up Membership at here: https://docs.thimpress.com/paid-membership-pro-add-on-for-learnpress/setup-membership/
If the option “Always Buy The Course Through Membership” is enabled.