LearnPress Settings

In this section, we will guide you to configure your LearnPress

1. Enable register option

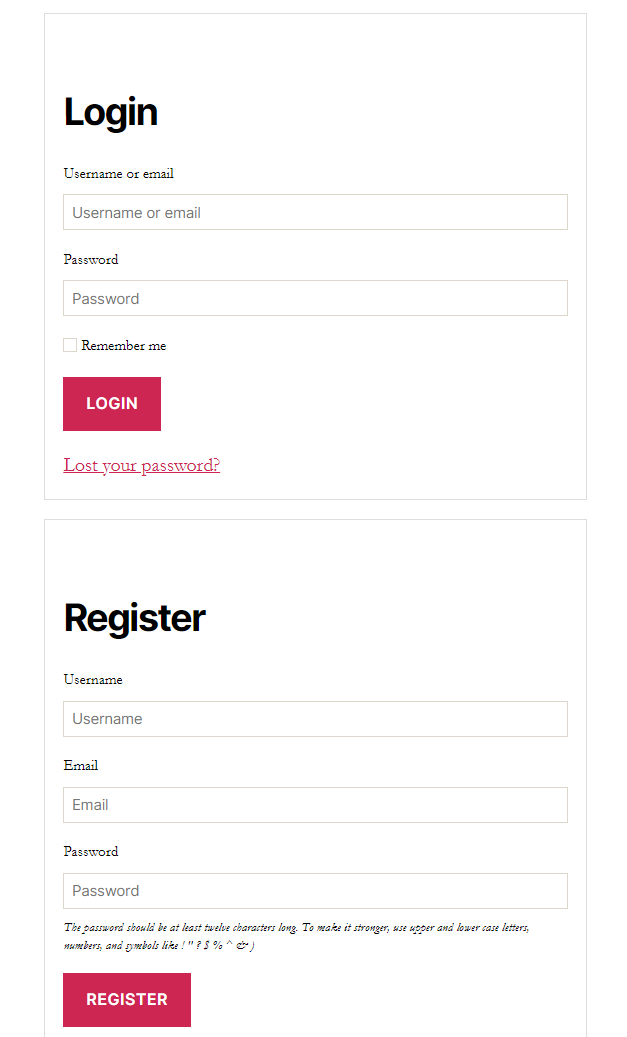
You can enable or disable the register option in the login/account page by going to your Dashboard => Settings => General => Membership => Any one can register.

Register option

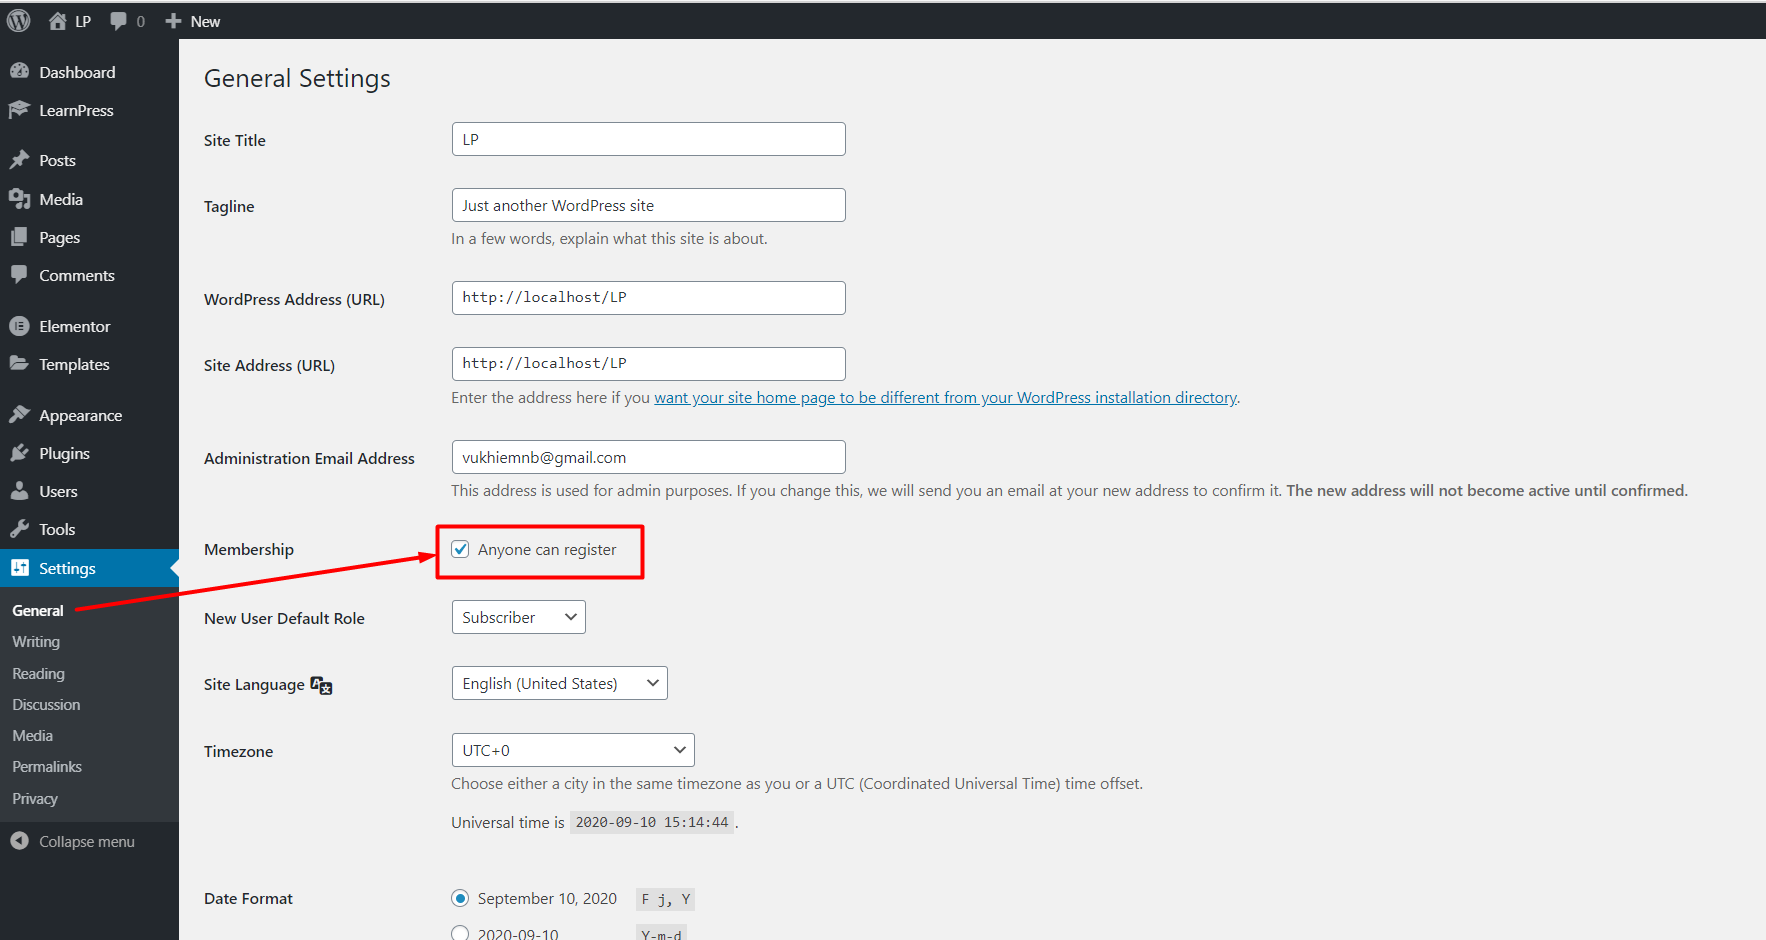
If you enable this option. Visitors can register on your website.

And if you disable this option. No one can create a new account on your website. Only you as an admin can create a new user in the backend.

2. Select the Homepage

You can choose which page will be your home page (the page visitors will see when they enter your main URL) in Dashboard => Settings => Reading => Your homepage displays => Home page, then select the page you want.

Choose the hompage


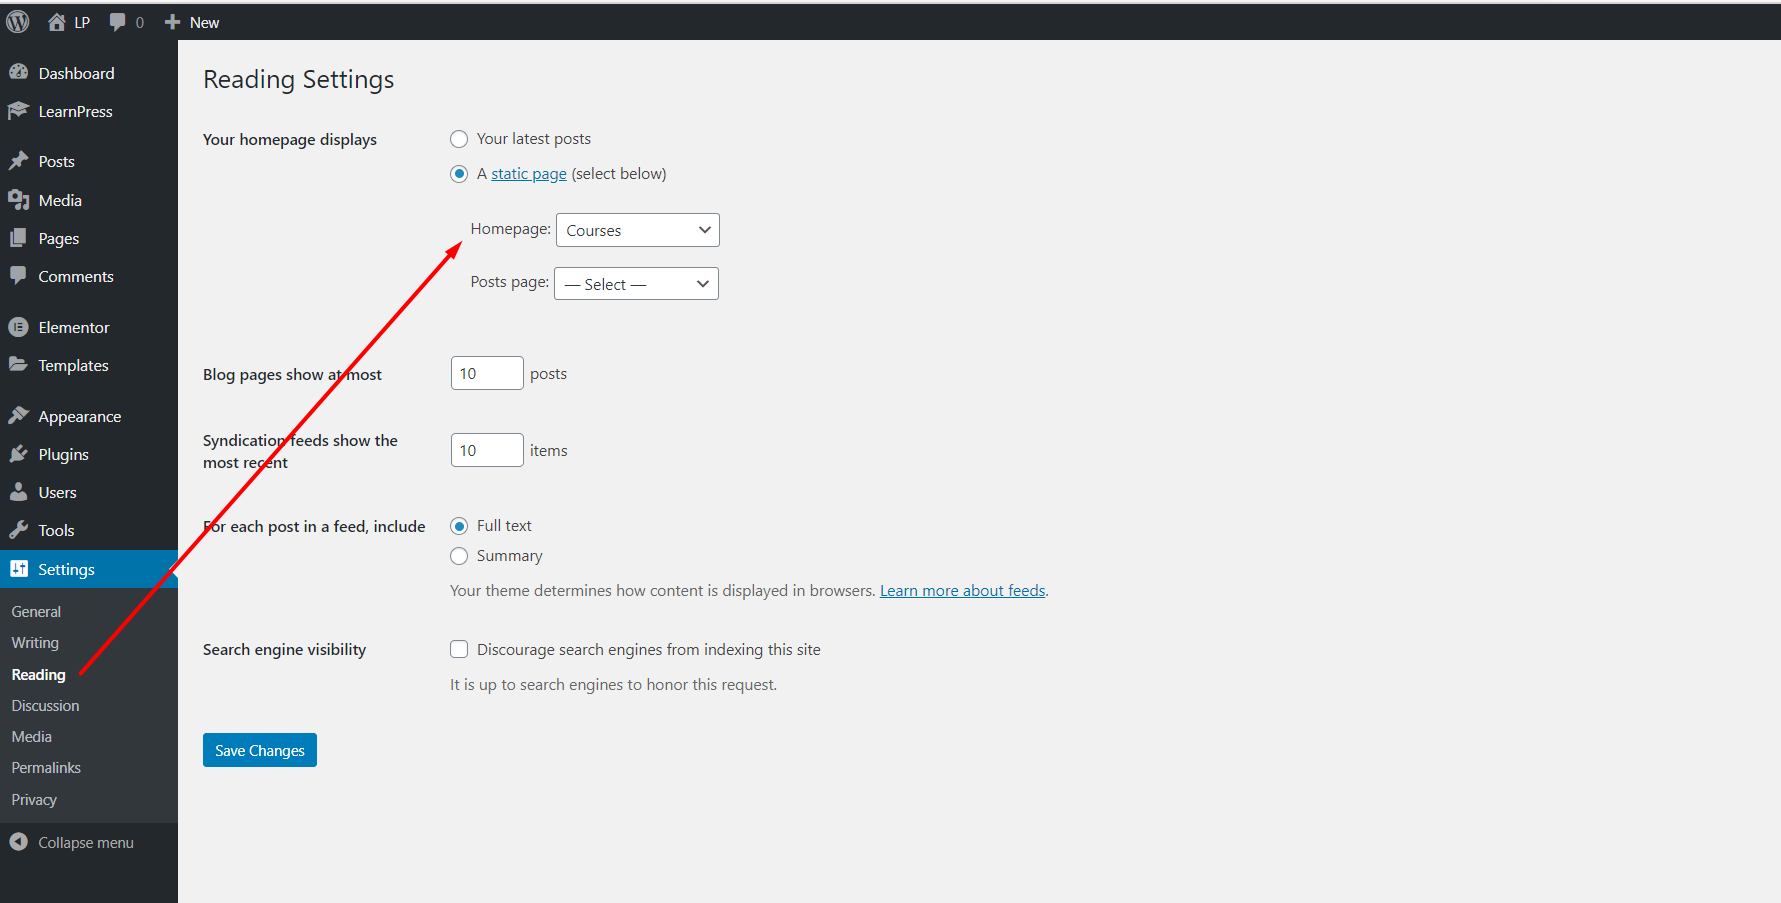
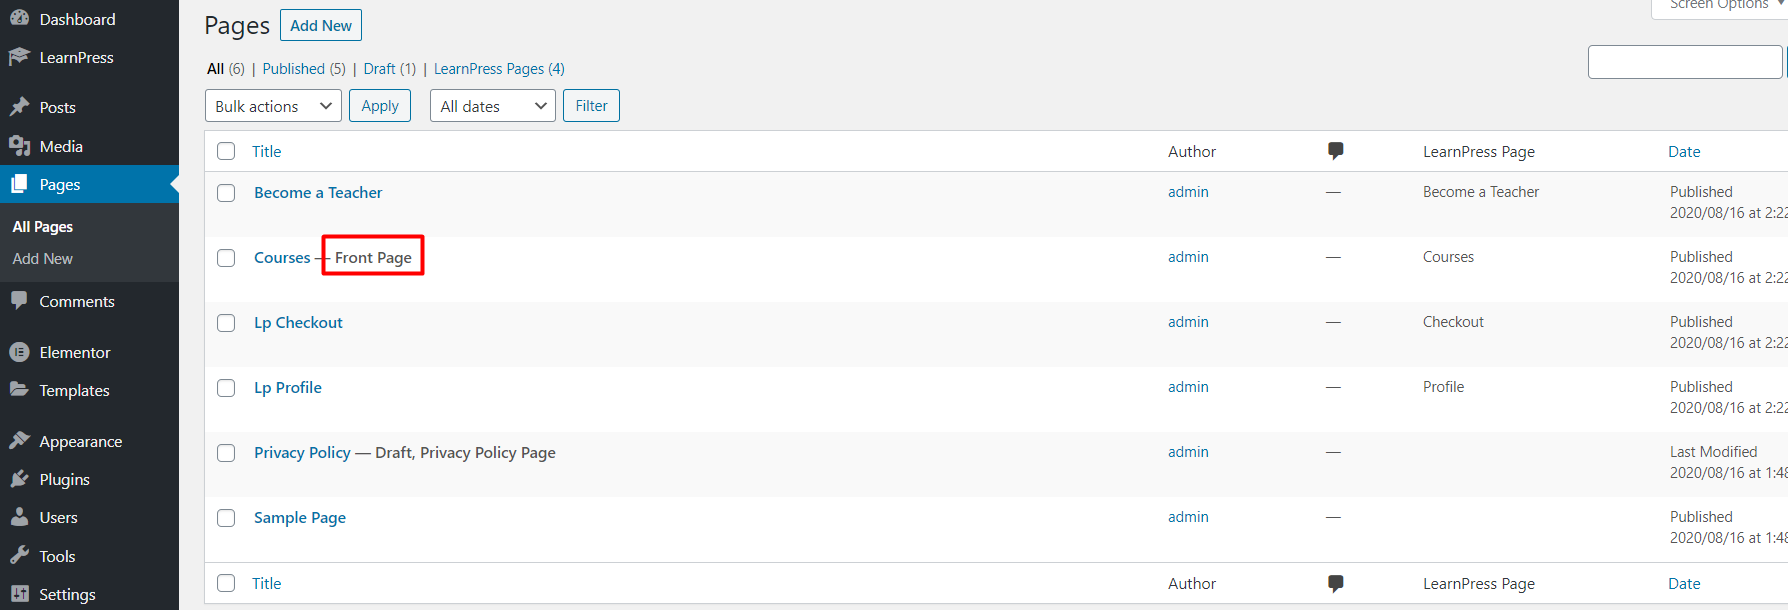
And the selected homepage will have this tag beside the name of that page:

Homepage selected tag

3. Error when access lesson/quiz page

There are some reasons if you got a 404 error when access a lesson/quiz page. Below are two common reasons:

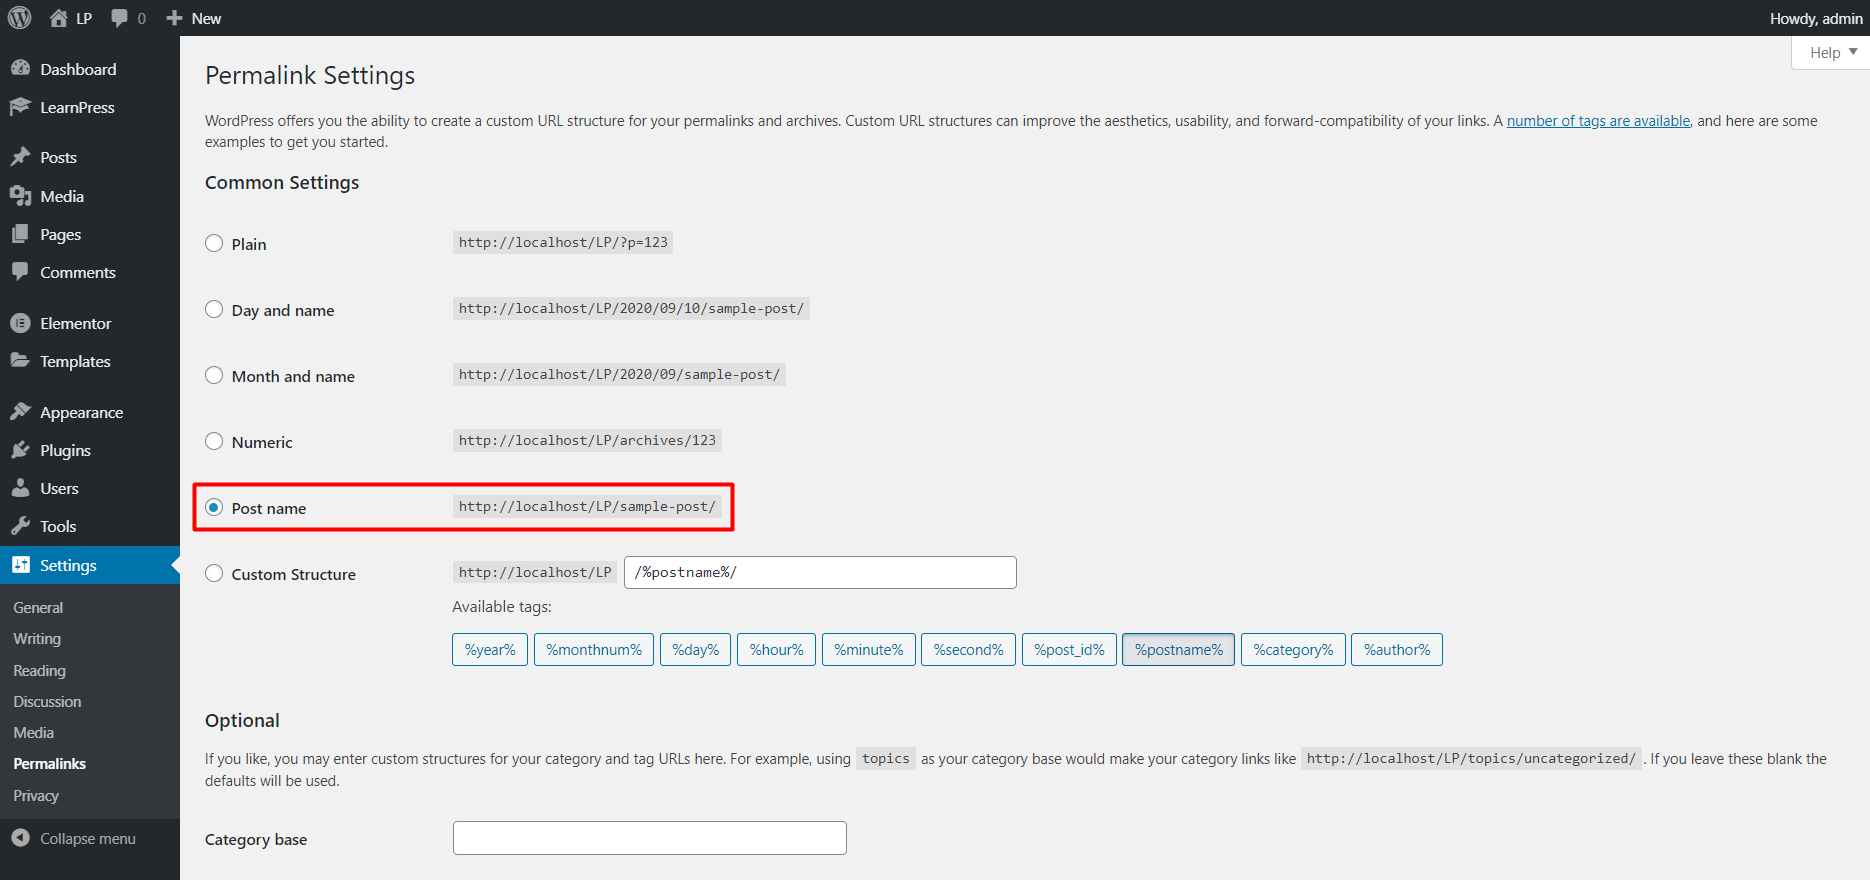
The first reason is setting the wrong permalinks. You should set your permalinks is Post name in Dashboard => Settings => Permalinks => choose Post name.

Set permalinks


The second reason is that you didn’t publish that lesson/quiz/course.

If the 404 error reason is none of the above reasons. Please create a topic on our forum: LearnPress support forum. We will check your issue.

4. Logout redirect and Currency

You can set the page you want your users will be redirected after logout by going to your Dashboard => LearnPress => Settings => General => Logout redirect, choose the page you want.

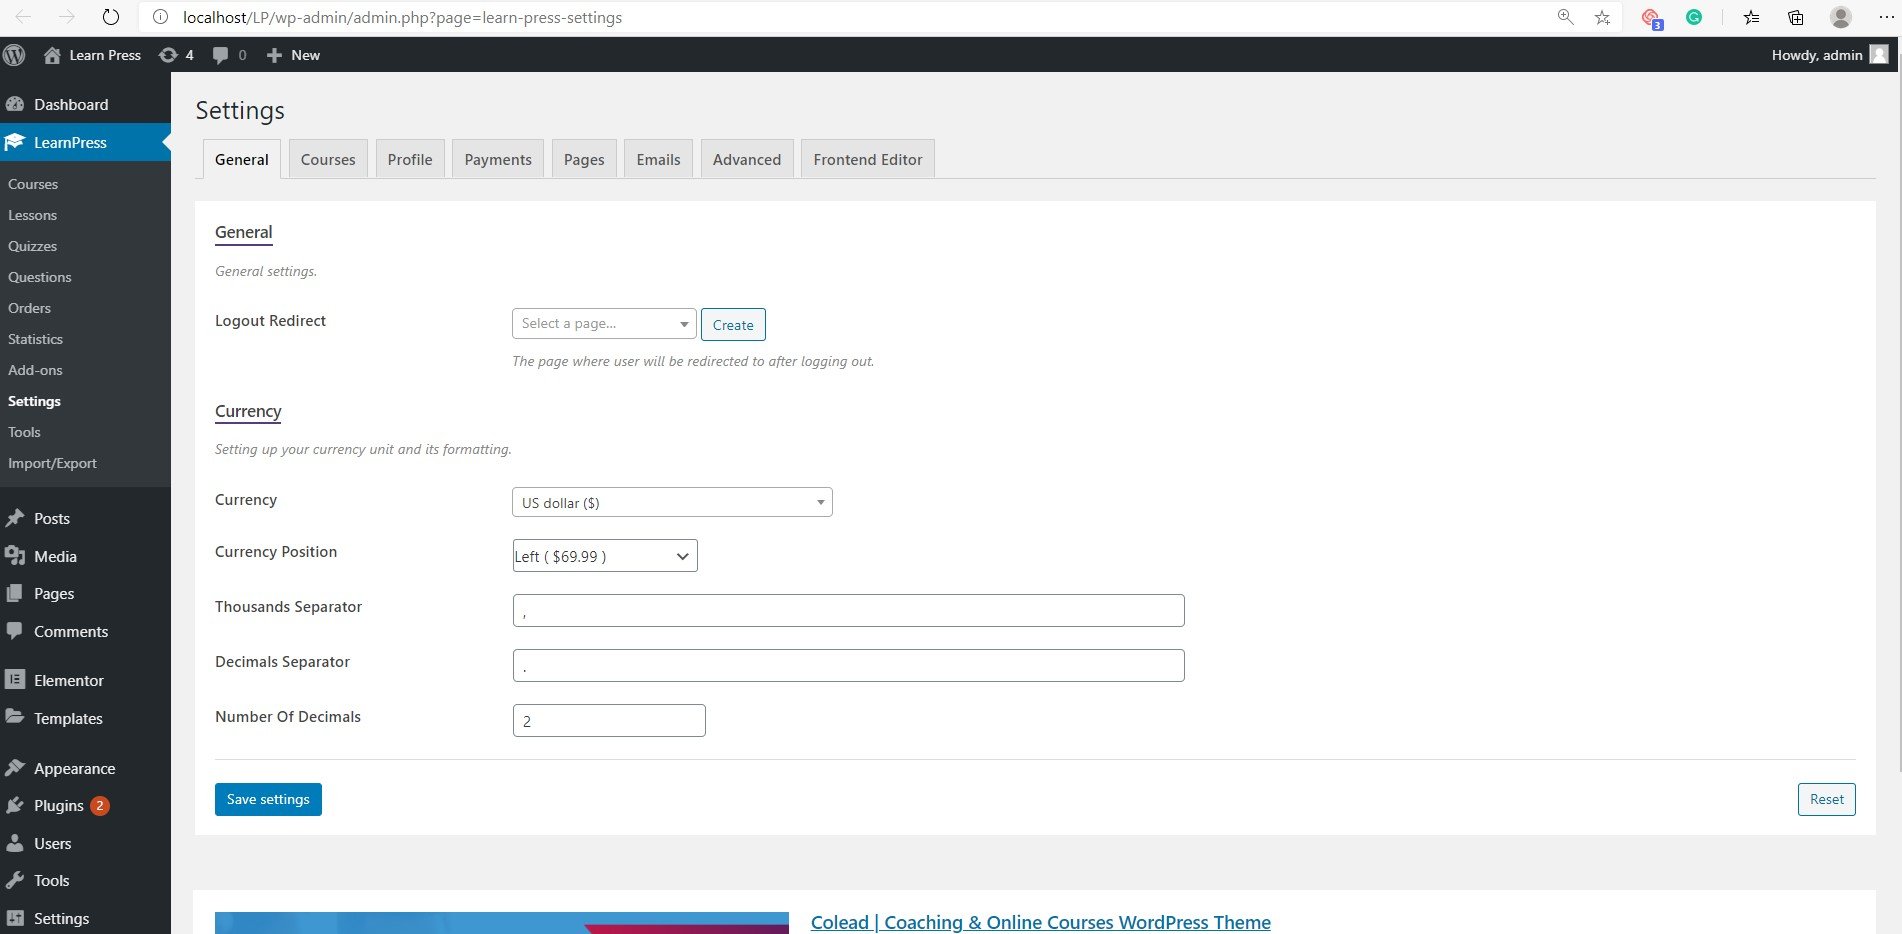
And you can set the currency displaying on your website in this section too.

5. Course review requirement

We have the option to require the admin review before publishing a course in Dashboard => LearnPress => Settings => Course => General
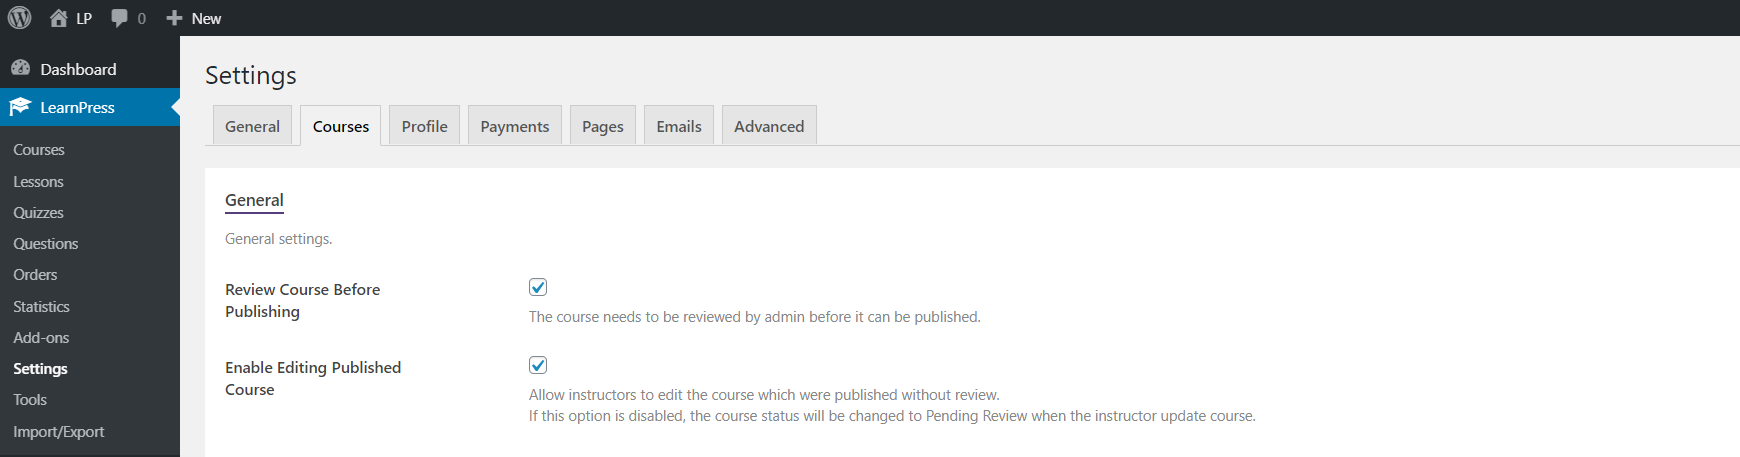
Review Course : The course needs to be reviewed by admin before it can be published.

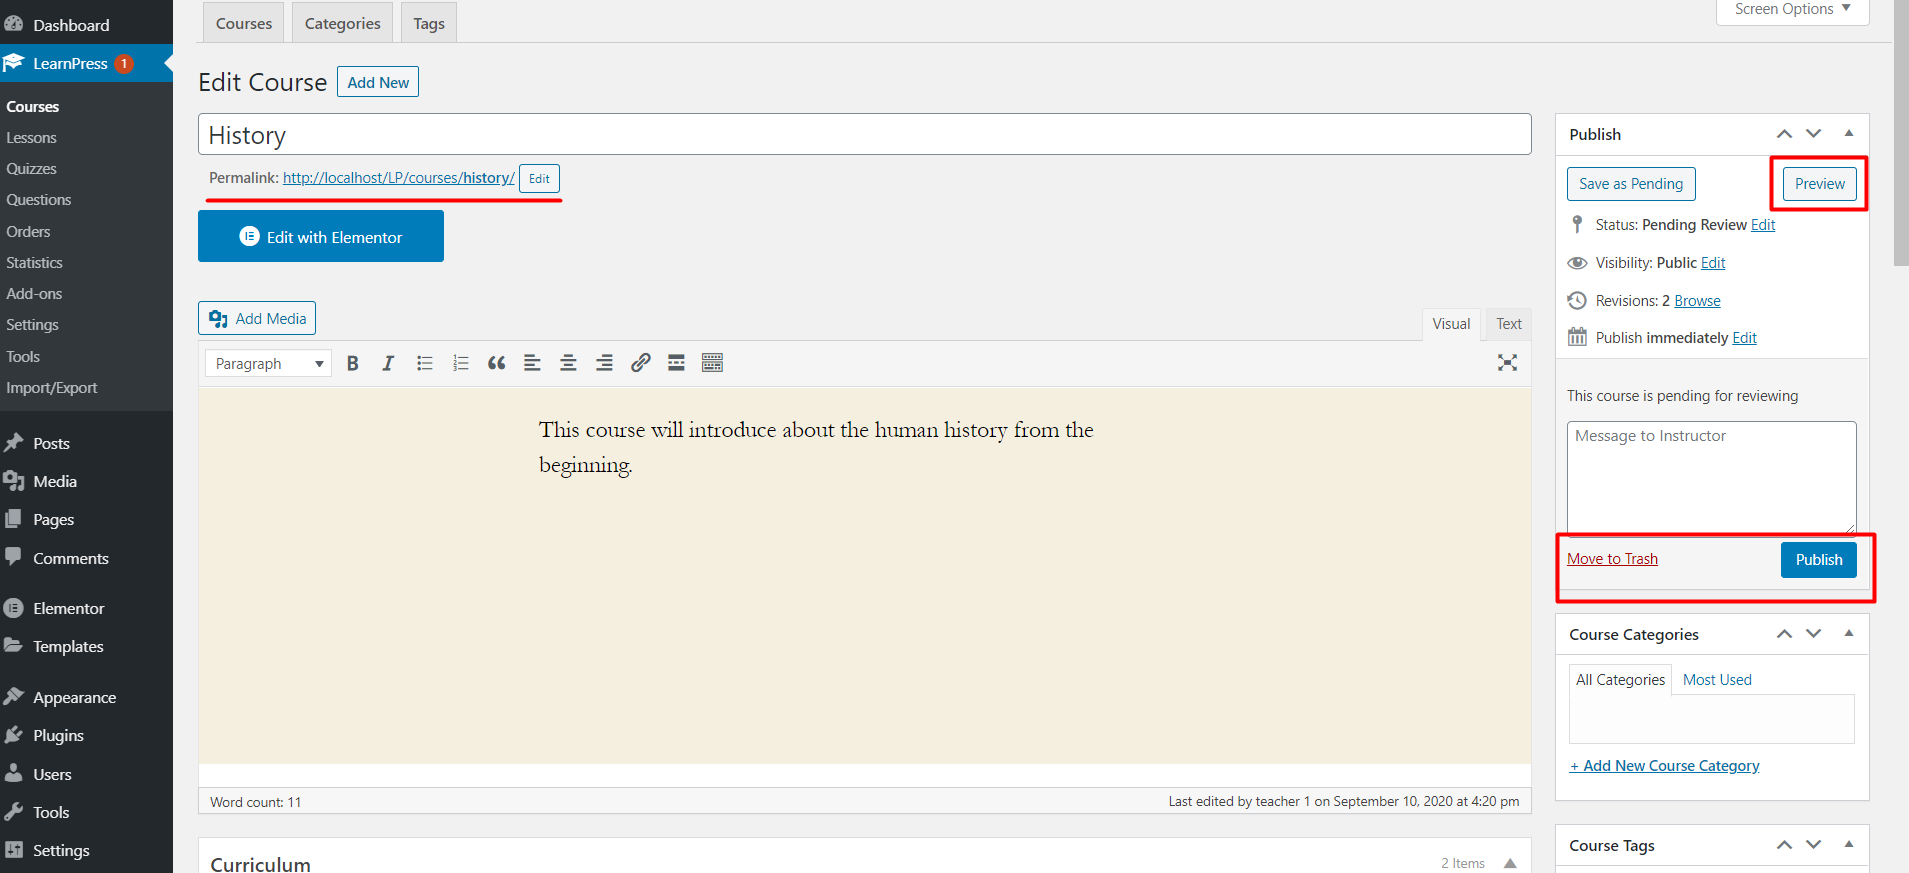
When a teacher submits a course for review, you will see a notice on LearnPress and that course in Pending status, as the below picture:

Admin - Submit for review


You can edit that submitted course, you are able to preview the course by click to the permalink of the course or click to the “Preview” button. As an admin, you have the right to publish or delete the submitted courses.

Admin - publish course review

6. Pagination Type

To change the Pagination Type, go to your WordPress dashboard -> LearnPress -> Settings -> Courses -> Pagination Type.

If you turn on the Loading ajax Courses, you can select one of the three Pagination Types: Number, Load More, or Infinite Scroll. If you turn off this feature, the Pagination Type will be set to Number by default.

  • Number: This pagination type shows the courses on numbered pages. You can navigate to different pages by clicking on the numbers at the bottom of the page.

  • Load More: This pagination type displays a Load More button at the bottom of the page. You can click on this button to view more courses without changing the page.

  • Infinite Scroll: This pagination type loads more courses seamlessly as you scroll down the screen. You will see a rotating icon at the bottom of the page while the courses are loading.

7. Course Thumbnails

This option is to set if you want to set all course thumbnails on the course page will display the same size or not.

You can enable it by going to your Dashboard => LearnPress => Settings => Courses => Course Thumbnails => Archive Course

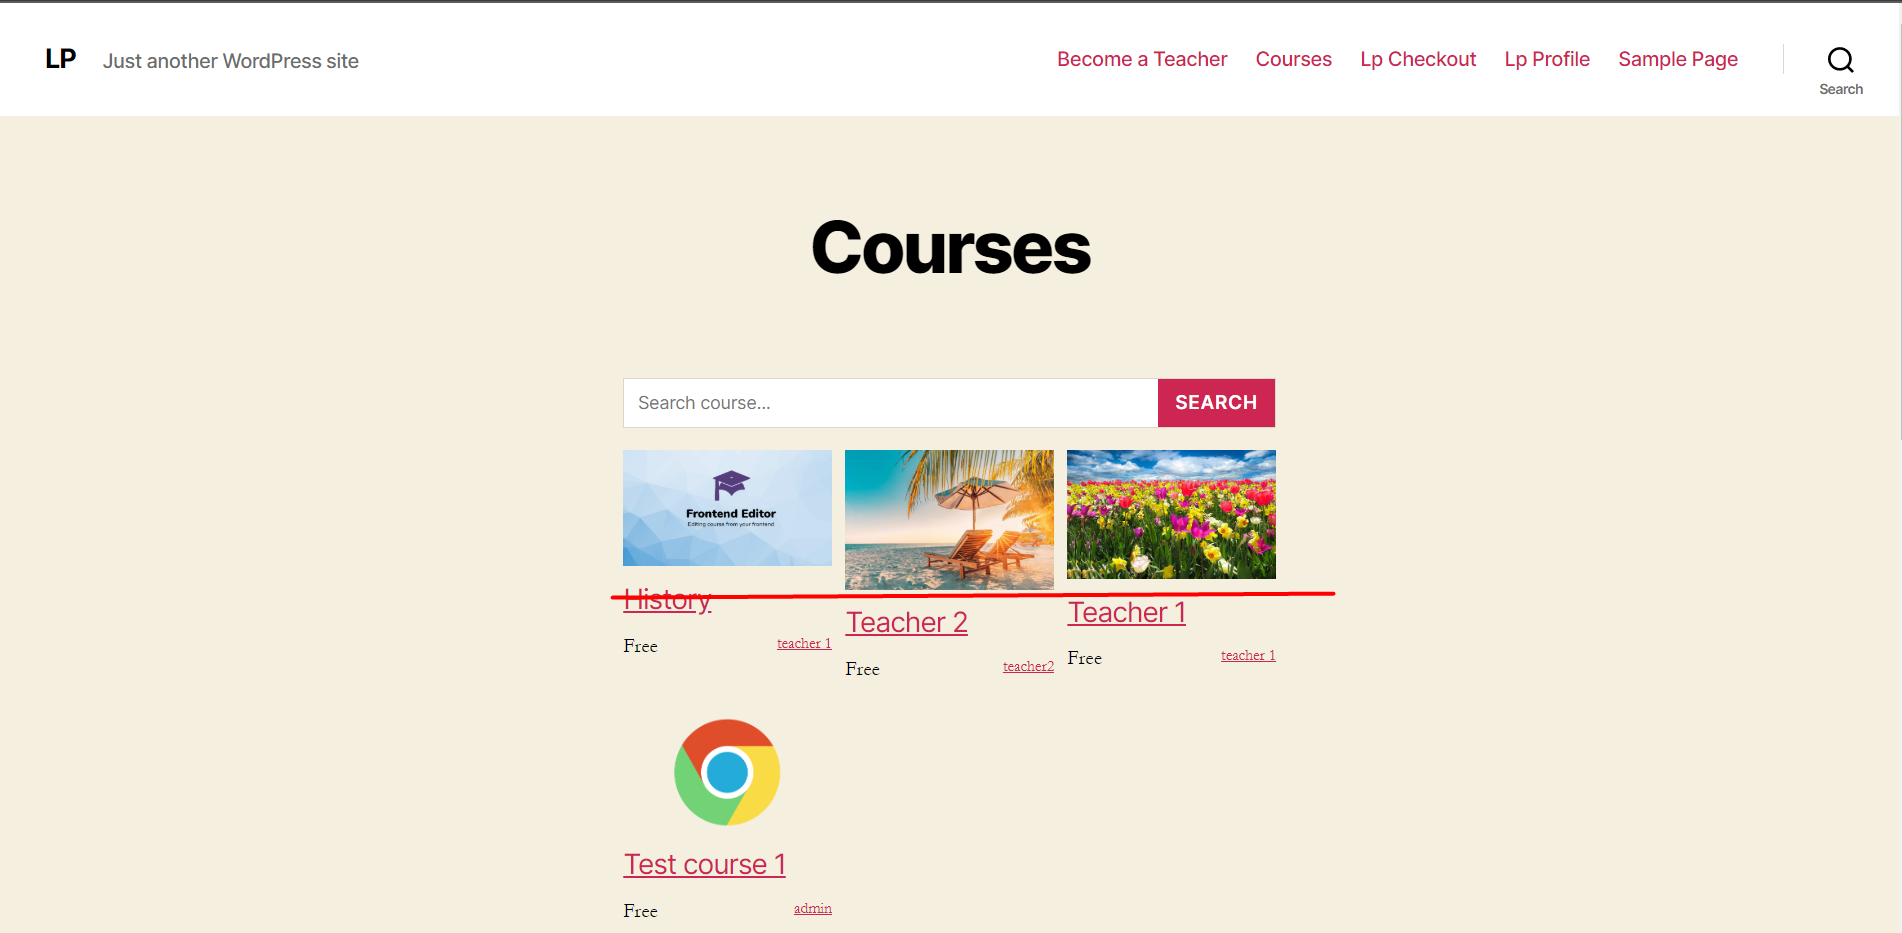
If you disable this option, the course thumbnail in the course page will look like the below picture:

Disable course thumbnail


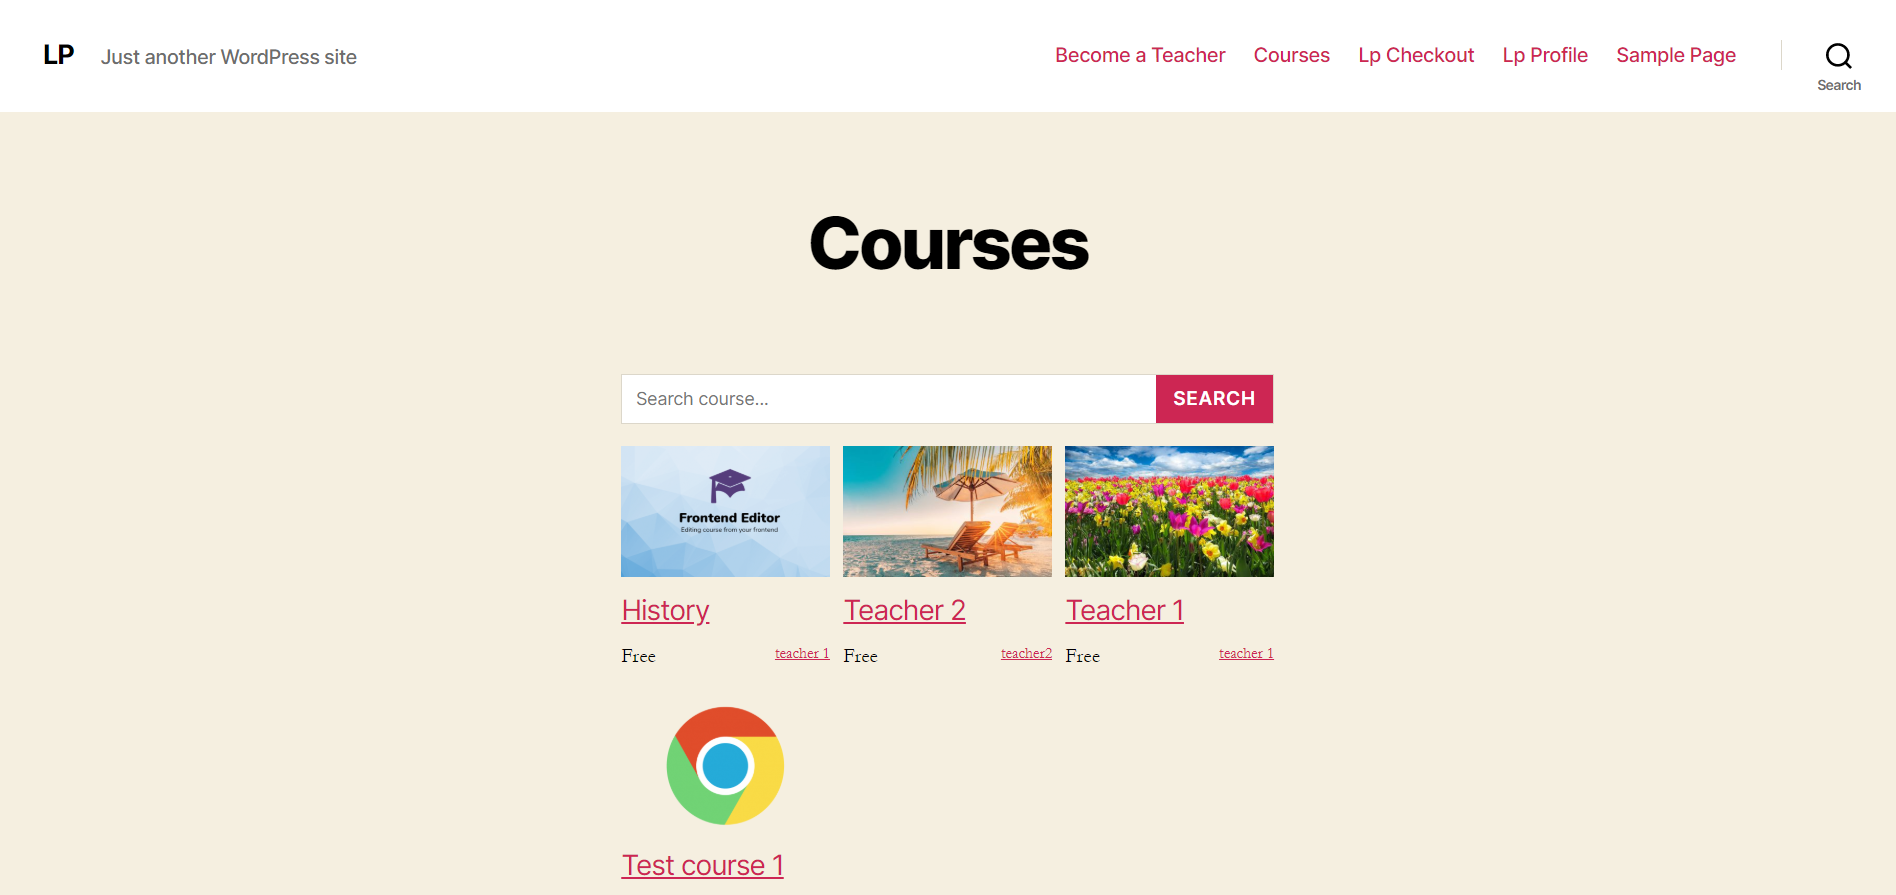
If you enable the Course Thumbnails option, all the course thumbnail will have the same size as below picture:

Enable course thumbnail

8. Profile

The default profile page of LearnPress is the lp-profile page (or profile page).

If you don’t have our lp-profile page, you can create a new page, then add our profile shortcode

[learn_press_profile]
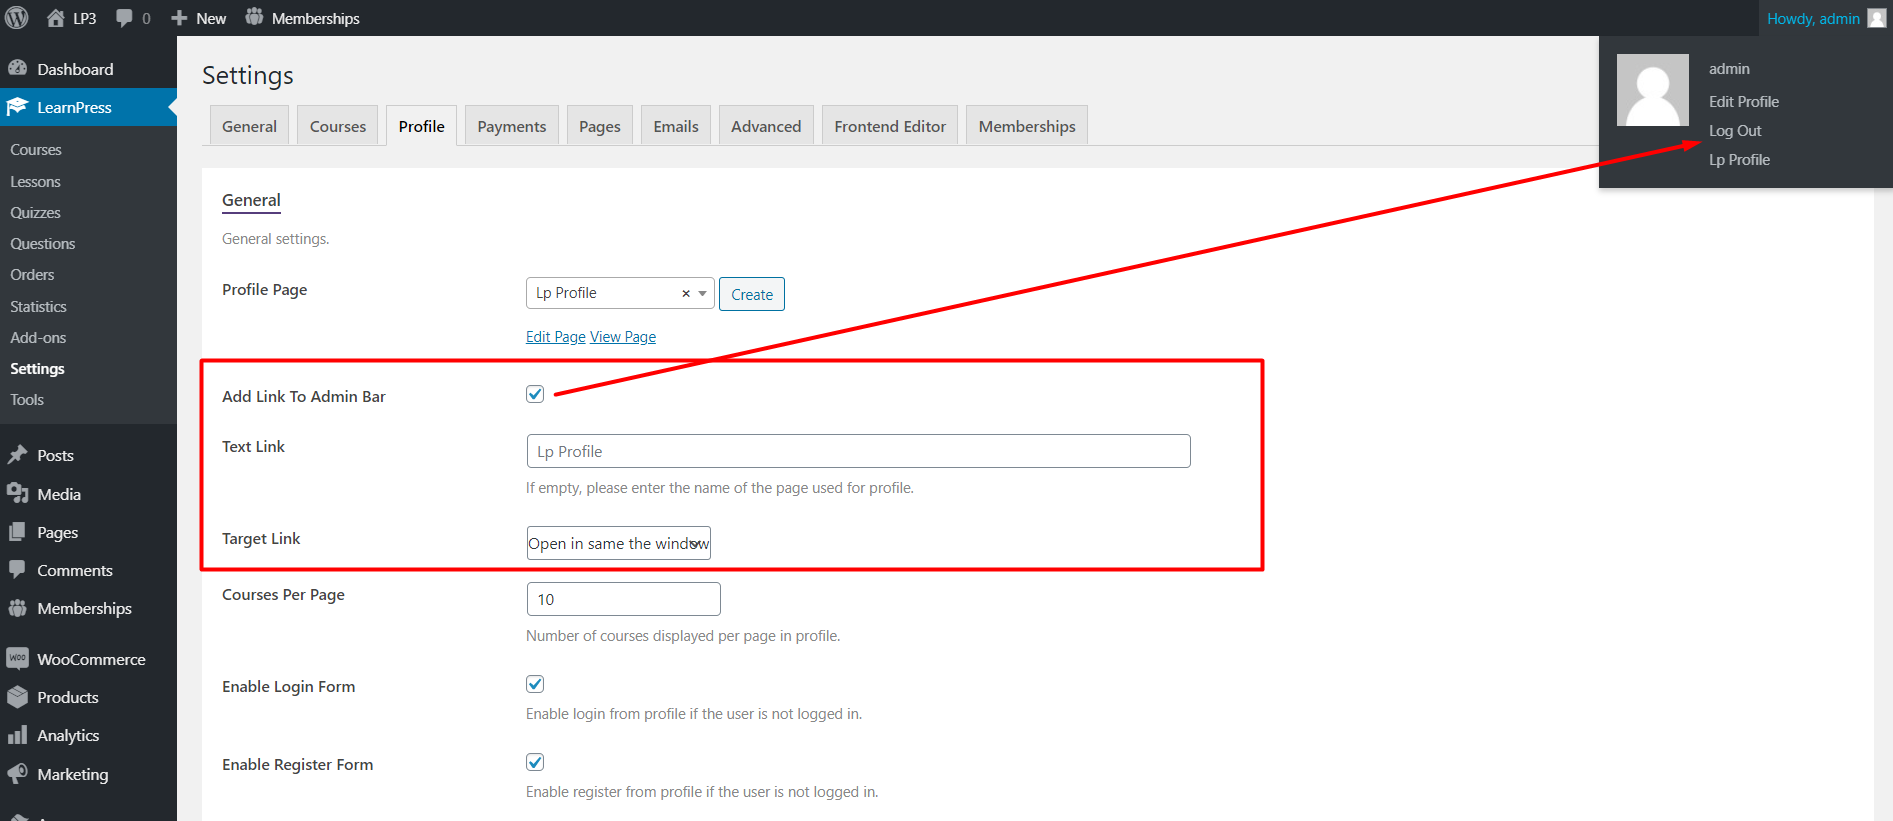
 

If you don’t enable “Enable Login Form” and “Enable Register Form” options,  users will log in and register through the default login form from WordPress. If you enable those options, our login and register forms will display on the profile page.

profile-forms

Users can change the size of their avatar in the “Avatar Dimensions” section.

When you enable the “Courses” option in Privacy. Students can see the courses of instructors or other students.


9. Payment

The default checkout page of LearnPress is the “Lp-Checkout” page. If you don’t have that page, you can create a new page then add our checkout page shortcode:

[learn_press_checkout]

All your available payment methods will be displayed on the payment tab. You can activate or deactivate the payment method by click to the circle checkboxes in the “Status” column, and then click to the name of the payment method to configure it.

Paypal is the default payment method for LearnPress. If you want to use the payment methods which are supported by WooCommerce, you need to install our WooCommerce add-on for LearnPress.

If you use our WooCommerce add-on for LearnPress, please choose the checkout page of LearnPress is the “Lp-Checkout” page, and the checkout page in WooCommerce is the “Checkout” page.

woo-pages

All your available WooCommerce payment methods will be displayed in LearnPress => Settings => Payment => WooCommerce. You can click on the payment method to configure it.

When you enable the WooCommerce, the “Buy this course” button will change to the “Add to cart” button. The “Redirect To Woo Checkout” option will redirect users to the WooCommerce checkout page after they click on the “Add to cart” button.

You can make users agree with your Terms and Conditions before placing an order by creating a Terms and Conditions page and set in the LearnPress settings. Then it will display and is required to be checked.

terms-and-conditions

If you want users can buy the course without login, you can enable “Guest Checkout” in LearnPress payment settings. When users didn’t login and press the “Buy This Course” button, there is a “Continue checkout as guest?” button on the checkout page.


guest-checkout-pagePlease make sure that you have enabled the Guess email in LearnPress => Settings => Emails

guest-enable-emailOn the checkout page, users need to enter the email address that they will receive the Order key to access the course. Visitors can choose if they want to create an account with the email on the checkout page or not.

guest-email

Then users will get the email which contains their order key

The course will be added to the account of the email that users used on the checkout page when they create a new account. Or if they want to use on another account, they can login with that account and submit the order they get in their email.

guest-add-order-key

If the order is added successfully, the screen is like below:

guest-add-key-success

Note: The “Guest Checkout” option only works with default LearnPress payment methods, not working with WooCommerce. If you use WooCommerce with LearnPress, users have to login to buy the course.

10. Become a teacher

When you enable the “Instructor Registration” option in LearnPress => Settings => General. Users can register and request to become a teacher at the same time by click to the “Want to become an instructor” checkbox on the registration form.

become-a-teacher-checkboxWe have a default form for the user to request to become a teacher on your website, it is the “Become a Teacher” page, and you can find it in Dashboard => Settings => Pages => Become A Teacher Page, then click “View Page”

become-a-teacher-form

You are able to change the text with some translate plugins, but you cannot edit this form.

Users have to login to fill this form. After a user filled the form, the admin will get an email about the submitted form. You need to enable become a teacher email in LearnPress => Settings => Emails => Become An Instructor.

become-a-teacher-enable-email

In the email content, admin can view/accept/deny that request.

become-a-teacher-requested-email

11. Emails

All emails which are sent from LearnPress are in Dashboard => LearnPress => Settings => Emails

lp-emails

You can see all the active emails in this place. If you want to enable/disable any type of email, you can click to the circle checkbox to change its status. And if you want to enable/disable all emails, you can click to the “Enable all” or “Disable all” button.

You are able to edit the email content by clicking to the email name to edit it.

12. Memberships

If you are using our Paid Membership Pro add-on for LearnPress to integrate LearnPress with plugin Paid Membership Pro, please change the “Log In Page” in Paid Membership Pro to “Use WordPress default”. Because if you choose “Log In Page” is Log In, it may result in a conflict with our LearnPress, such as user cannot change their password.

13. LearnPress Tools

At LearnPress 4, we have created Tools for you to easily handle and use LearnPress.

1. Course Data

  • Install Sample Data: Create a Sample course with lessons and quizzes. The content will be filled with Lorem text. You can read about how to do this here.
  • Reset course progress: Here, you can reset all the progress of the enrolling users and courses.

Please go to Dashboard => Learnpress => Tools => Course Data => Fill course name => Search => Delete (Reset). You can see the below picture[/vc_column_text][/vc_column][/vc_row]

tool_4

After reset, you can check it again by searching for the reset course. No course found will now be displayed.

  • Reset user progress: This action will reset the progress of all courses that a user has enrolled in.

Please go to Dashboard => Learnpress => Tools => Course Data => Fill user or email  => Search => Delete (Reset). You can see the below image:

tool_6

You can reset each course or all courses.

tool_7
tool_8

  • Reset item progress for a user: This action will reset the progress of a specific lesson or quiz

Please go to Dashboard => Learnpress => Tools => Course Data => Reset item progress for a user =>  Fill user ID or email and Item ID => Reset. You can see the below image:

tool_12

After a successful reset will display Item progress deleted.

tool_11

2. Data base

  • Repair Database: This tool will help you to remove unwanted data and recalculate the relationship.

Please go to Dashboard => Learnpress => Tools => Database => Repair Database => Check box you want => Repair now. You can see the below image:[/vc_column_text][/vc_column][/vc_row]

tool_13

  • Upgrade Database: Force upgrade database to latest version. Please be careful before taking this action.

Please go to Dashboard => Learnpress => Tools => Database => Upgrade Database => Upgrade now. You can see the below image:

tool_15

  • Remove current Data: This option allows deletion of all courses, lessons, quizzes, and questions.

Please go to Dashboard => Learnpress => Tools => Database => Remove curent Data => Remove. You can see the below image:

tool_16

  • Remove outdated Data: Remove all courses, lessons, quizzes, and questions from versions older than 1.0.

Please go to Dashboard => Learnpress => Tools => Database => Remove outdated Data => Remove. You can see the below picture:

tool_17