Download Theme
Get the Theme installation package from your account download page and save it to your desktop.
Since required & recommended plugins are already packed in the download file, you won’t need to go download them individually.
Upload Theme
You can upload the Theme file in two ways:
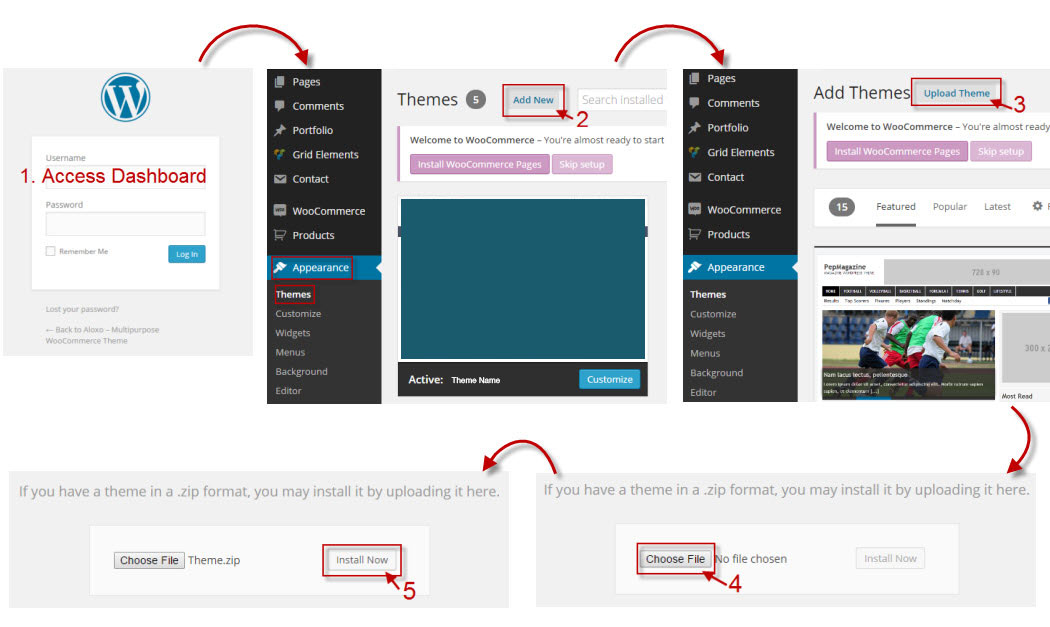
I. Via WordPress – Log into your WordPress site.
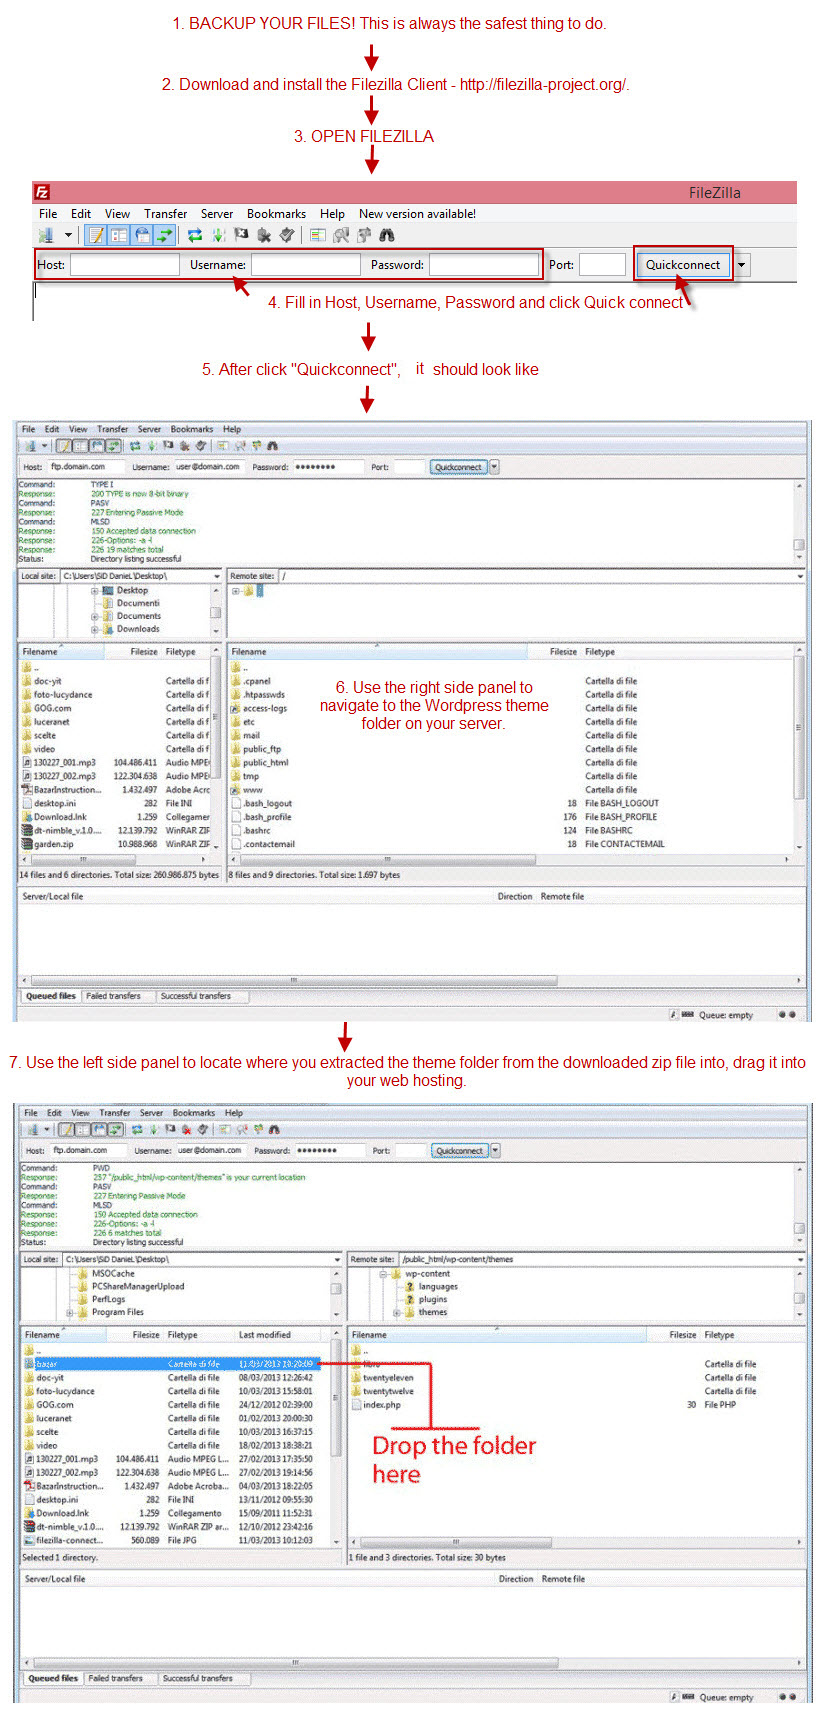
II. Uploading Via Filezilla
(SKIP THIS STEP if you have already successfully uploaded theme via WordPress) – Now you will learn how to upload your files using the Filezilla client.
1. System Requires
It is recommended using those limits to a minimum as follows in order for free-trouble while installing demo or saving customize.
max_execution_time 3000
memory_limit 256M
post_max_size 64M
upload_max_filesize 64M
2. Install Theme
For uploading Theme with WordPress uploader:
Wait for the notice below to appear and then click the link “Activate”.

For uploading Theme with FTP tool:
1. Open the WordPress Dashboard.
2. Go to Appearance > Themes.
3. Click activate Theme.
Install Required Plugin
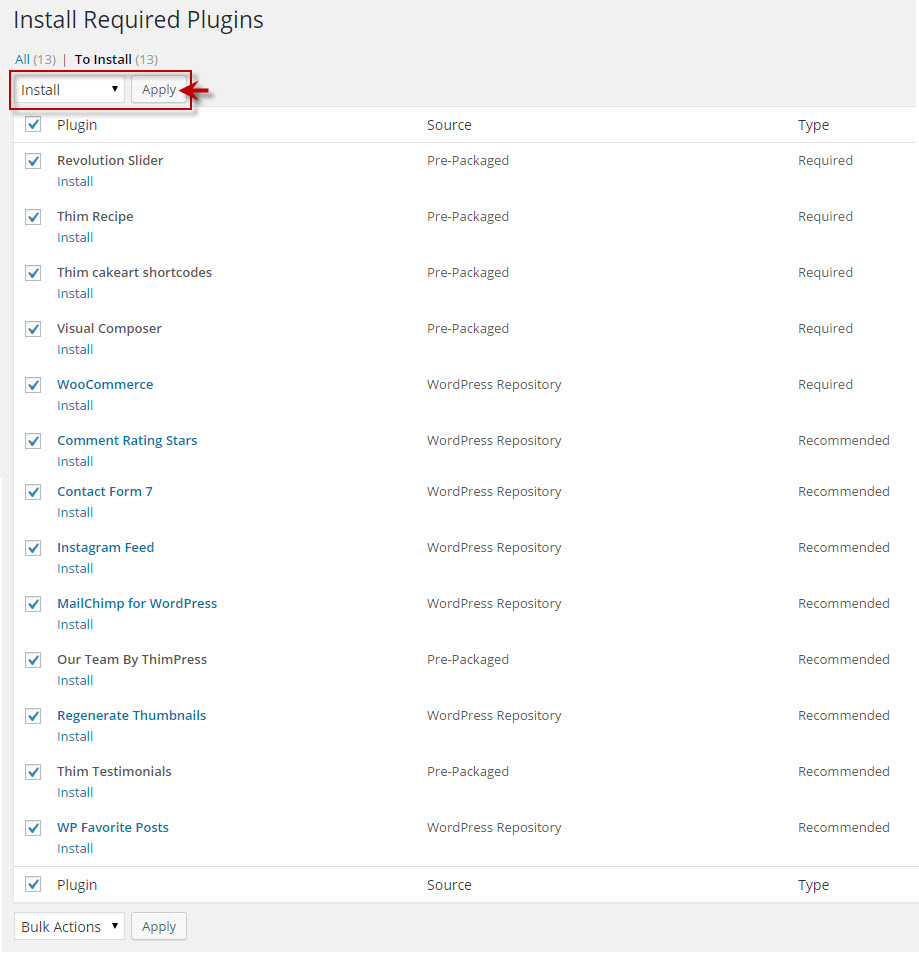
A notice will appear asking you to install some required plugins after Active Theme.
1. Click on “Begin installing plugins” link.

2. Click on the box beside “Plugin” label to select all plugins in the list, choose “Install” from the drop-down list at the top and then click “Apply”.
When the notice “All installations have been completed” appears, click on Return to Required Plugins Installer link under it to turn back to the plugin list.
3. Click on the box beside “Plugin” label to select all plugins in the list, choose “Activate” from the drop-down list at the top and then click “Apply”.
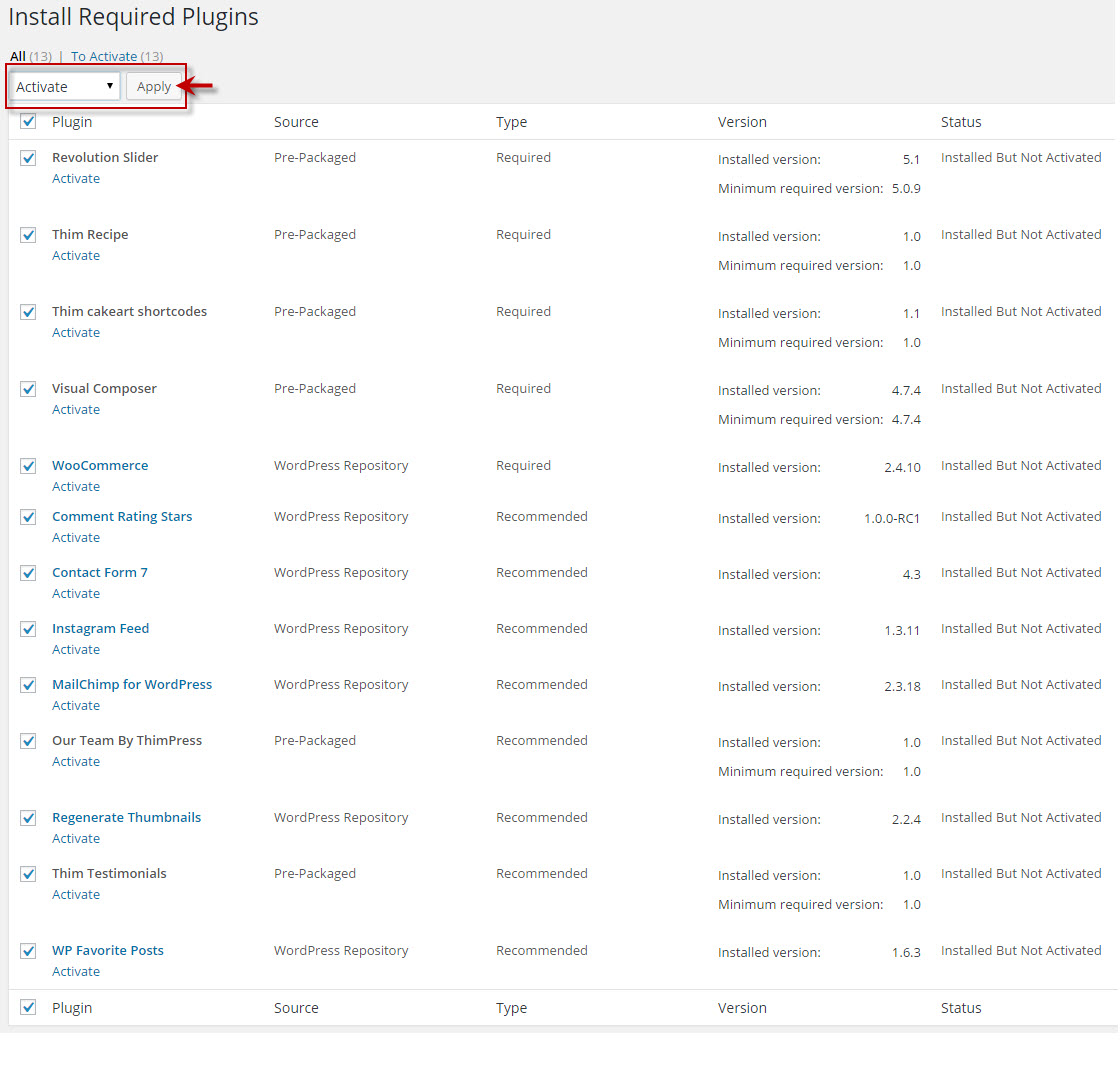
The installing process status will be shown in your browser. It may takes a few minutes, so please be patient.
After completing the activation and no bug occurred, you will see status of all plugins is activated.
Import Demo Data
I. The first way: Importing by one click
This is a priority to use for importing fully demo content.
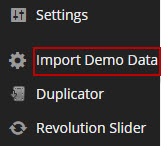
1. Click <<Import Data Demo>> buttons on backend:
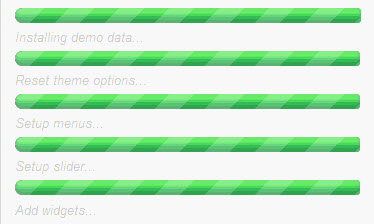
2. Access “Data Demo” tab and find the “Import Data Demo” section.
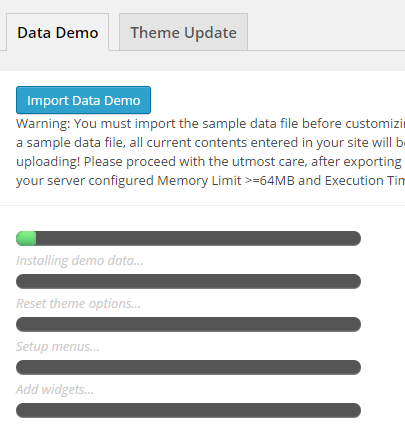
The progressing will display on import status bars so you will know when it is finished and your data is ready.
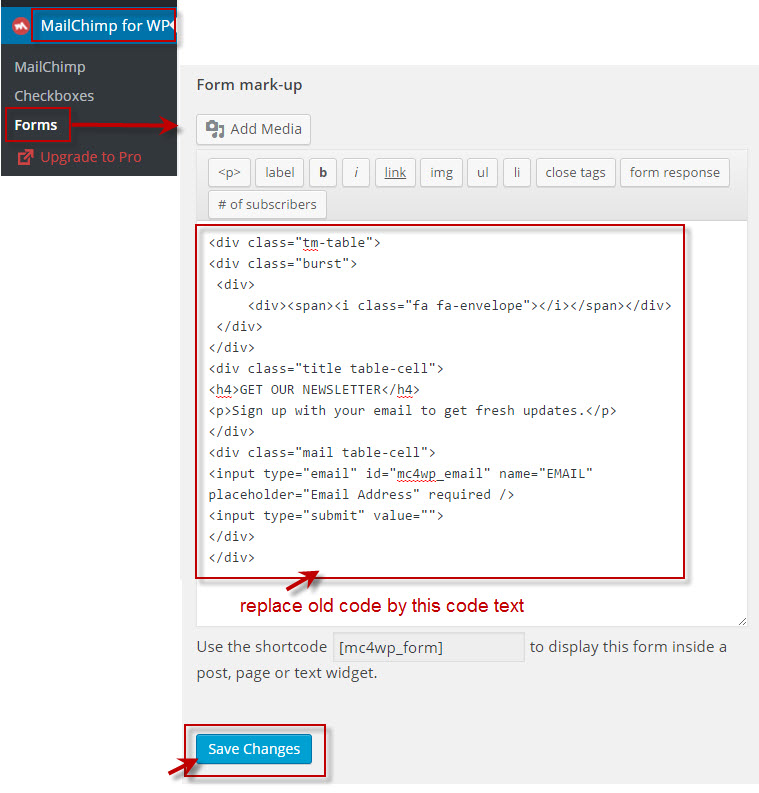
After already import demo data successfully, go to MailChimp for WP >> Form >> Form mark-up >> replace old code text by this code text:
<div class="tm-table">
<div class="burst">
 <div>
 <div><span><i class="fa fa-envelope"></i></span></div>
 </div>
</div>
<div class="title table-cell">
<h4>GET OUR NEWSLETTER</h4>
<p>Sign up with your email to get fresh updates.</p>
</div>
<div class="mail table-cell">
<input type="email" id="mc4wp_email" name="EMAIL" placeholder="Email Address" required />
<input type="submit" value="">
</div>
</div>
You can see this screenshot for more instruction:
NOTES: IMPORT DEMO DATA BY ONE-CLICK WAY WILL NOT INCLUDE IMAGES FROM OUR DEMO SITE. ALL IMAGES WILL BE REPLACED BY SAMPLE IMAGES.
II. The second way is recommended to use if you have any trouble in the first way.
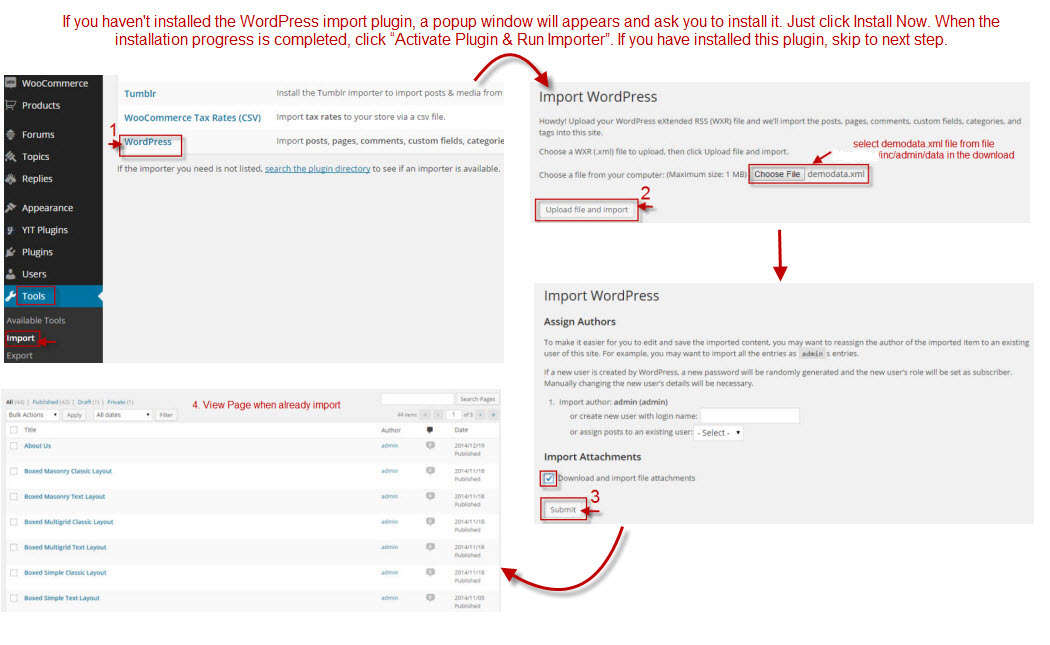
1. Import .xml file:
Where is file .xml to import?
There is a “demodata.xml” file placed in folder cakeartincadmindata, just find this file for importing demo.
Following these steps to import demo data via .xml file:
2. Set Up Front Page:
– Go to Setting >> Reading.
– select a static page (select below) >> Choose Front page is Home page.
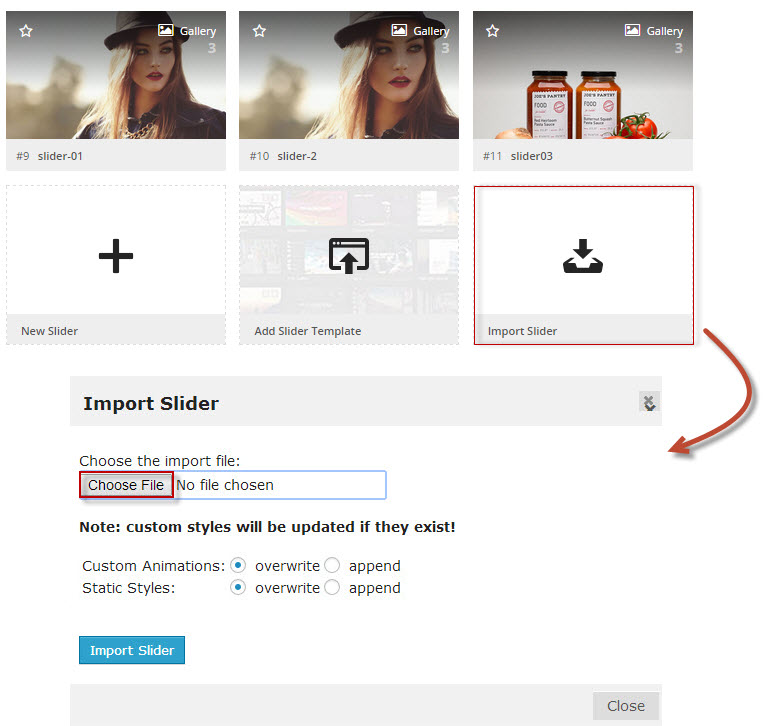
3. Import Revolution Slider:
The download package contains the exported slider (Revolution Slider) that can be used as your slider template. Please do follow the steps below to import it.
- Go to “Revolution Slider >> Revolution Slider“
- You can use template sliders or Click “Import Slider” to import the slider.
- Click “Browse” >> choose file themestheme_nameincadmindatarevslider >> select one file zip revolution slider >> Click “Import Slider” button to start importing the slider.
- Repeat the steps to import another revolution slider.
For the Slider Revolution WordPress 5.x, there are lots of options to adjust slides such as animation, navigation, parallax, Google Fonts, etc. Please follow the official Slider Revolution document.
4. Import Widget:
– Install and Active Widget Importer Plugin.
– Go to Tool >> Widget Setting Imports >> Select a file >> Choose file themesmabuincadmindatawidgetwidget_data.json >> Click on “Show Widget Settings” >> Select all active widget >> Click on “Import Widget Setting“.
5. Import Setting:
Go to Appearance >> Customize >> Import/ Export Setting >> Import Setting >> choose file theme/inc/admin/data/setting.js >> click “Save & Publish” button.
6. Configure Menu:
Go to Appearance >> Menu >> select “Main Menu” >> choose “Primary Menu” >> click “Save Menu“.
7. Configure MaiChimp:
Go to MailChimp for WP >> Form >> Form mark-up >> replace old code text by this code text:
<div class="tm-table">
<div class="burst">
 <div>
 <div><span><i class="fa fa-envelope"></i></span></div>
 </div>
</div>
<div class="title table-cell">
<h4>GET OUR NEWSLETTER</h4>
<p>Sign up with your email to get fresh updates.</p>
</div>
<div class="mail table-cell">
<input type="email" id="mc4wp_email" name="EMAIL" placeholder="Email Address" required />
<input type="submit" value="">
</div>
</div>
You can see this screenshot for more instruction: