Mag footer consists of the widget area and the copyright area. Both of these areas can be configured in Customize. Footer Widgets are added in the Footer Sidebars.
Footer Section Options:
To configure for footer, go to Dashboard >> Appearance >> Customize >> Footer tab >> Setting. There are options:
1. Show Footer Widget: This option allows you to show or hide Footer Widget area.
2. Background Color: Pick a background footer color.
3. Colors: Pick color for tittle, text, link, hover on footer section.
Copyright Section Options:
To configure for footer, go to Dashboard >> Appearance >> Customize >> Footer tab >> Copyright tab. There are options:
1. Show Copyright Text: This option allows you to enable or disable copyright text section.
2. Background Color: Pick a background color of copyright section.
3. Colors: Pick color for text, link, hover on copyright section.
4. Copyright Text: Enter text in copyright section.
How To Add Widgets into Footer Sidebar:
Widgets add various content or features to your site. They can be added, removed, and rearranged in Dashboard >> Appearance >> Widgets tab >> Footer Sidebar.
Step 1 – First, make sure that you’ve enabled footer widgets on your site. To do this, navigate to the Dashboard >> Appearance >> Customize >> Footer tab >> Setting and switch the “Footer Widgets” option to On. Set how many columns you’d like to display by customizing the “Sidebar Number” option.
Step 2 – Once you’ve enabled footer widgets, navigate to Dashboard >> Appearance >> Widgets tab to access the widgets and footer widget sections.
Step 3 – You will see a Footer Sidebar on the right hand side for each footer column you selected to have in Customize.
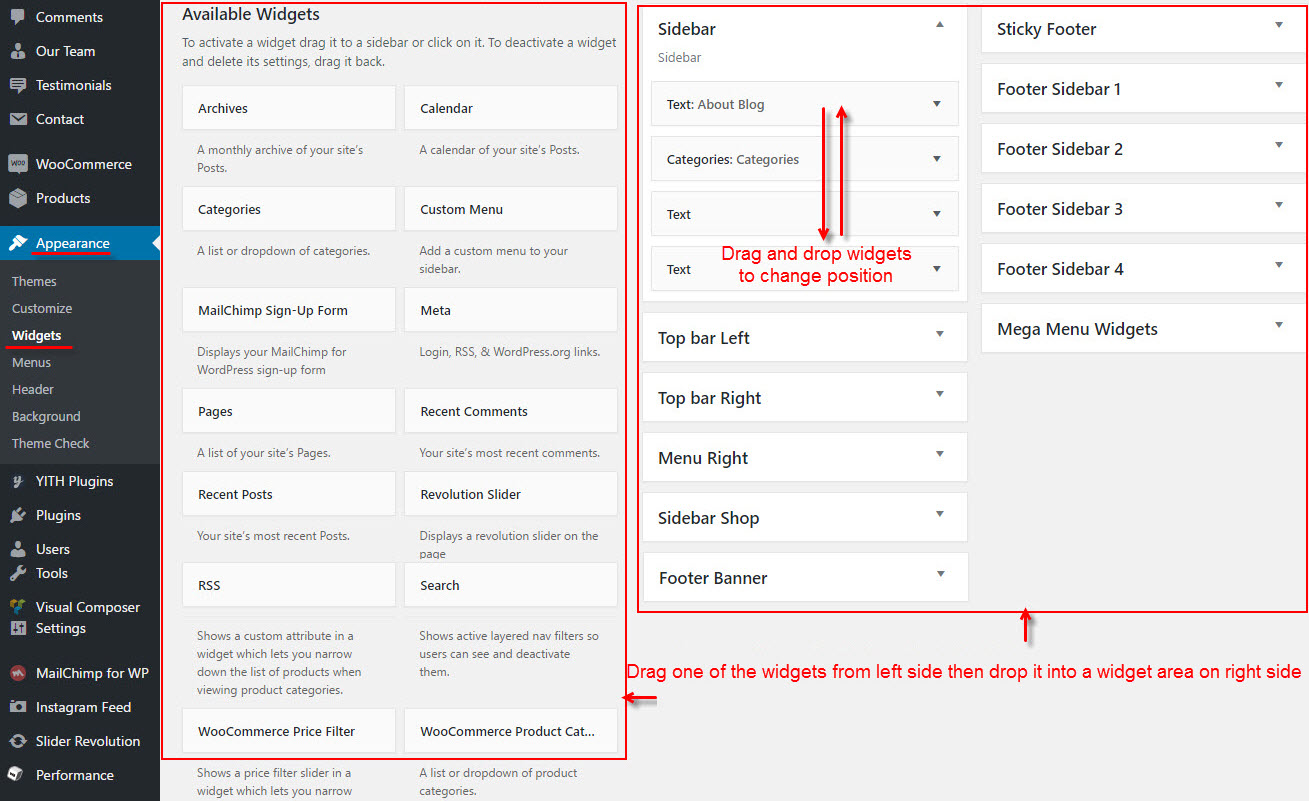
Step 4 – On the left hand side are your widgets, simply drag and drop the widgets you want from the left side into the ‘Footer Sidebar’ sidebar on the right side. See the screenshot below.