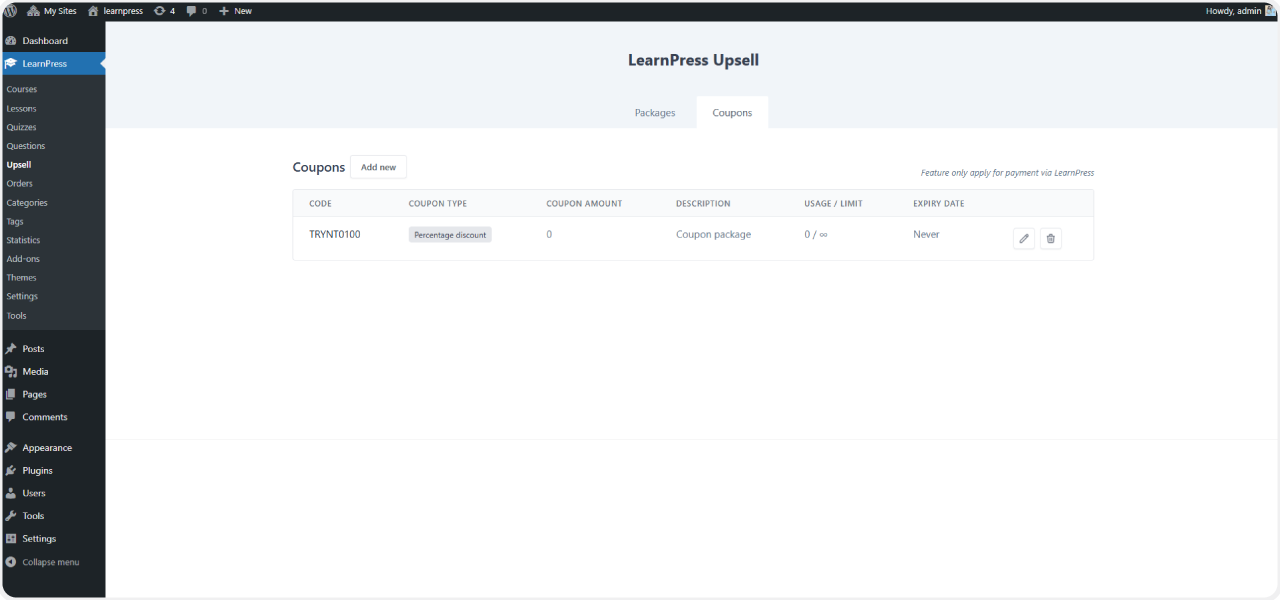
To add a new coupon, go to your Dashboard -> LearnPress -> Upsell -> Coupons and click on the Add New button to add a new coupon.
The opening screen requires you to fill out all the coupon details.
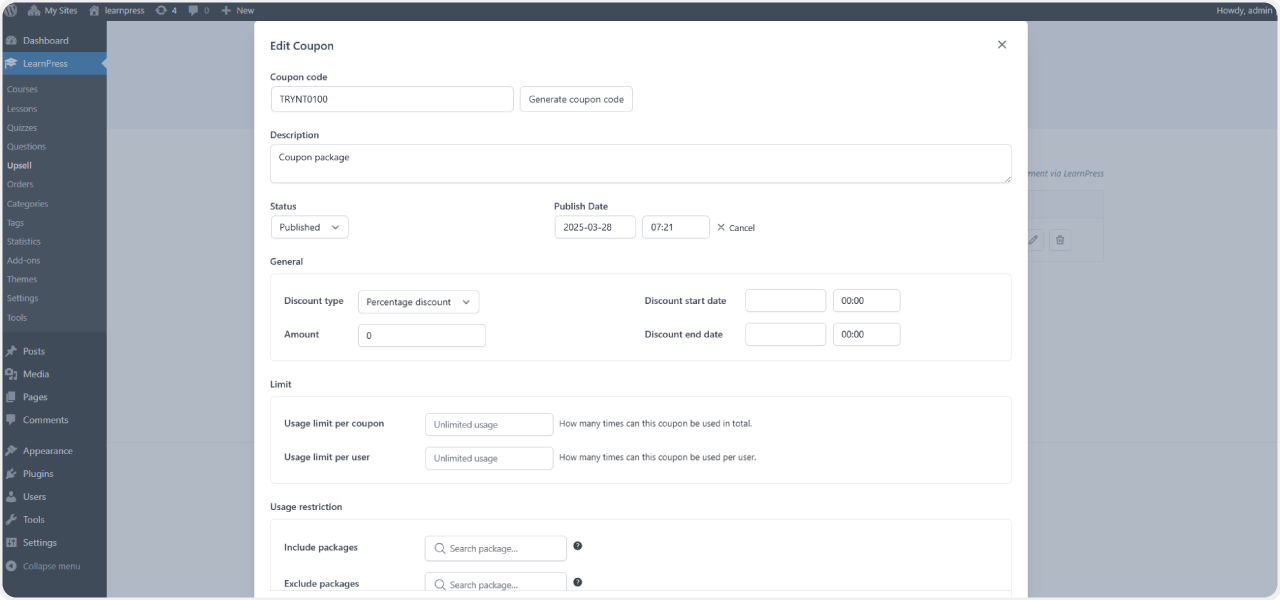
Coupon Details
-
Coupon Code:
Enter your custom code or click “Generate coupon code” to auto-generate one. -
Description:
Add internal notes or descriptions for this coupon. -
Status:
Choose between Publish, Draft, Pending, or Trash. -
Publish Date:
Set a specific date/time to publish or choose “Immediately”.
Discount Settings
-
Discount Type:
Choose between Percentage or Fixed discount. -
Amount:
Enter the discount amount. (e.g., 10 for 10% or $10) -
Discount Start Date / End Date:
Set the time window the coupon is valid.
Usage Limits
-
Usage Limit Per Coupon:
Total number of times this coupon can be used. -
Usage Limit Per User:
Number of times a single user can use this coupon.
Usage Restrictions
-
Include Packages:
Only apply coupon to selected packages. Leave blank for all. -
Exclude Packages:
Coupon will not apply to these packages. -
Include Courses:
Coupon will only apply to these courses. -
Exclude Courses:
Coupon will not apply to these courses. -
Include Course Categories:
Coupon will only apply to these course categories. -
Exclude Course Categories:
Coupon will not apply to these categories. -
Allowed Emails:
Comma-separated list. Use wildcards (e.g., *@gmail.com) to restrict.