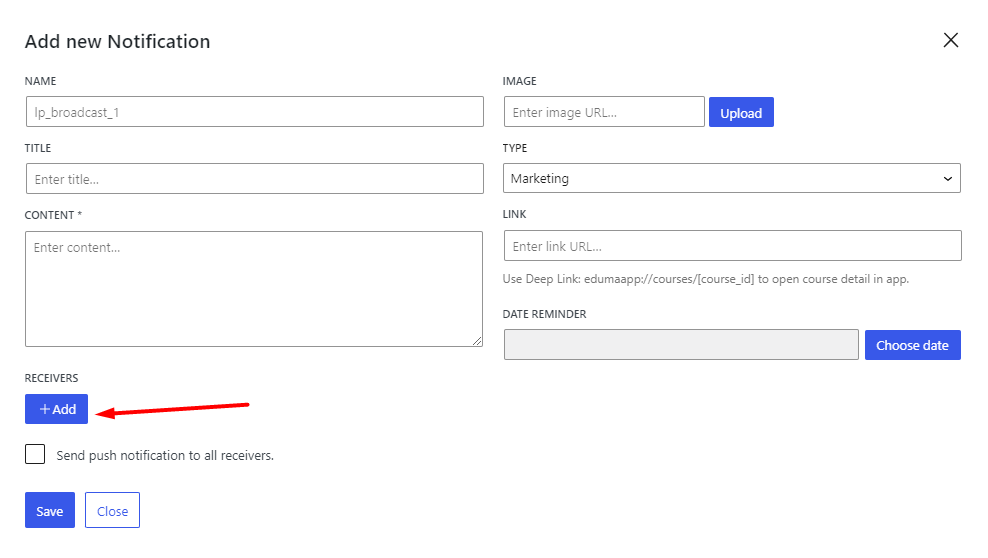
You can create and send push notifications to users by going to your WordPress admin dashboard > LearnPress > Notifications > Add New
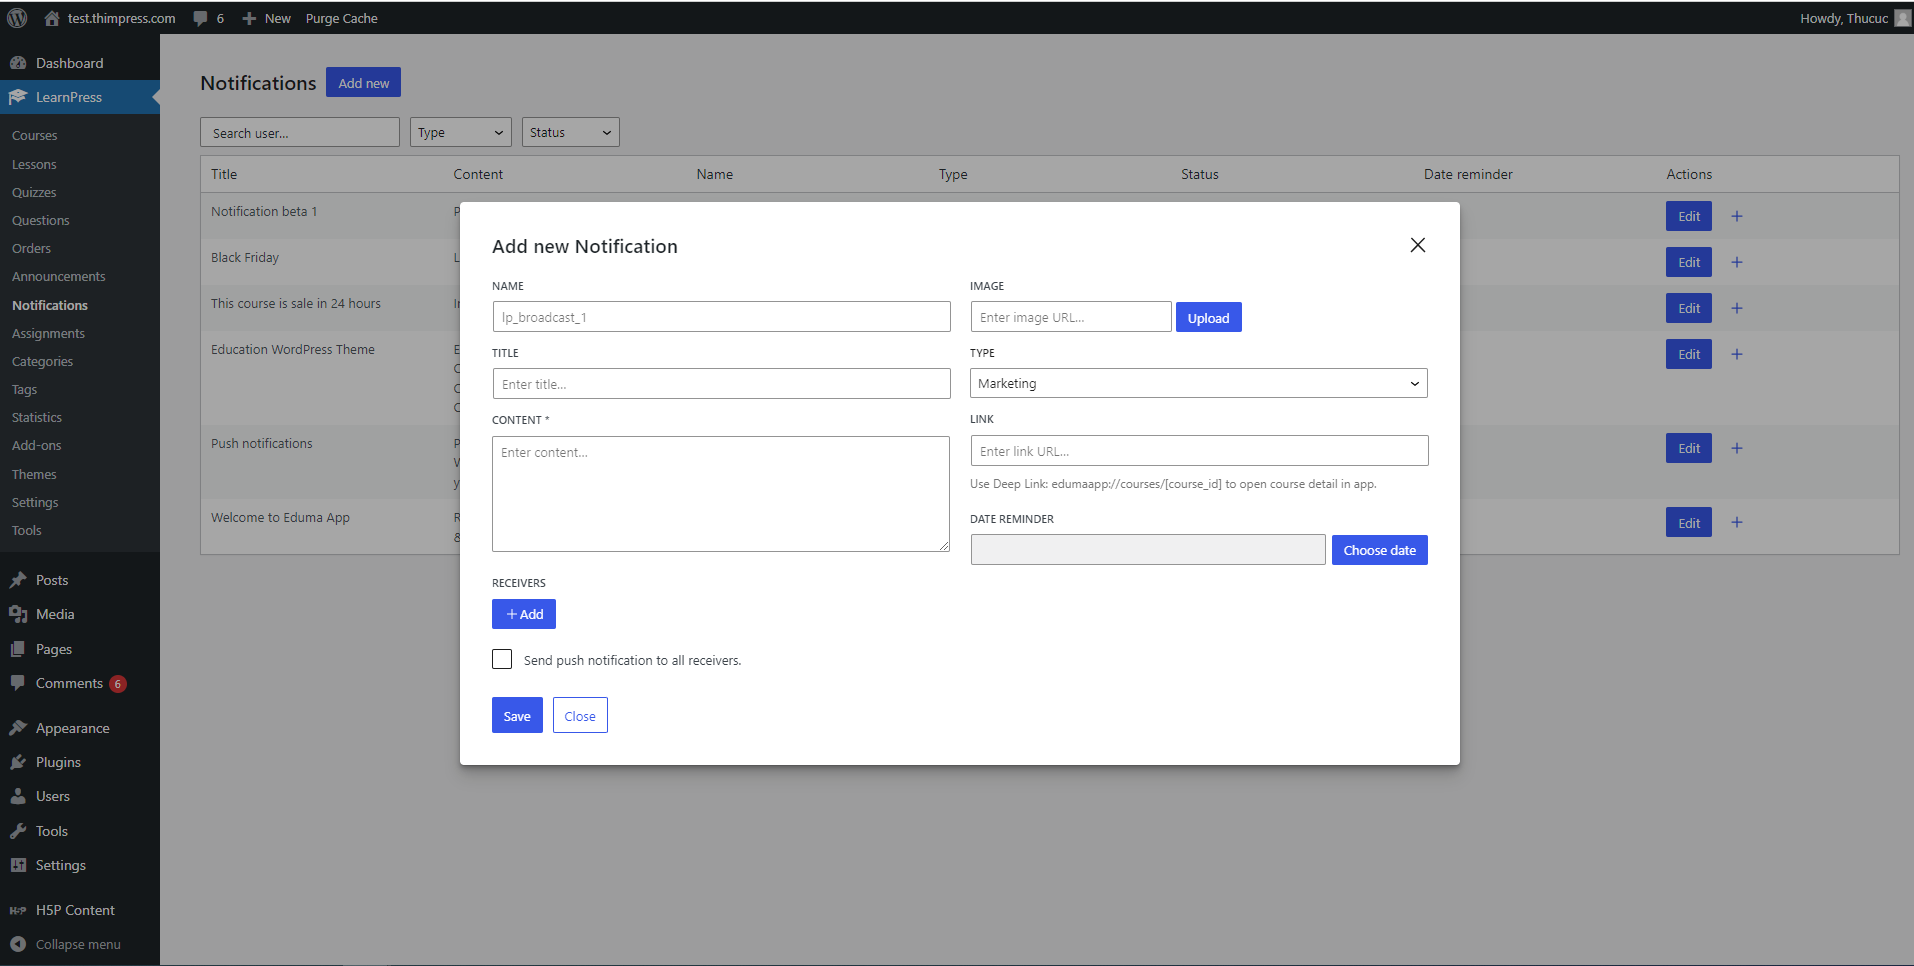
A notification usually includes a name, a title, content, an image, a type, a link, a date reminder, and receivers.
- Name: The name of the notification và it will be displayed as “lp_broadcast_1”.
- Title: The title of the notification.
- Content: You need to add content for the notification (This is a required condition).
- Image: Attaching an image to your push notification. You can upload an image file (either jpg, jpeg, png, or gif) from your library or enter the image URL.
- Type: There are four notification types: Marketing, information, update, and warning notification.
- Link: Use the link: edumaapp://courses/[course_id] to open course details. Or you can customize any link and when you click on it, it will open in the selected browser.
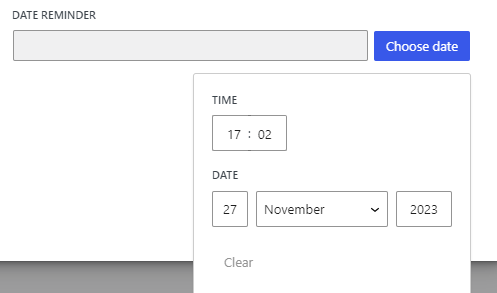
- Date Reminder: Click on the “Choose date” button to choose the date and time for the notification to be sent.
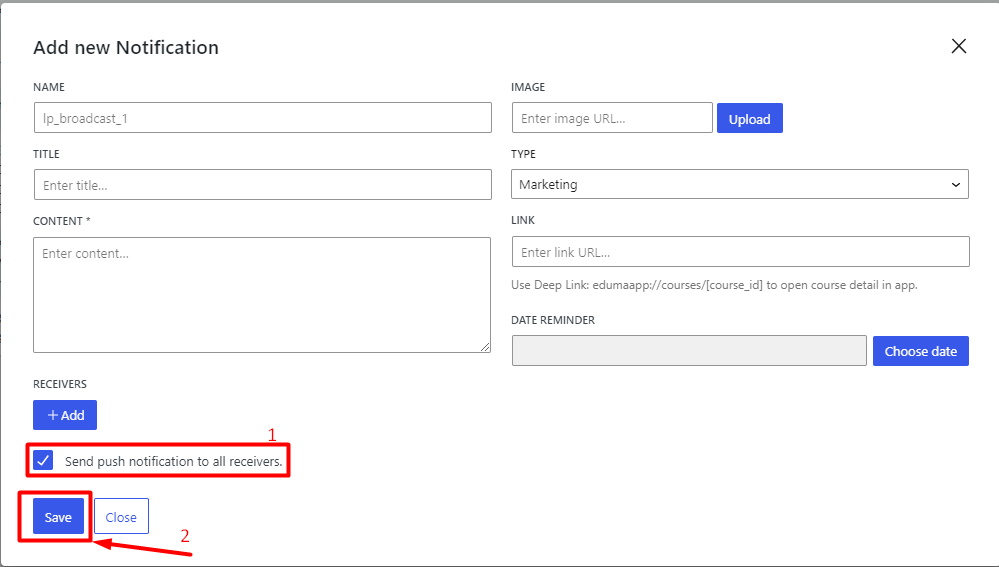
Don’t forget to select “Send push notification to all receivers” and click “Save” to save all your changes.
If you want to have different notification recipient options, click Add to select a recipient.
- To send a push notification to all users, select Include and All users.

- To send a push notification to each role, select Include and choose one of three roles: Administrator, Instructor, or Student.

- To send a push notification to any user, select Include and choose one or more users, depending on your choice.

- To send a push notification to users except for the role you choose, select Exclude and choose one of three roles: Administrator, Instructor, or Student.

- To send a push notification to users except for the username you choose, select Exclude and Select User.

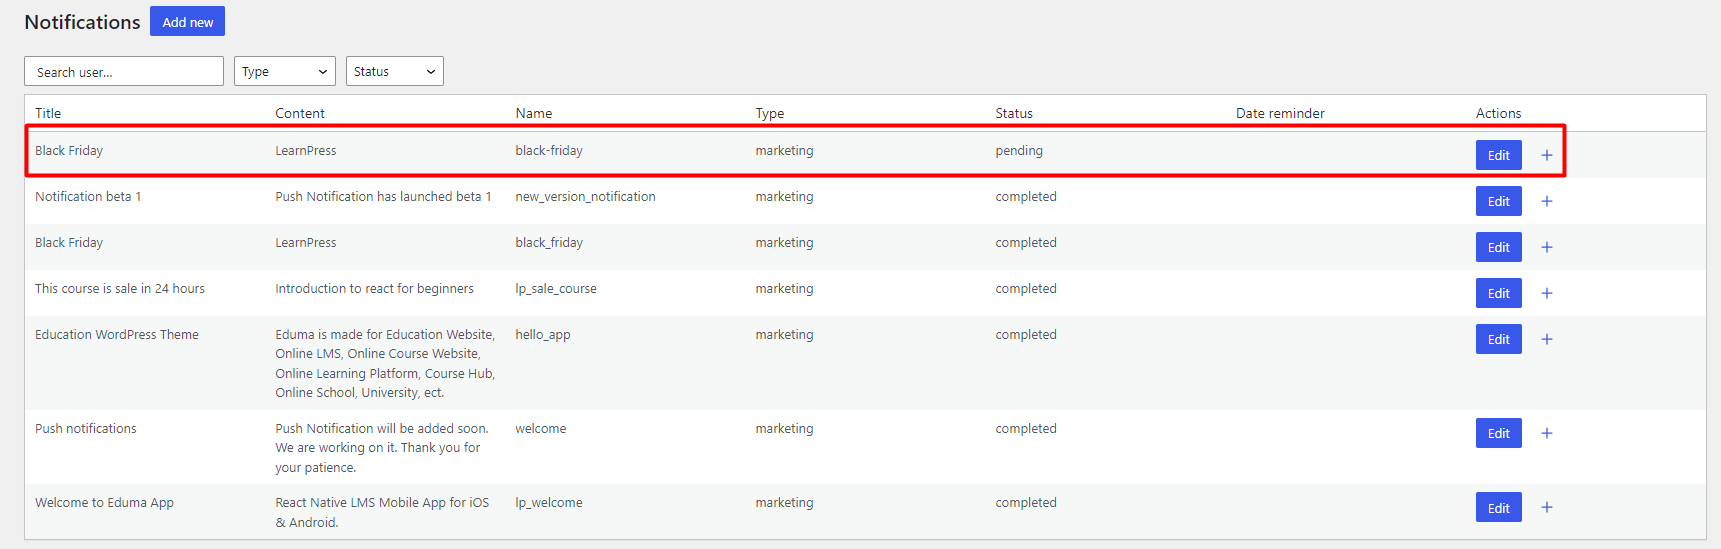
After completing all the information in the new notification, click “Save“, and the screen will display as follows:
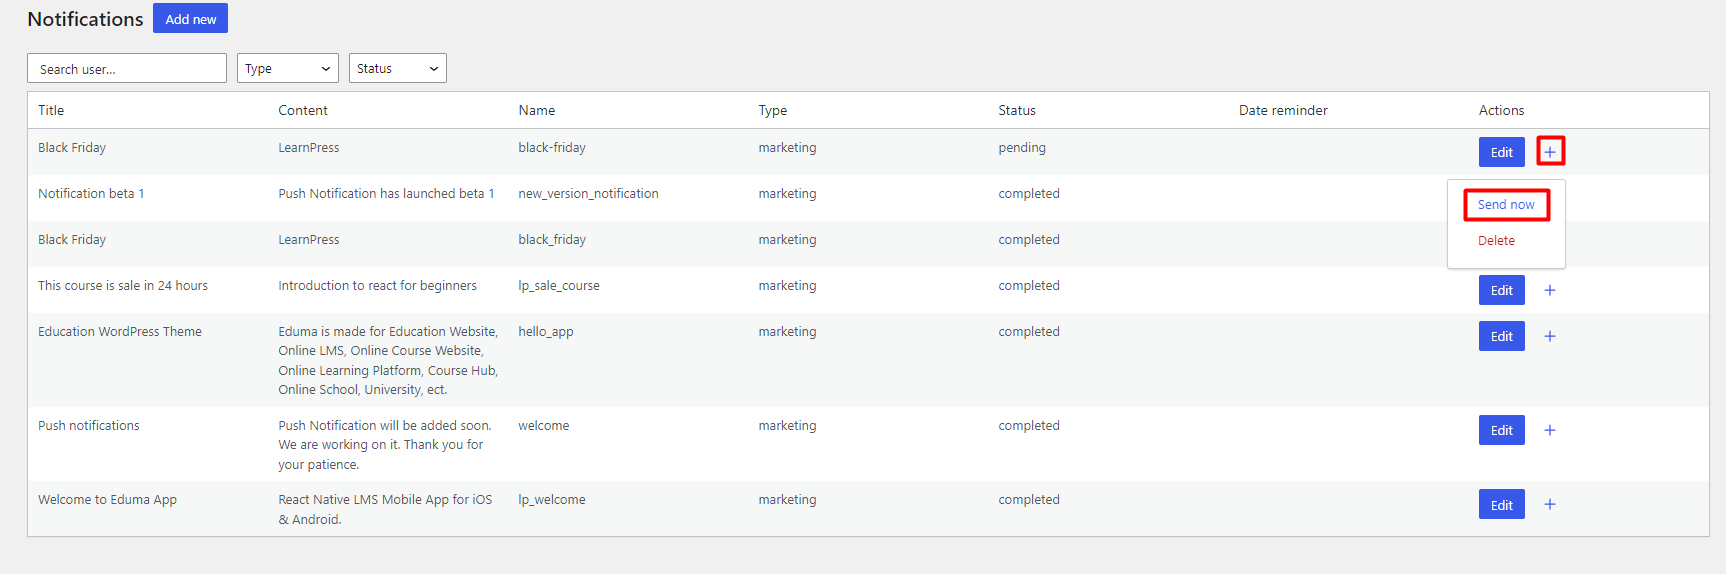
The last step to send the notification is to click on “+” and select “Send Now.“
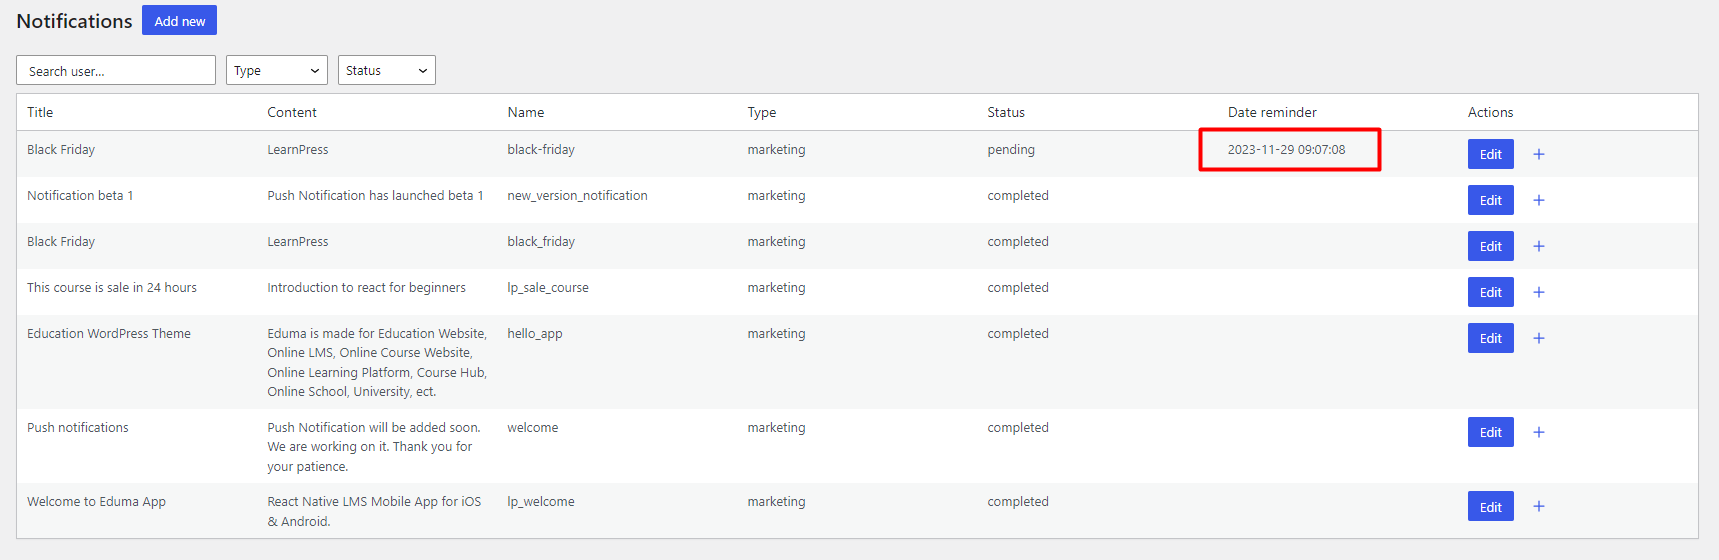
After you have sent the notification, the status will be changed from “Pending” to “Completed.” The notification has now been sent.

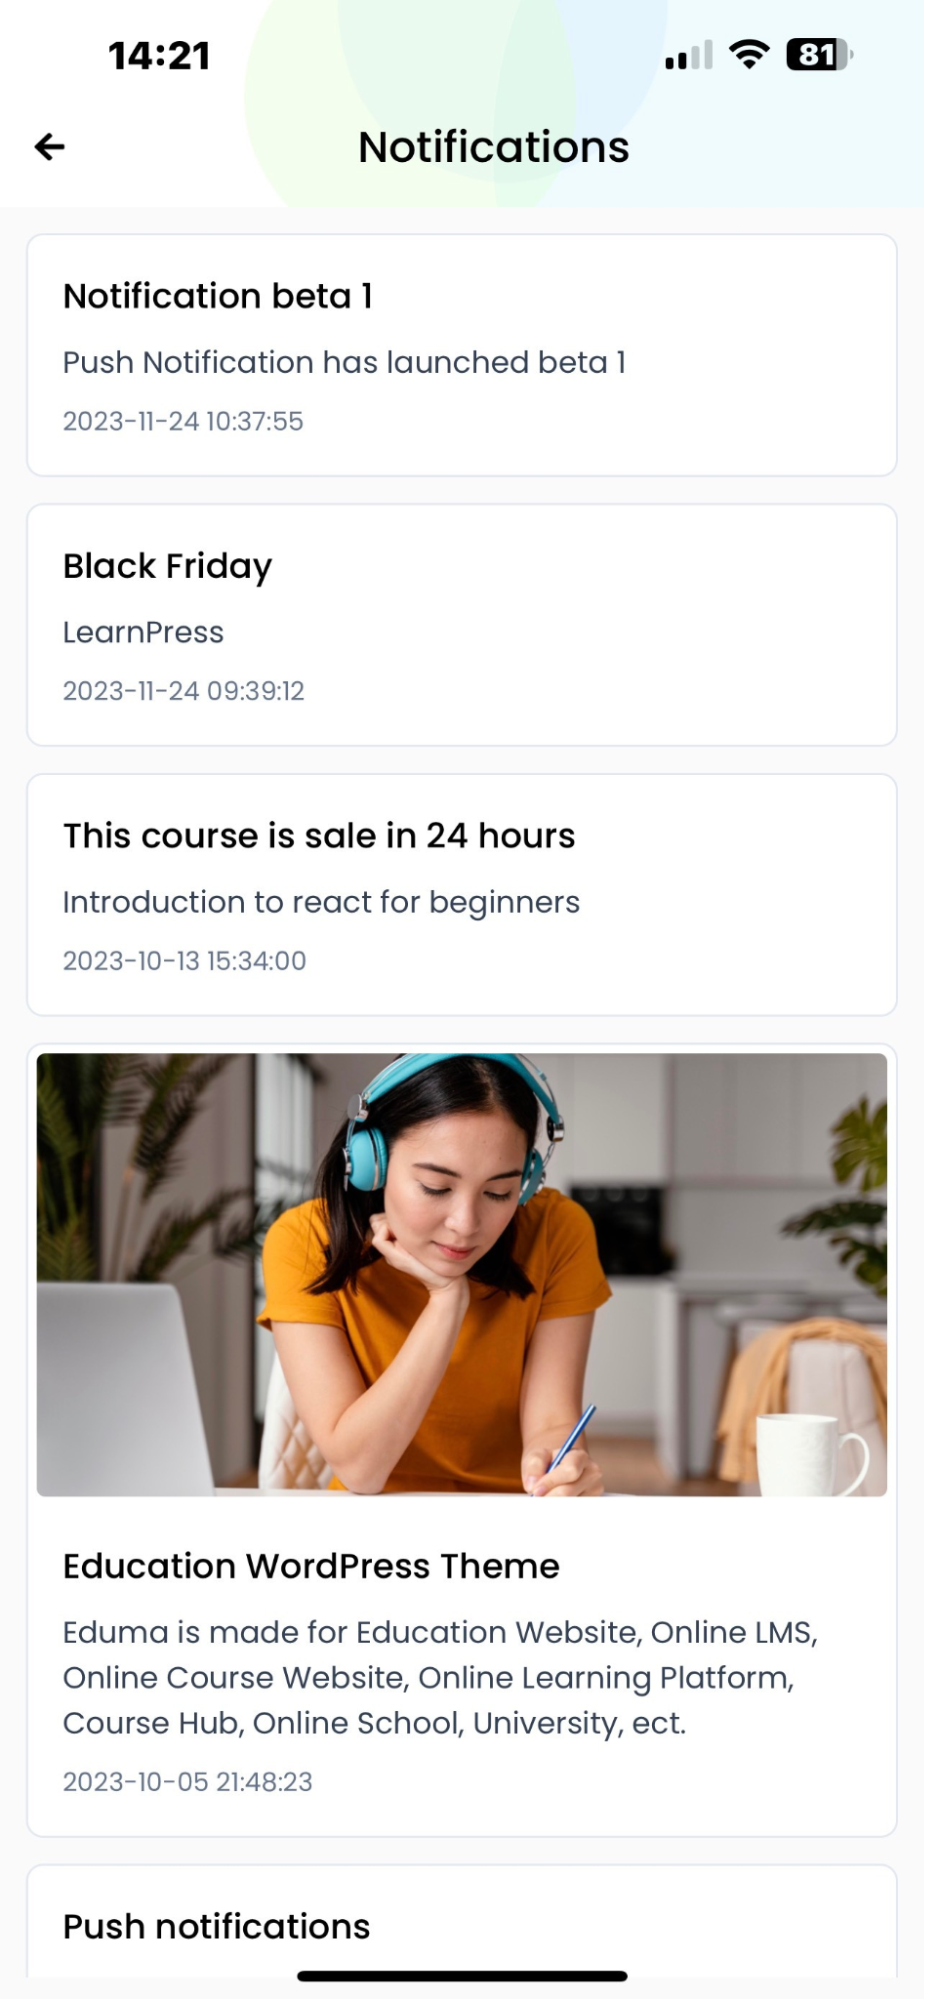
After the notification is sent, the recipient’s account will display the notification as follows:
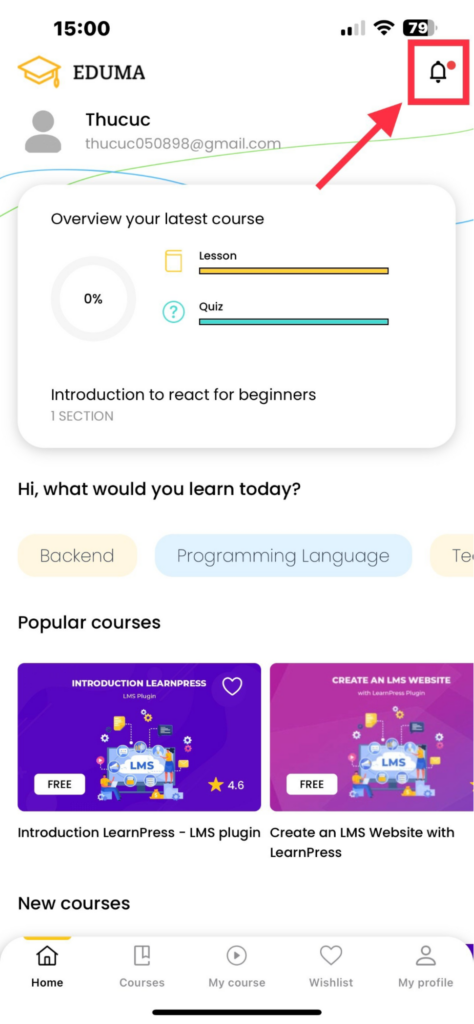
When you click on the notification icon, the screen will display as shown below:
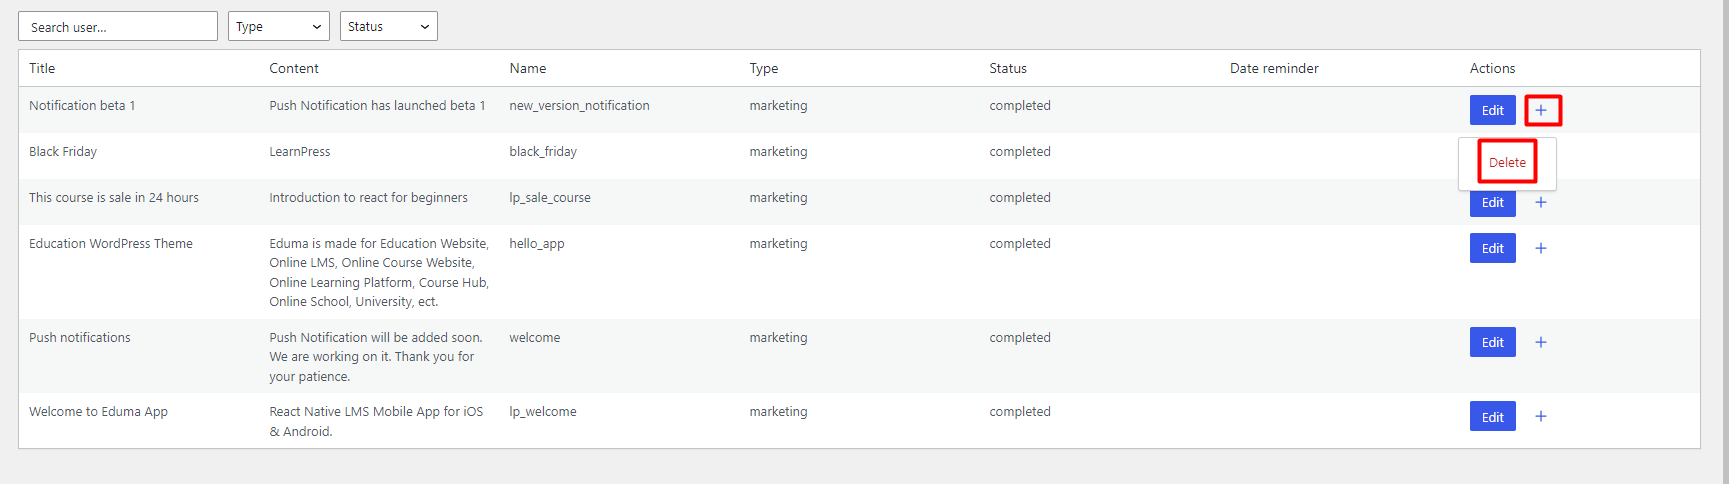
To delete a notification, click on “+” and select “Delete“.
To edit a notification, you need to click on “Edit” and edit the content. Then don’t forget to click on “Save” to save the notification that has just been edited.

If you choose the time the notification is sent, the time will be shown here.
To find a username, type the username in the “Search user” field.
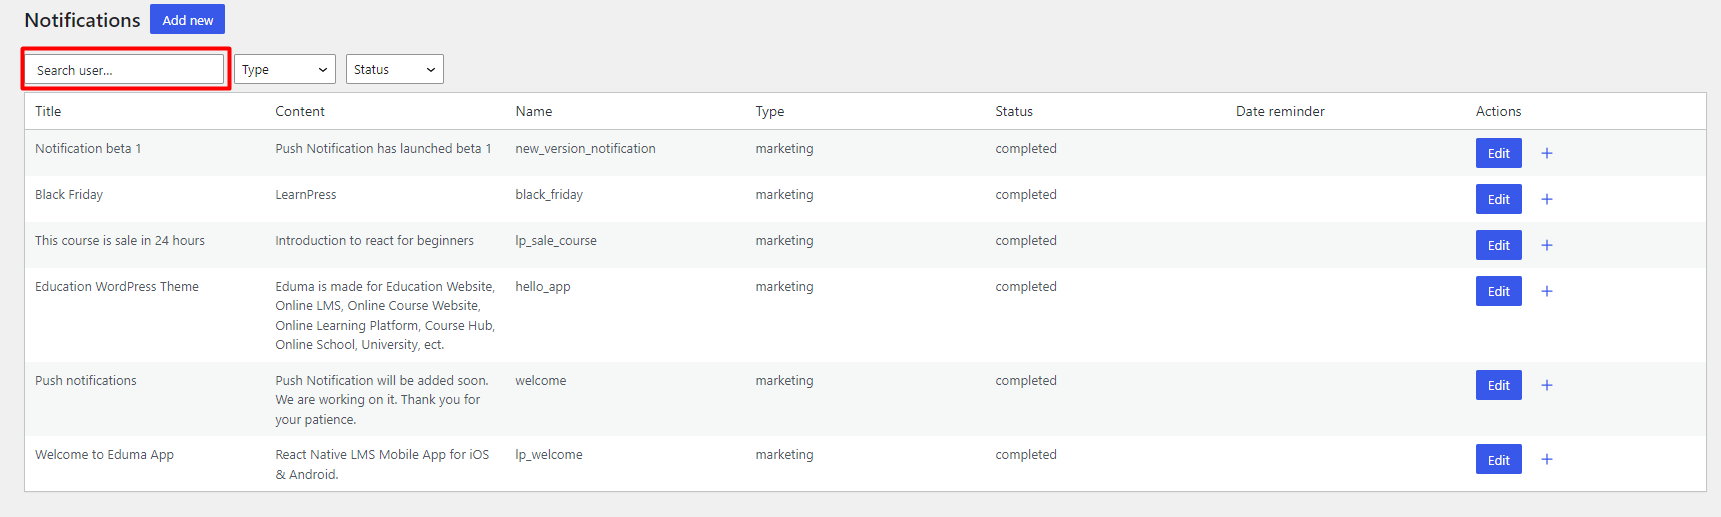
When you click on “Type“, you can choose to display the types of notifications: Marketing, Information, Update, or Warning.
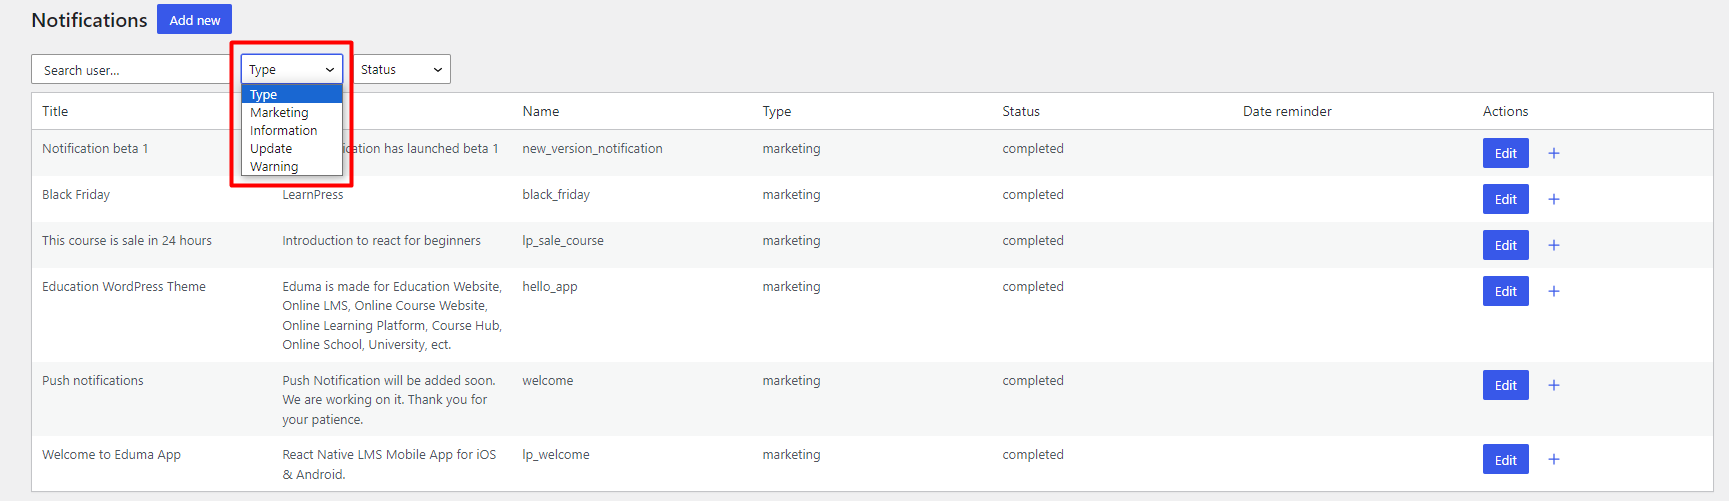
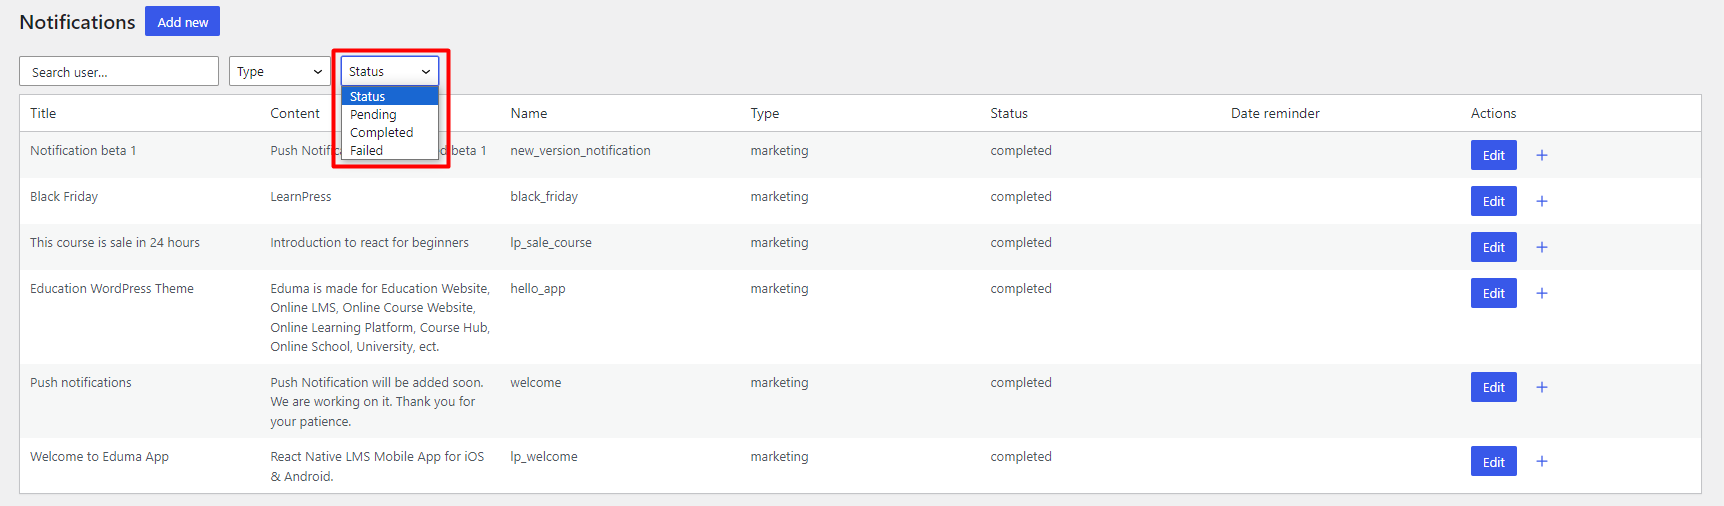
Click on “Status” and select the statuses you want to display: Pending, Completed, or Failed.